
User Guide for
Mexirica Navegante
A 2-in-1 Shredder and Extrusion Machine
"From the shores of Ilha Grande, we gather what the ocean returns, and with care, we transform it, giving back to the island that gives us everything."
Table of Contents:
Why We Do This (introduction to the plastic problem)
Materials (required materials and tools)
Safety Guidelines (operating precautions)
Troubleshooting (common machine issues)
Plastic Info (different types of plastics)
Initial Steps (collection, sorting, and cleaning)
Microplastics (definition and importance)
Beams + Sheets (the extrusion and baking process)
Secondary Steps (preparing the molds and finishing)
Mexirica Navegante (Machine overview and functionality)
Baking with the Oven (plastic sheets process)
Toolbox + Molds (maintenance and mold management)
How-To’s (cleaning, blade changing, temperature control)
Fun Facts (machine features and uses)
Beam Making (step-by-step guide for creating beams)
Assembling the Machine (setup instructions)
Troubleshooting & Tips (additional advice)
Why We Do This
Plastic pollution is one of the most significant environmental challenges of our time, particularly in the oceans. On Ilha Grande, we strive to combat this issue by collecting ocean plastic from our beaches and giving it a new purpose. This machine, the "Mexirica Navegante," empowers the local community to transform ocean waste into valuable materials like plastic beams and sheets, contributing to the preservation of our planet and the empowerment of people.
How It Started
The "Mexirica Navegante" is a direct outcome of the Casa Plástica Project and the NGO Somos Natureza’s partnership. Both are dedicated to creating solutions for sustainable living. Inspired by the Precious Plastic project, we adapted the shredder-extrusion machine to meet local needs. The journey began with a shared vision of turning the plastic problem into an opportunity for change.
WORK SAFE
⚠️ OPERATING THIS MACHINE INVOLVES DEALING WITH
SHARP BLADES,
HIGH TEMPERATURES
AND
ELECTRICAL COMPONENTS.
❗SAFETY IS OUR TOP PRIORITY.
BEFORE OPERATING THE MACHINE, IT'S CRUCIAL TO FAMILIARIZE YOURSELF WITH THE SAFETY PROCEDURES. ALWAYS WEAR PROTECTIVE GEAR, SUCH AS GLOVES, SAFETY GLASSES, AND HEAT-RESISTANT CLOTHING, AND ENSURE THE MACHINE IS MAINTAINED PROPERLY TO AVOID ACCIDENTS. THE FOLLOWING SECTIONS WILL GUIDE YOU THROUGH EACH STEP OF SAFE OPERATION AND TROUBLESHOOTING.
List of Materials
Before starting any process with the "Mexirica Navegante," make sure you have the following materials and tools on hand:
Ocean plastic waste: Collected from beaches, including microplastics, bottles, containers, fishing nets, and other debris.
Protective gear: Heat-resistant gloves, safety glasses, and protective clothing.
Cleaning tools: Brushes, water source, and biodegradable detergent for washing plastics.
Cutting tools: Scissors, knives, or a small saw for pre-cutting large plastic pieces.
Shredding container: A receptacle to catch shredded plastic.
Molds: For shaping the extruded plastic into beams or sheets.
Toolbox: Including basic tools for machine maintenance and emergency fixes (screwdrivers, wrenches, etc.).
Troubleshooting
Even with proper care, problems can arise when using the machine. Here’s a quick guide to some common issues and how to resolve them:
Machine Won’t Start:
Check if the power supply is connected properly.
Ensure the emergency stop button is not engaged.
Inspect the power switch and fuses for any damage.
Plastic Not Shredding Properly:
Ensure the plastic pieces are adequately pre-cut.
Check if the blades are sharp. Dull blades can affect performance.
Inspect the machine for any blockages in the shredding chamber.
Extrusion Issues:
If the plastic isn't extruding smoothly, the temperature may be too low. Adjust the heat settings accordingly.
Ensure the plastic is clean and free from contaminants, as this can clog the extruder.
Check for any obstructions in the extrusion nozzle.
Overheating:
If the machine overheats, stop the operation immediately and allow it to cool.
Ensure proper ventilation around the machine and avoid running it for extended periods without breaks.
Some Plastic Info
Understanding the different types of plastics is crucial for achieving the best results in recycling. Here are the most common types of plastic you will encounter:
Polyethylene (PE): Found in plastic bags, bottles, and containers. It is flexible and easy to shred and extrude.
Polypropylene (PP): Used in bottle caps, straws, and food containers. PP melts at a higher temperature and is suitable for making durable products.
Polystyrene (PS): Commonly found in disposable cutlery, cups, and packaging. It is lightweight but can be tricky to work with due to its brittleness.
PET (Polyethylene Terephthalate): Widely used in drink bottles. PET is strong but needs to be properly sorted and cleaned before processing.
Each plastic type behaves differently in the shredding and extrusion processes, so proper sorting is key to ensuring the quality of the final product.
Let's Pick-Up some Plastics
The first step in the recycling process is collecting ocean plastic from the beaches. This includes various types of plastic waste, such as bottles, fishing nets, and microplastics. Organize your collection, separating larger items from smaller debris, and be mindful of any potential hazardous materials.
First Sorting
Once
the plastic has been collected, it needs to be sorted. The first
sorting focuses on separating the plastic waste from glass, metals,
rubber, organic matter and other materials. We also separate by size
and condition, like bags, all soft plastics and vert chunky or really
small fragments should be discarded.
We focus on large plastic
pieces that can be kept aside for pre-cutting and other smaller
fragments that should be cleaned and prepared for shredding.
Second Sorting
This
step is more meticulous. You will now sort the plastic according to
type, separating Polyethylene
(PE - #2) and Polypropylene (PP - #5)
plastics from others.
Sorting by type ensures better-quality
extrusion and final products. Plastics that are too degraded or that
have paper labels on them should be discarded as they may affect the
extrusion process.
Microplastics
In
the shredding process we are going to create what we call
microplastic.
By definition, every piece of plastic that's
smaller than 0.5cm is considered microplastic. Although it's terrible
on the environment, it's a necessary step in our process. This will
allow us to reuse the once harmful material that we have collected
from the oceans and transform it into a new raw material that can
last a very long time!
Beams
Beams are made by extruding shredded plastic into molds. They are strong and durable, ideal for construction, furniture, or other practical applications. Each type of plastic will create beams with slightly different properties, so experiment with combinations based on your needs.
Sheets
The baking process is used to create plastic sheets. After shredding the plastic, it is placed into an oven-safe tray that fits into our machine’s oven. The plastic melts and spreads evenly across the tray, creating a flat, durable sheet that can be used for a variety of applications, from surfboards to signage. Depending on the thickness and texture desired, you can adjust the oven temperature and baking time.
Wash
Clean plastic is essential for successful recycling. After sorting, the plastic should be washed to remove sand, dirt, and other contaminants. Use biodegradable detergent and scrub the plastics with brushes. Rinse thoroughly and let them dry before moving to the next steps.
Pre-Cut
Larger plastic pieces, such as bottles and containers, need to be pre-cut before shredding. This ensures the pieces fit easily into the shredder and reduces the risk of clogging. Use a saw or heavy-duty scissors for cutting plastics into smaller, manageable pieces.
Shred
Once the plastic has been washed and pre-cut, it’s ready for shredding. Feed the pieces into the shredder portion of the "Mexirica Navegante." The shredded plastic will fall into a container, where it can be collected and prepared for either extrusion or baking. Ensure the plastic is shredded into small, uniform pieces for the best results.
The "Mexirica Navegante"
The "Mexirica Navegante" is a 2-in-1 shredder and extrusion machine, designed to simplify the recycling process. Its versatility allows it to transform shredded plastic into new materials like beams and sheets, using simple yet effective techniques.
Shredding
The shredding process begins by feeding the pre-cut plastic into the machine’s shredder. The sharp blades inside chop the plastic into small pieces. It’s important to check for blockages and ensure the blades are sharp for efficient shredding.
Extruding
The shredded plastic can be fed into the extrusion section of the machine. The plastic is heated and forced through a mold, which shapes it into beams. These beams can be used for various construction purposes, depending on the type of plastic and the mold used. Refer to the next steps to learn more.
Baking
To create plastic sheets, you will use the baking process. Place shredded plastic into a baking tray that fits into the other machine - the oven. Adjust the temperature depending on the plastic type (around 160 celsius for 90 minutes). Once melted, the plastic will spread and solidify into sheets. Be careful when removing the hot tray, and let the sheets cool before handling.
Toolbox
A basic toolbox is essential for operating and maintaining the "Mexirica Navegante." Make sure to have screwdrivers, wrenches, and a blade sharpener handy for any minor repairs or adjustments.
The Molds
Molds are used to shape the extruded plastic. Depending on the product you want to create (beams, sheets, etc.), different molds can be swapped in. Always ensure the molds are clean and free of debris before starting the extrusion process.
How-Tos
How to Clean the Machine: After each use, ensure that all plastic residues are removed. Clean the blades and extrusion nozzle to avoid buildup.
How to Change Blades: Follow the machine’s manual to safely remove and replace dull blades.
How to Maintain Proper Temperature: Different plastics require different heat settings. Refer to the plastic info section (2.3) for the right temperatures.
Fun Facts
The "Mexirica Navegante" got its name due to its bright orange color, reminiscent of a tangerine ("mexirica" in Brazilian Portuguese), and its ability to "navigate" through different plastic types!
The machine can process up to 3 kilograms of plastic per hour, depending on the plastic type and condition.
The recycled plastic beams and sheets have been used in everything from park benches to community art projects!
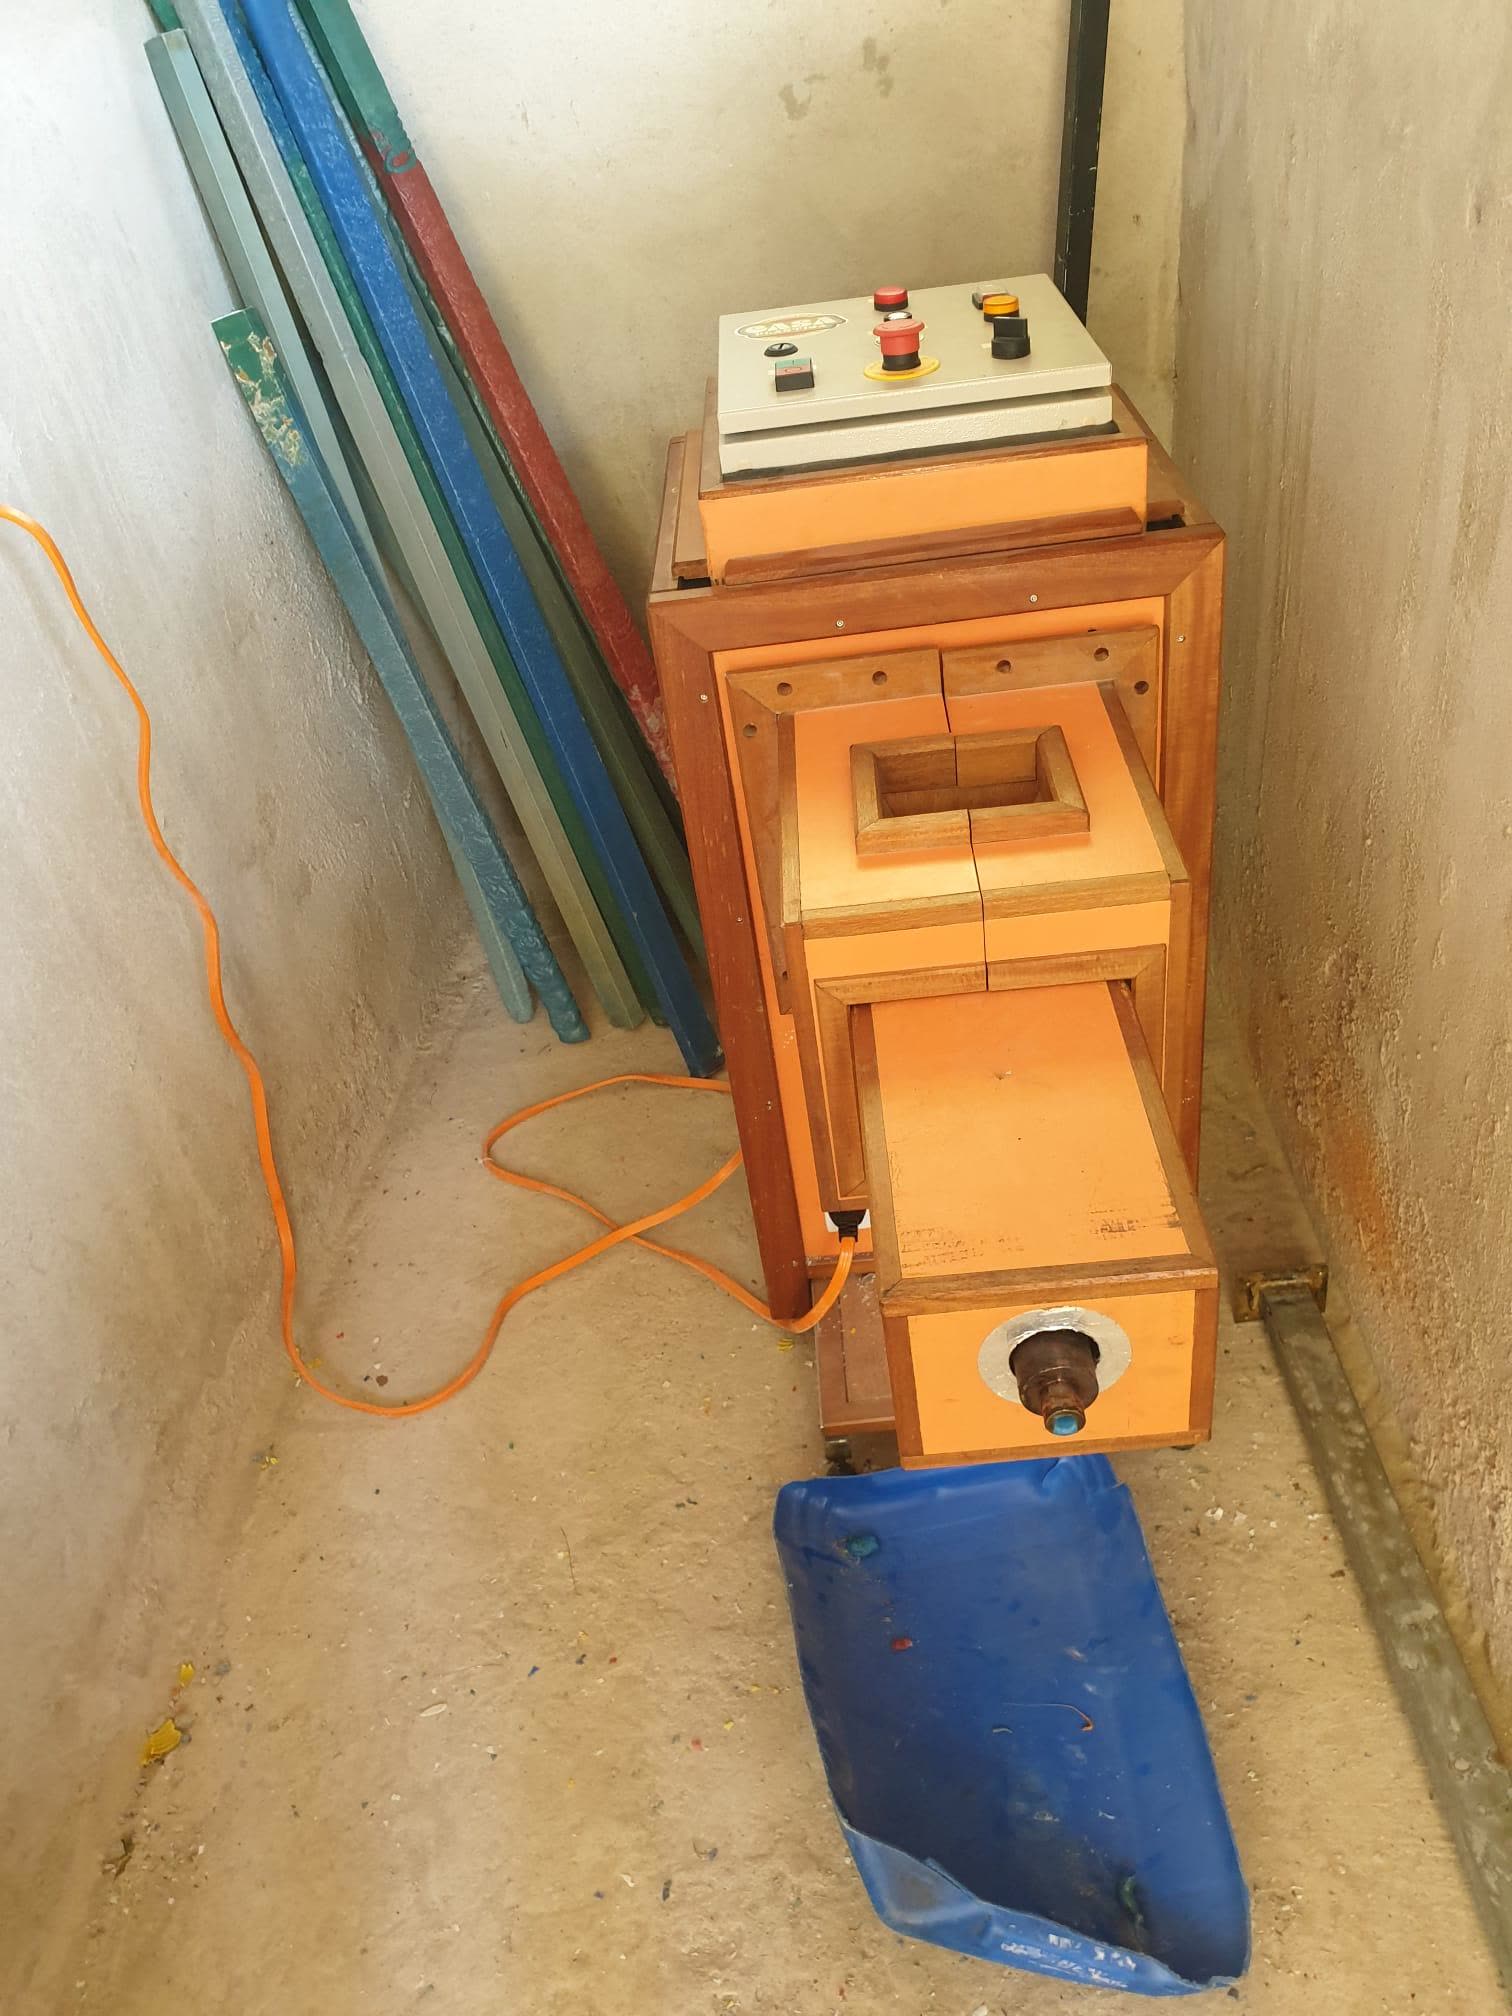
Making the Beams
This is how the machine should look once assembled:
Control panel:
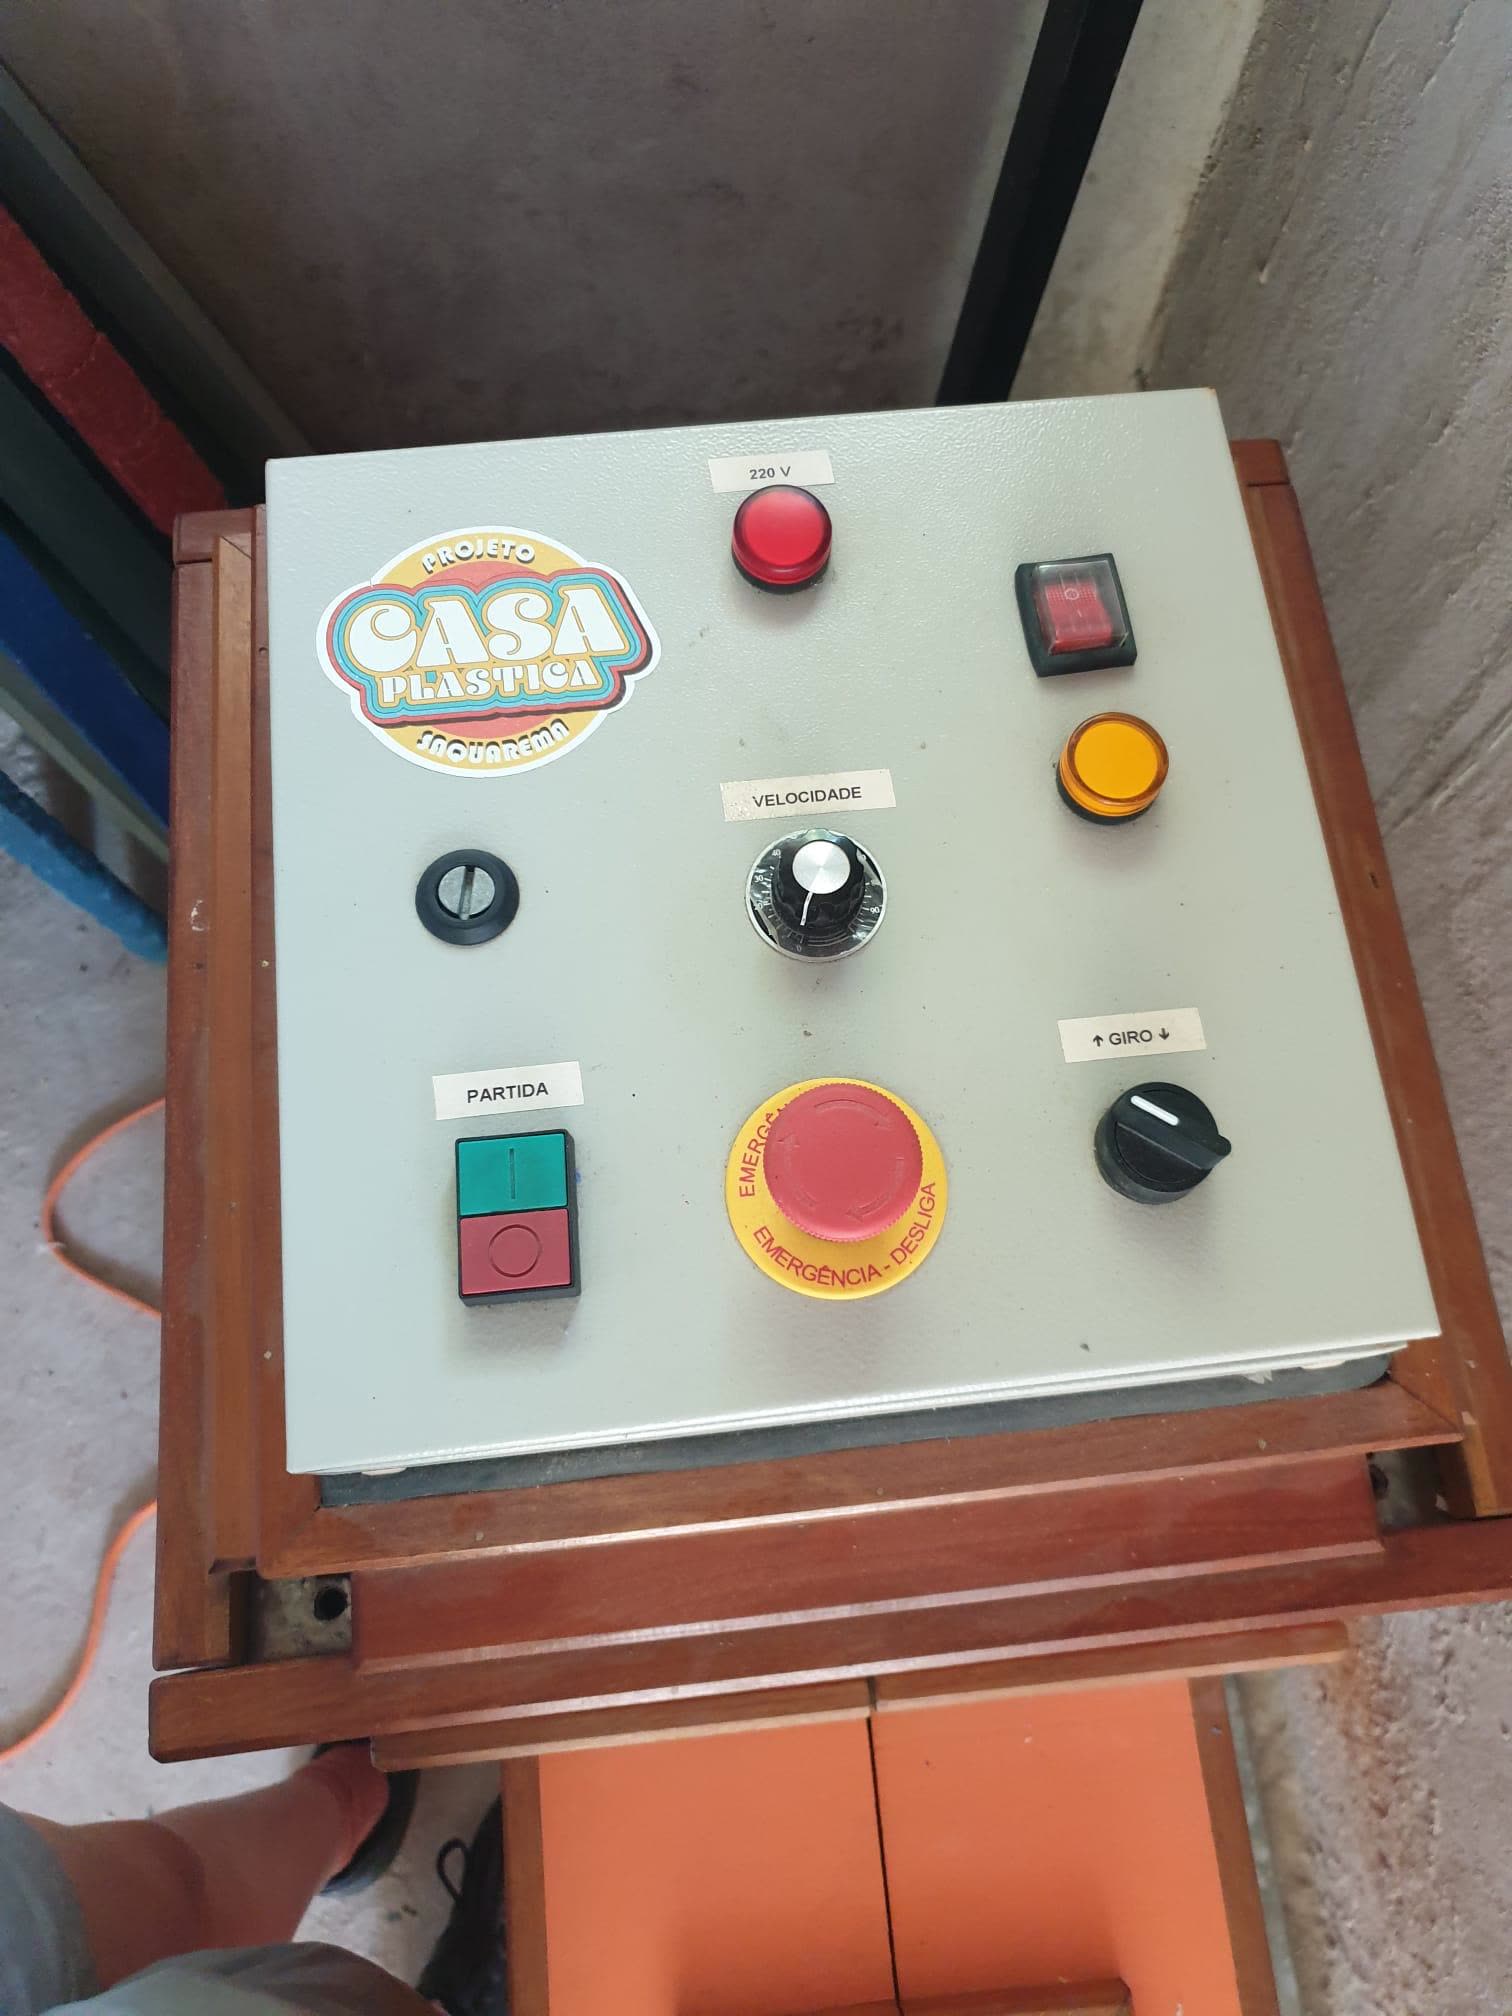
- Top right you see the button that turns the pink box on (this button turns on the heating).
- Bottom left is the start and stop (for the motor), and beside it is the emergency brake!
- The knob in the middle changes the speed, and the knob on the bottom right changes the direction of the motor.
- The red light indicates when the machine is on and yellow light indicates when it is heated.
Assembling the Machine:
Make sure the machine is unplugged and remove the wooden panels covering the motor by unscrewing any bolts attached (store these carefully in the tool box)
Starting point:
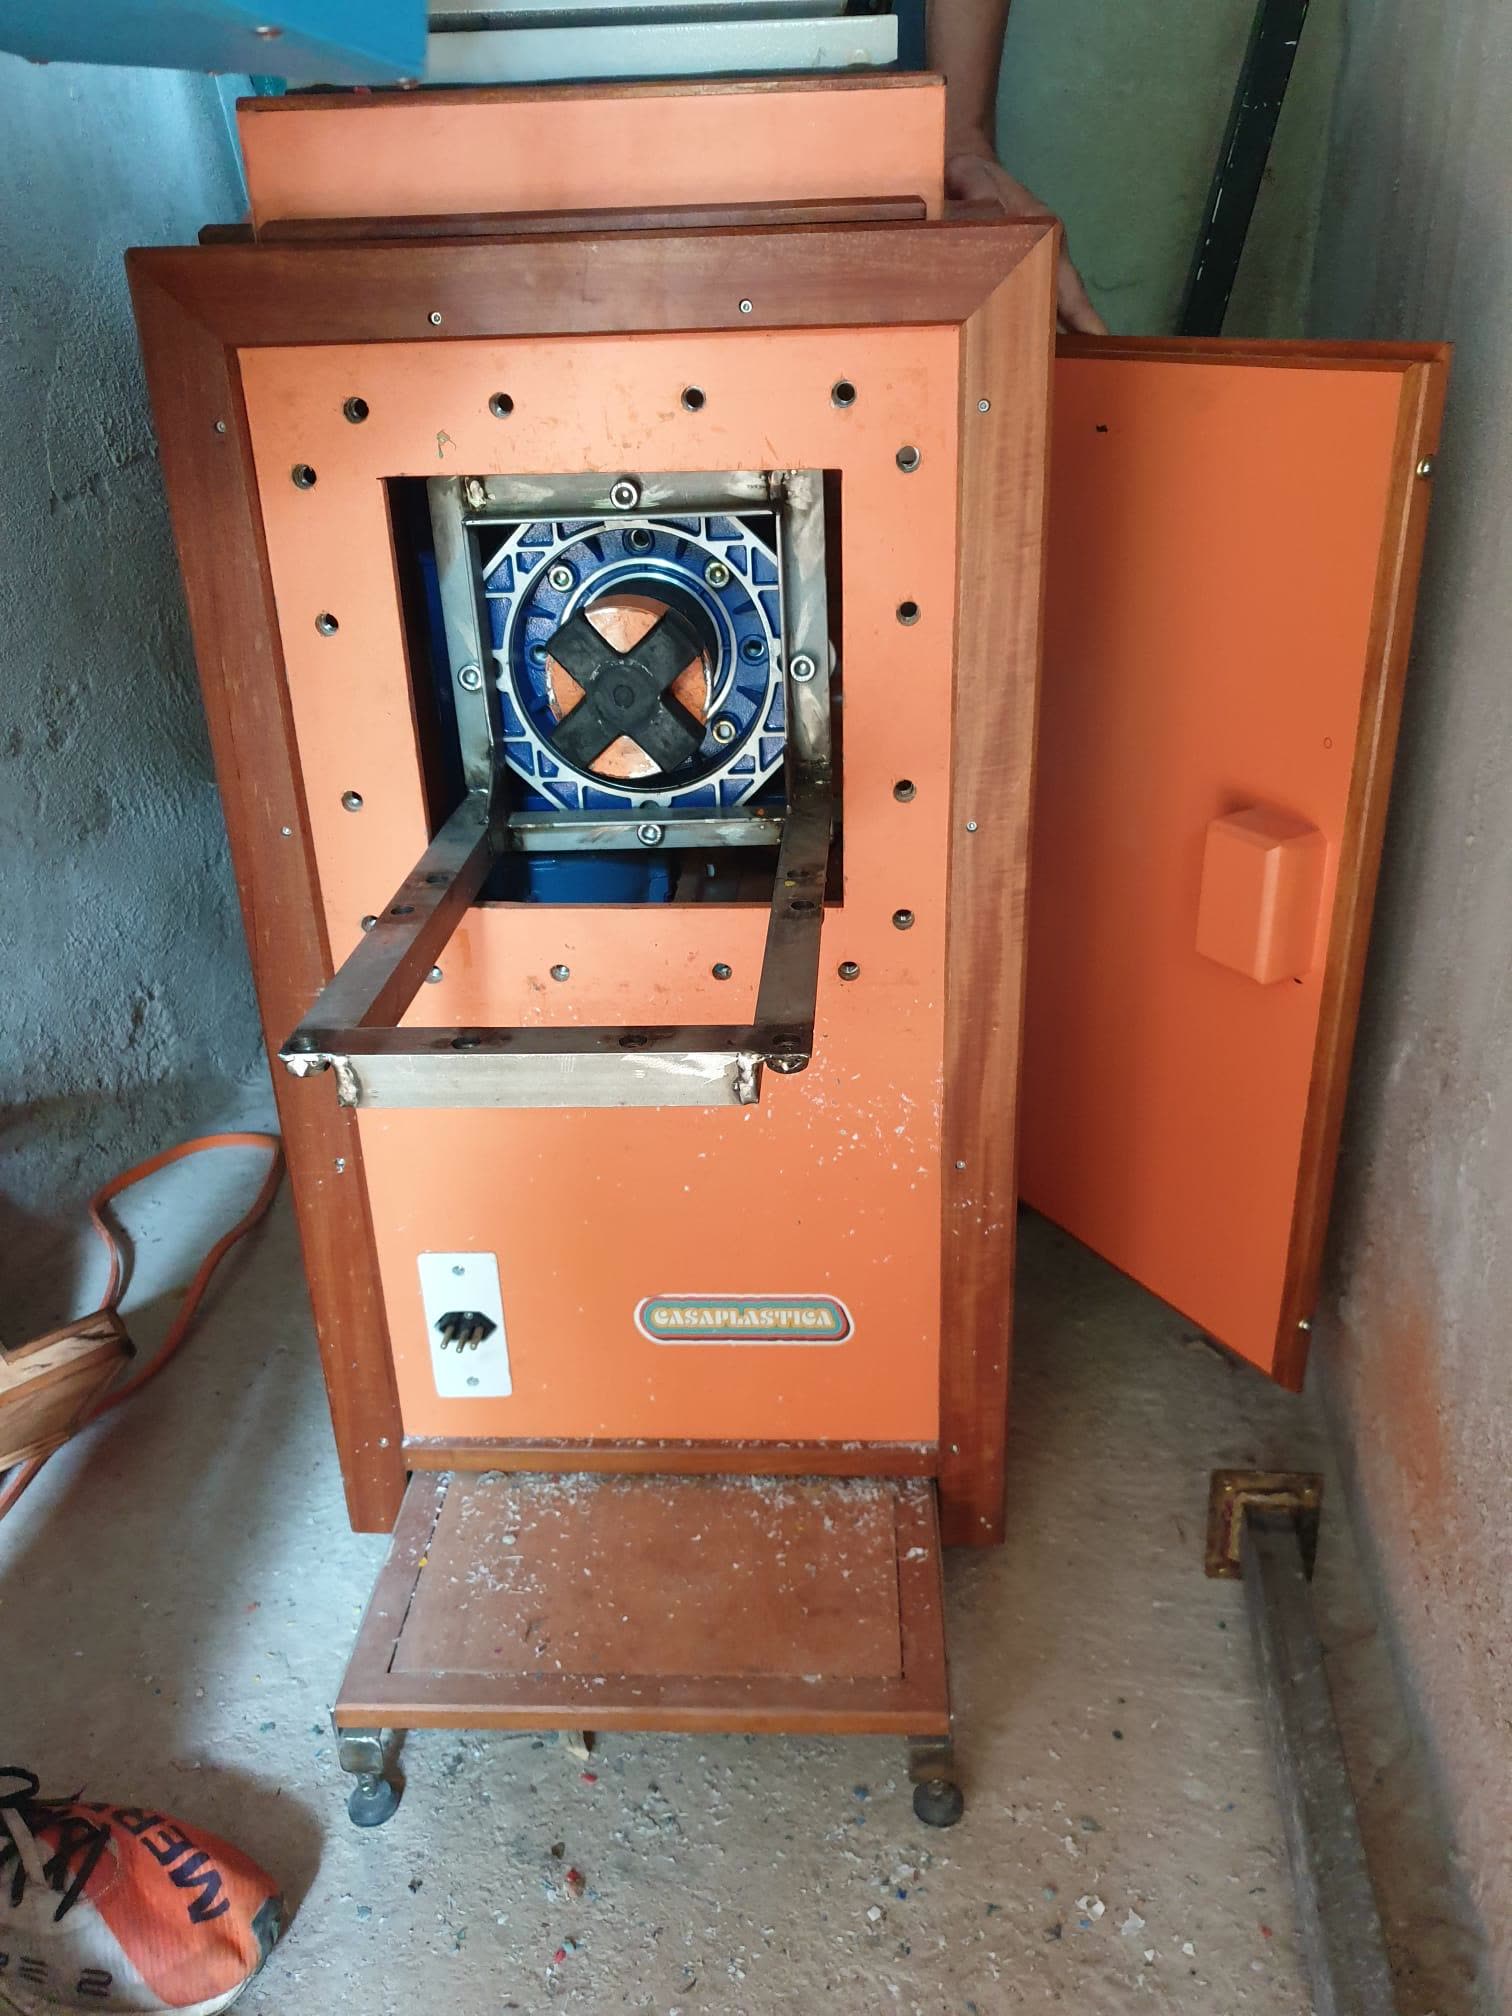
Make sure the black cross is attached to the orange part of the machine. Then attach the ‘beam making part’ to the orange core (see picture below).
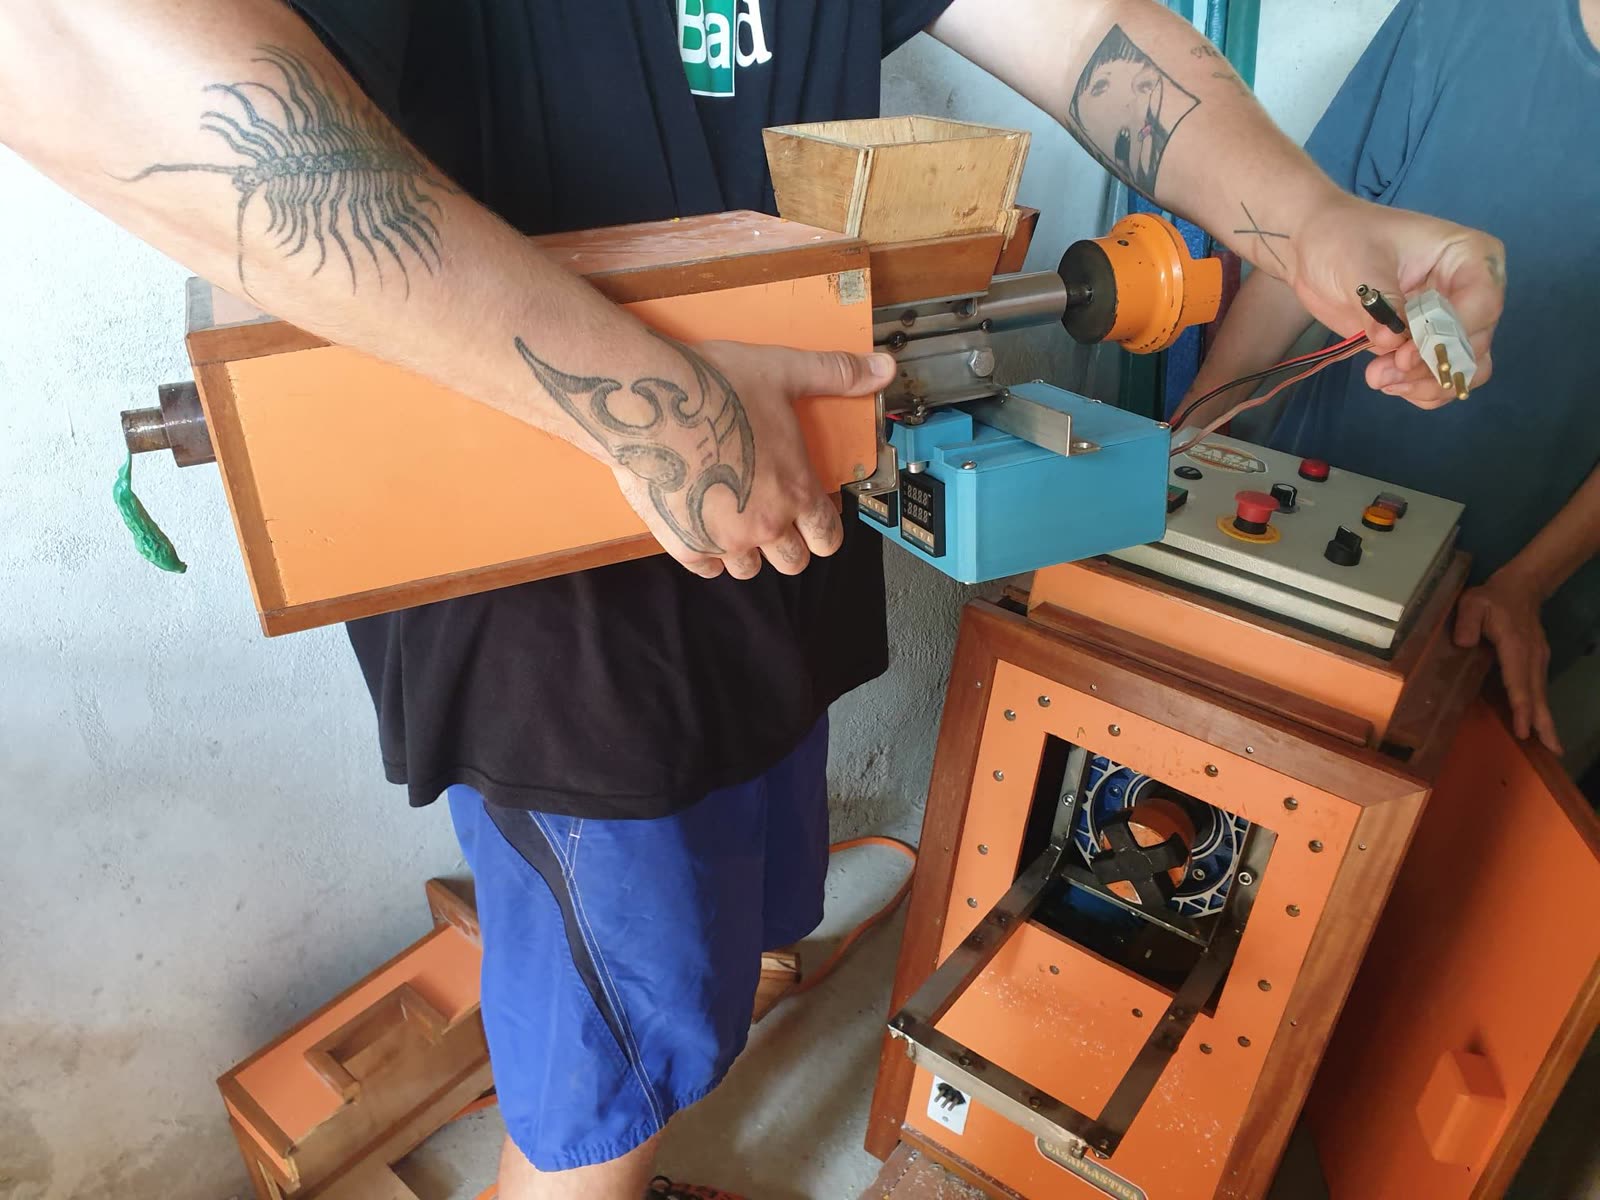
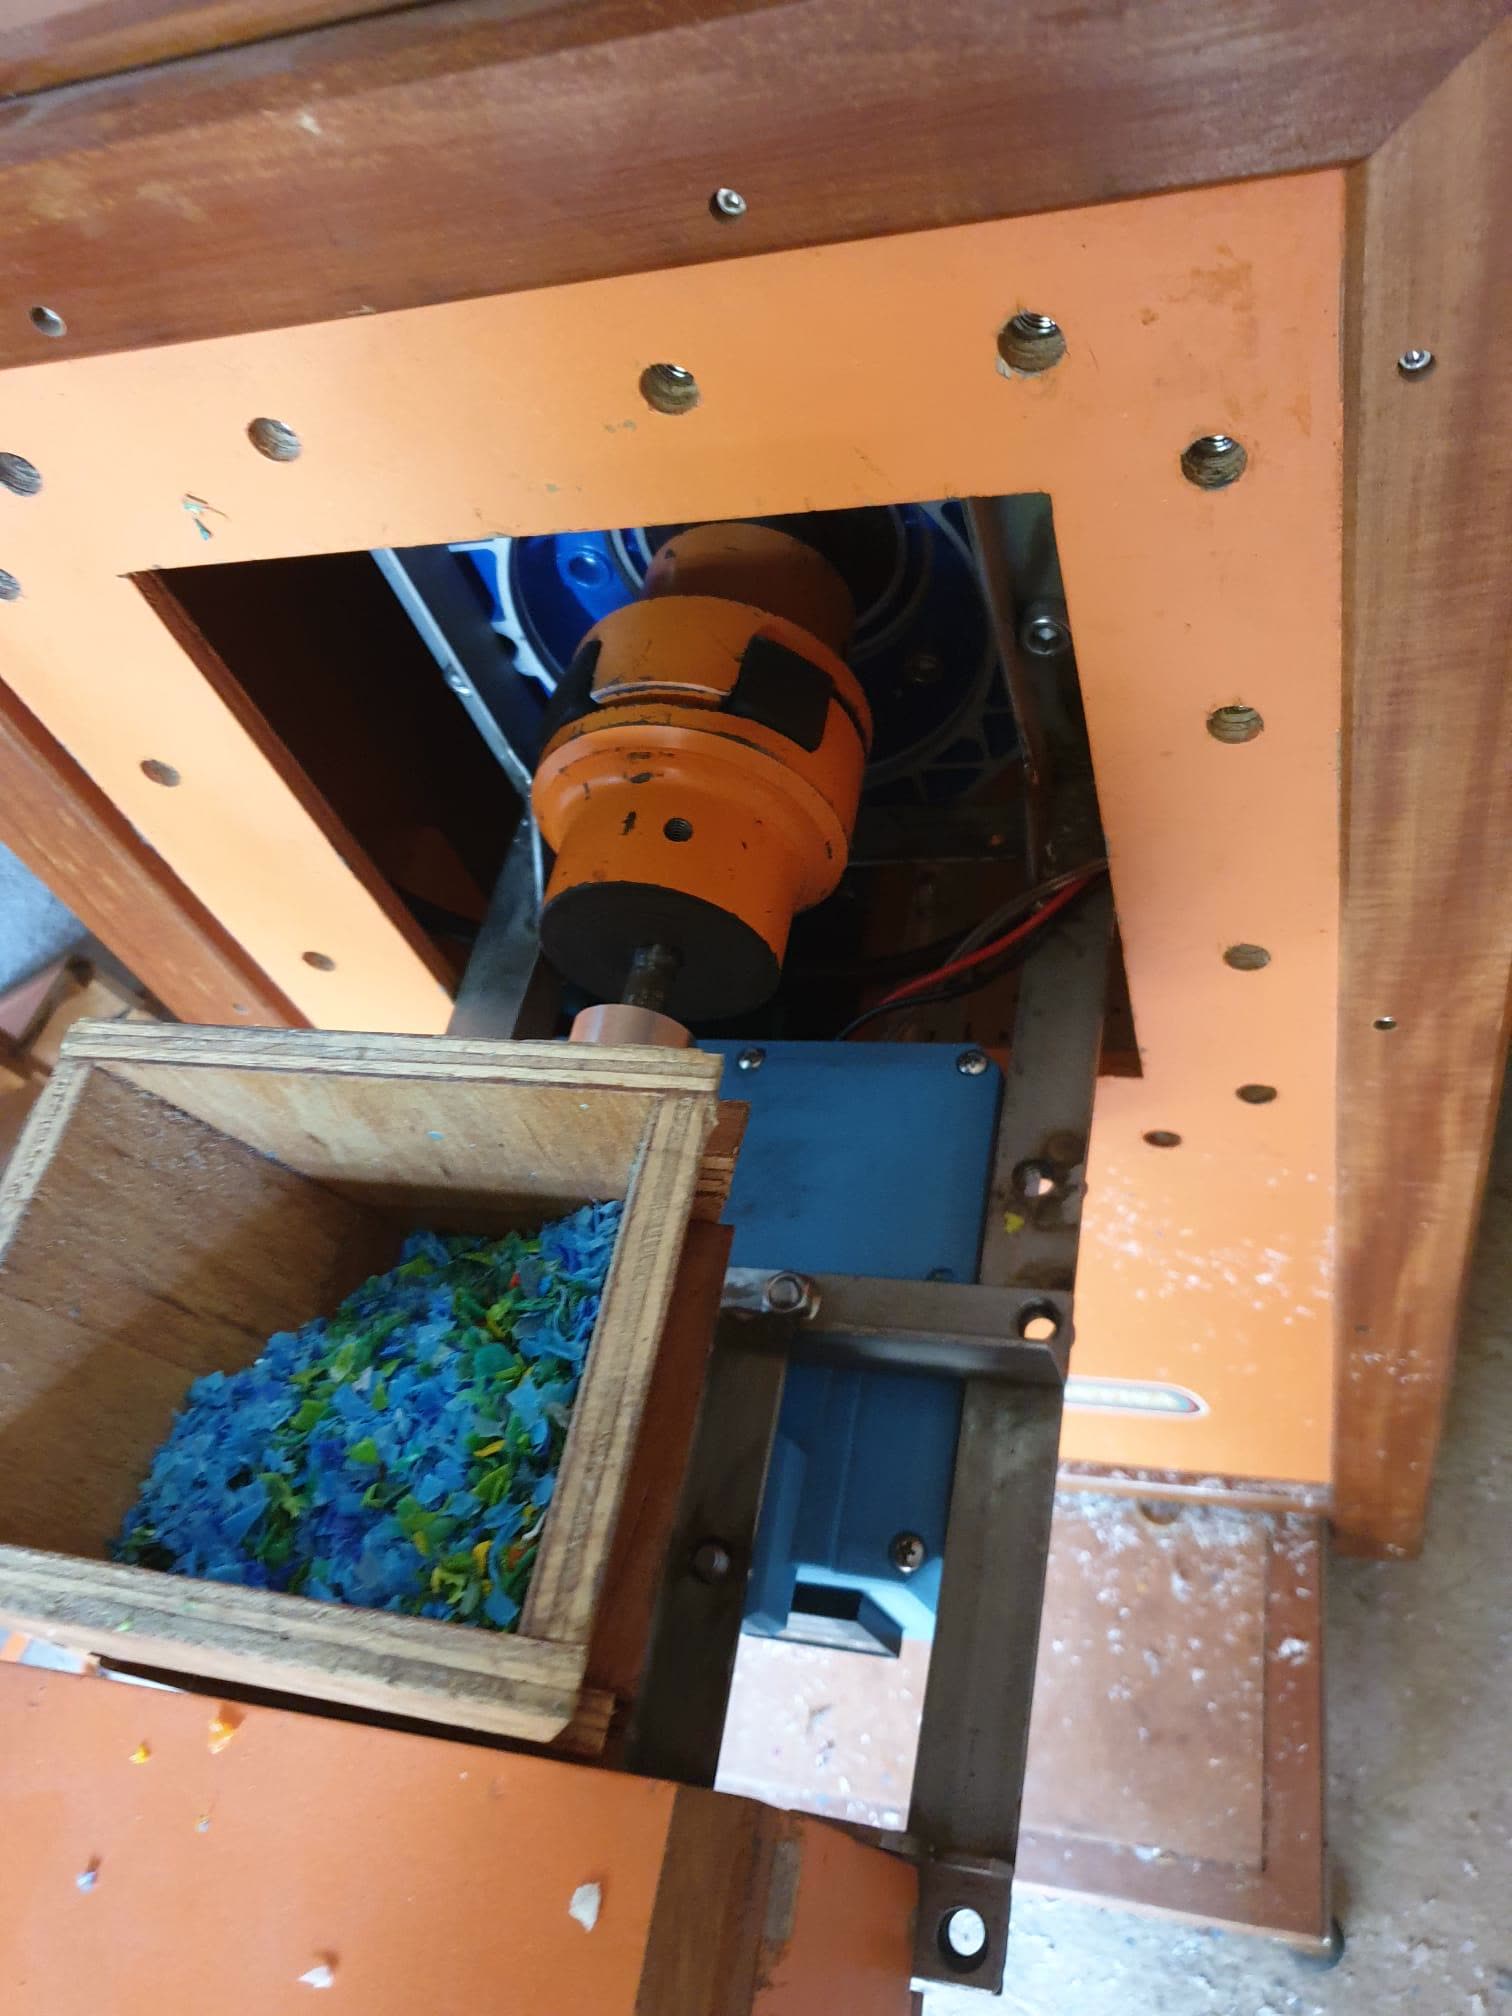
Troubleshoot: sometimes, the parts will not align because the core part is in a different position due to previous spinning/activity. If this is the case, turn on the machine and spin the rotator slightly until it is in the correct position
Once aligned, screw the four bolts into the following holes, like shown in the photos below.
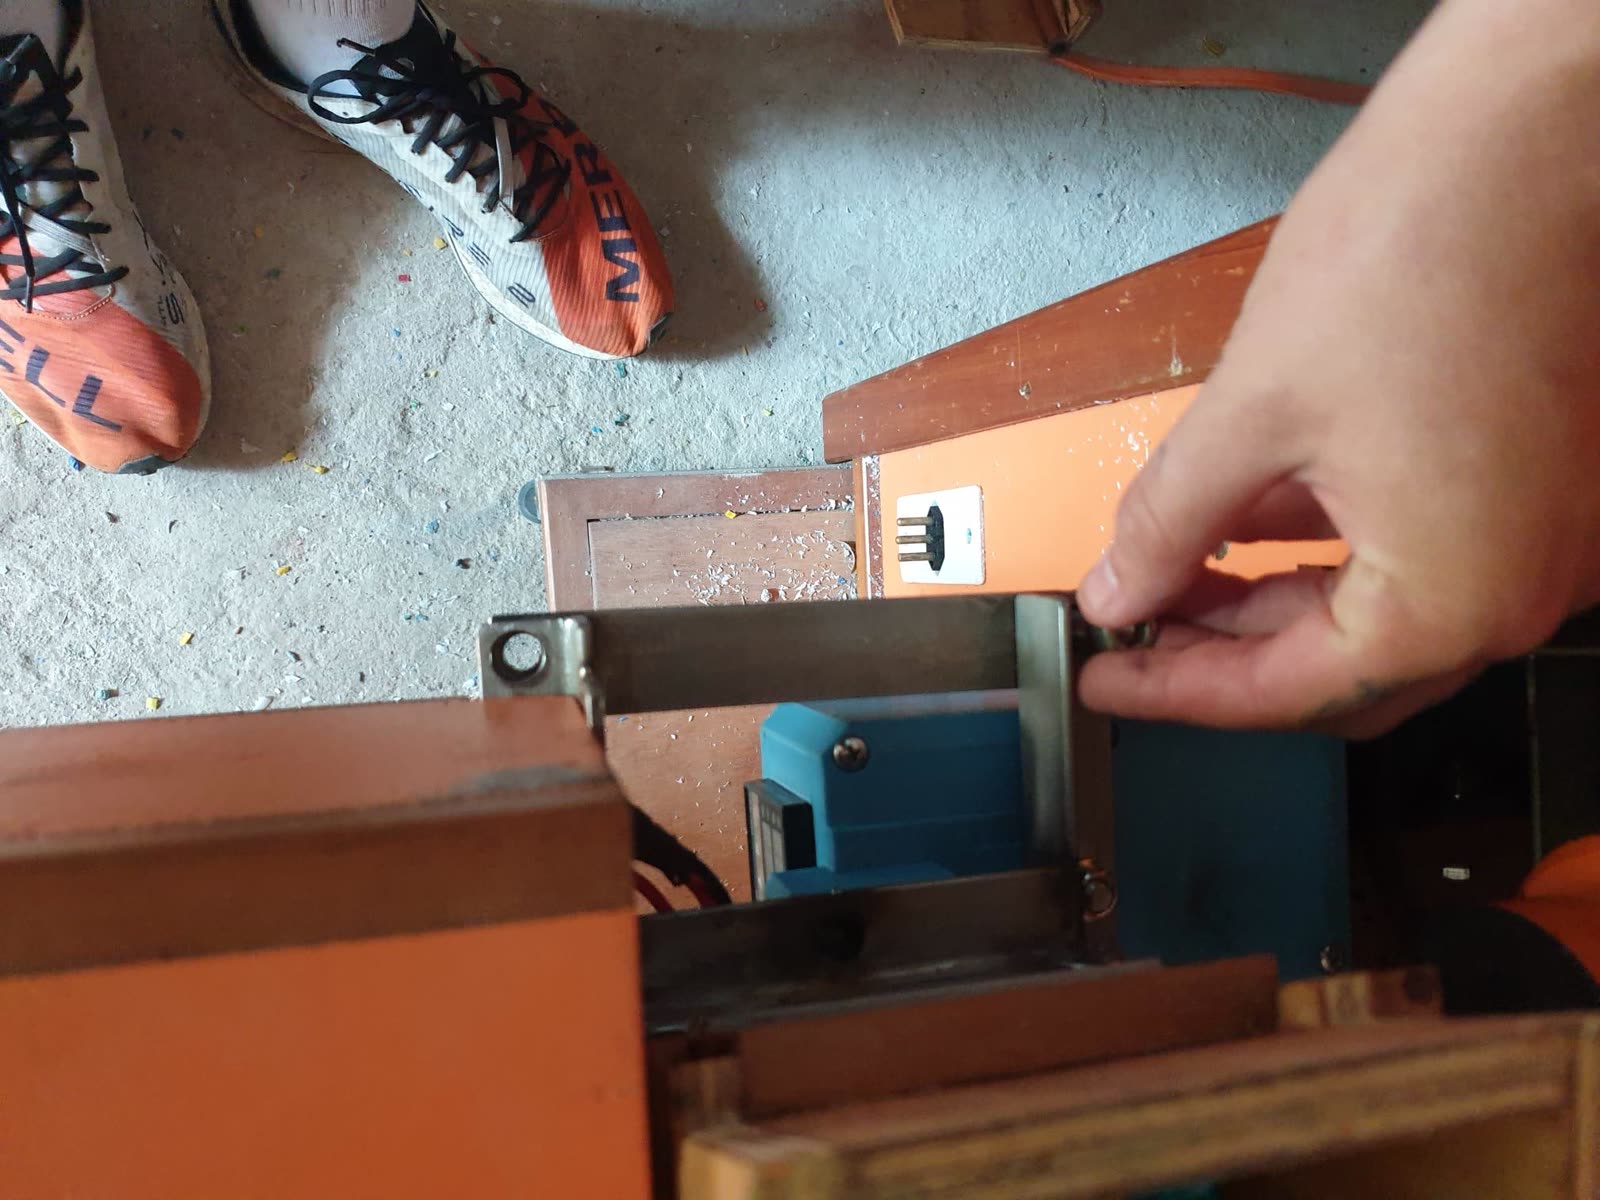
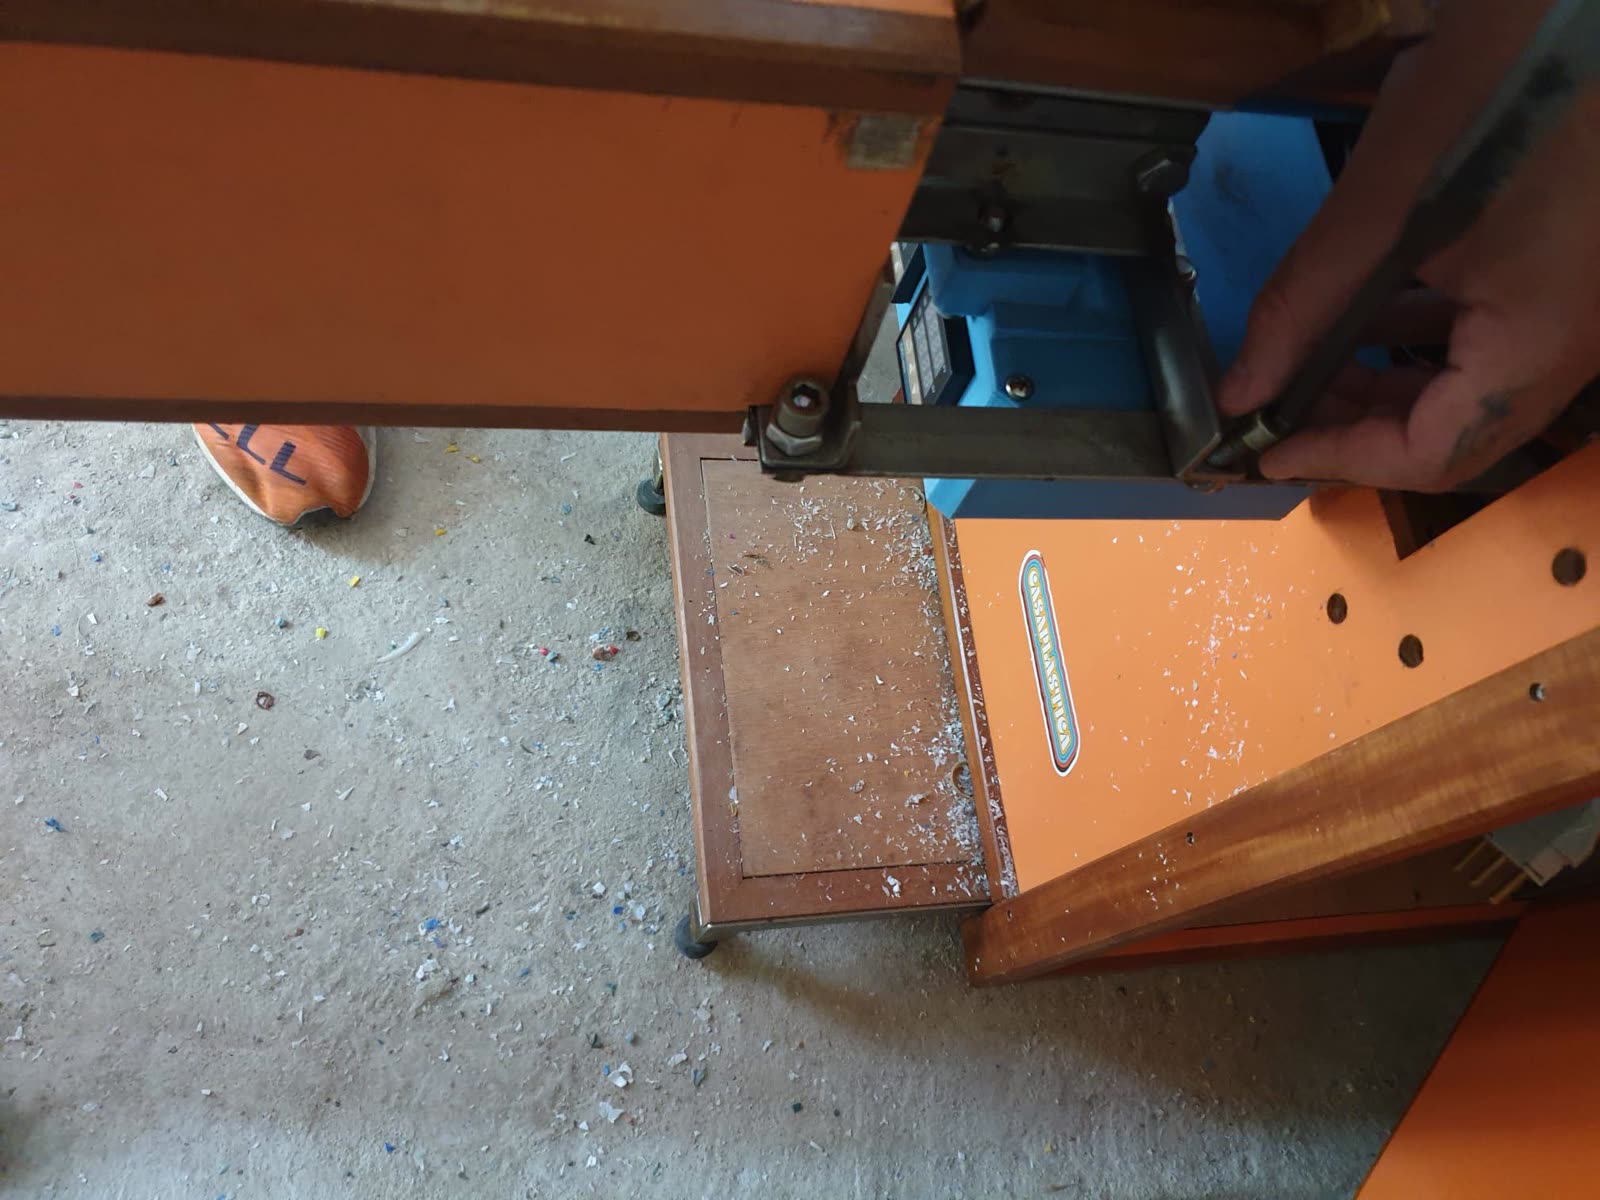
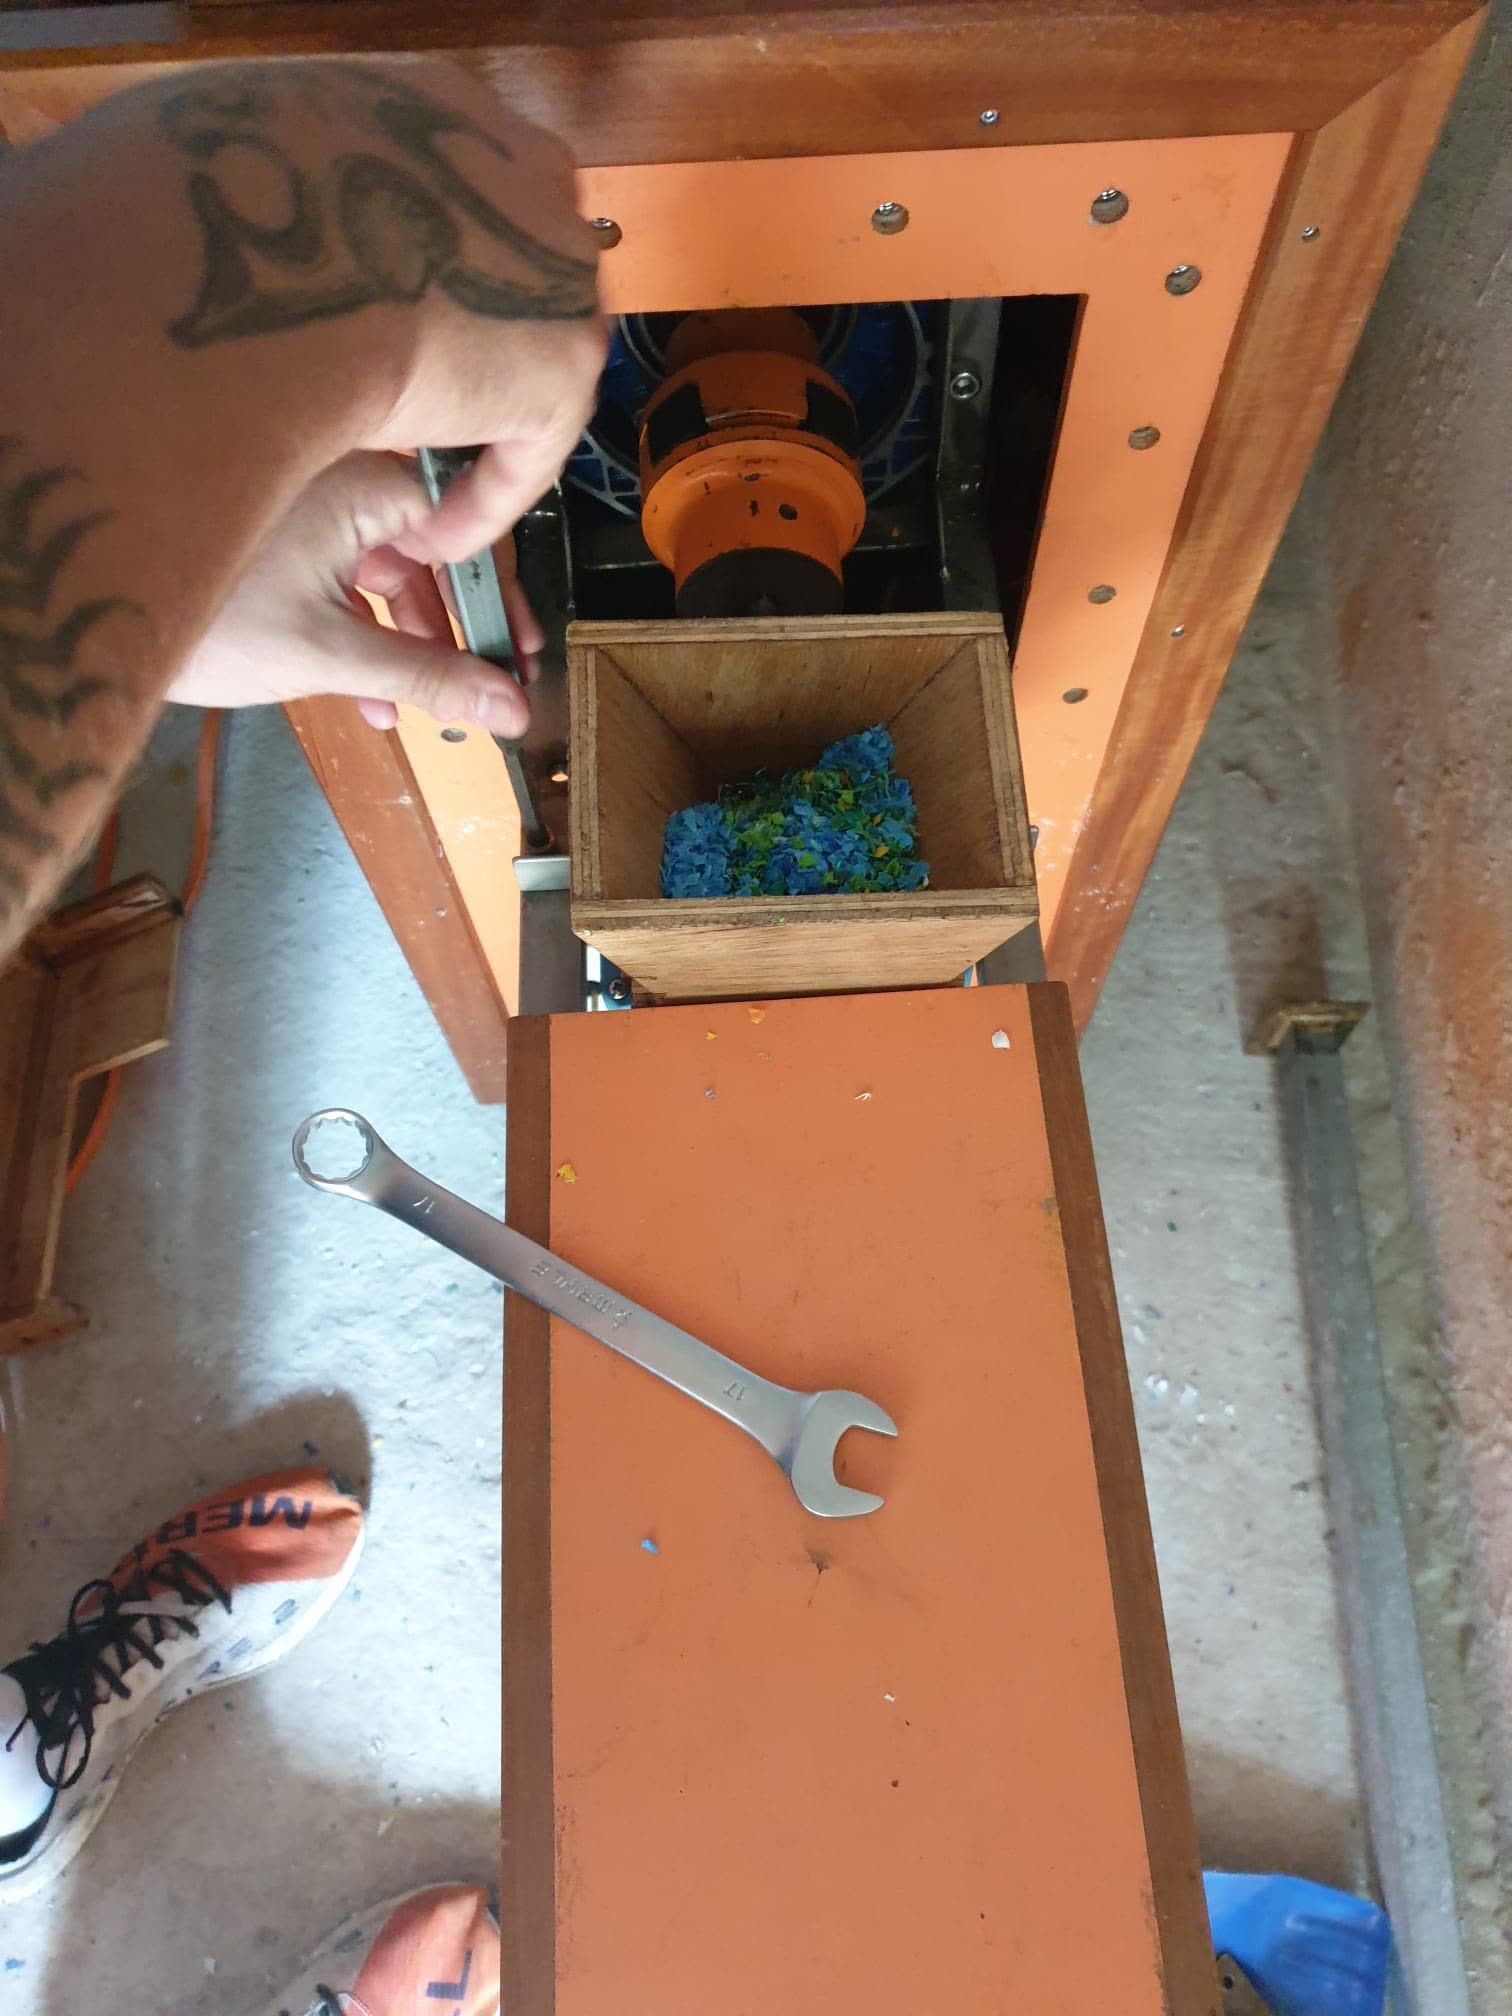
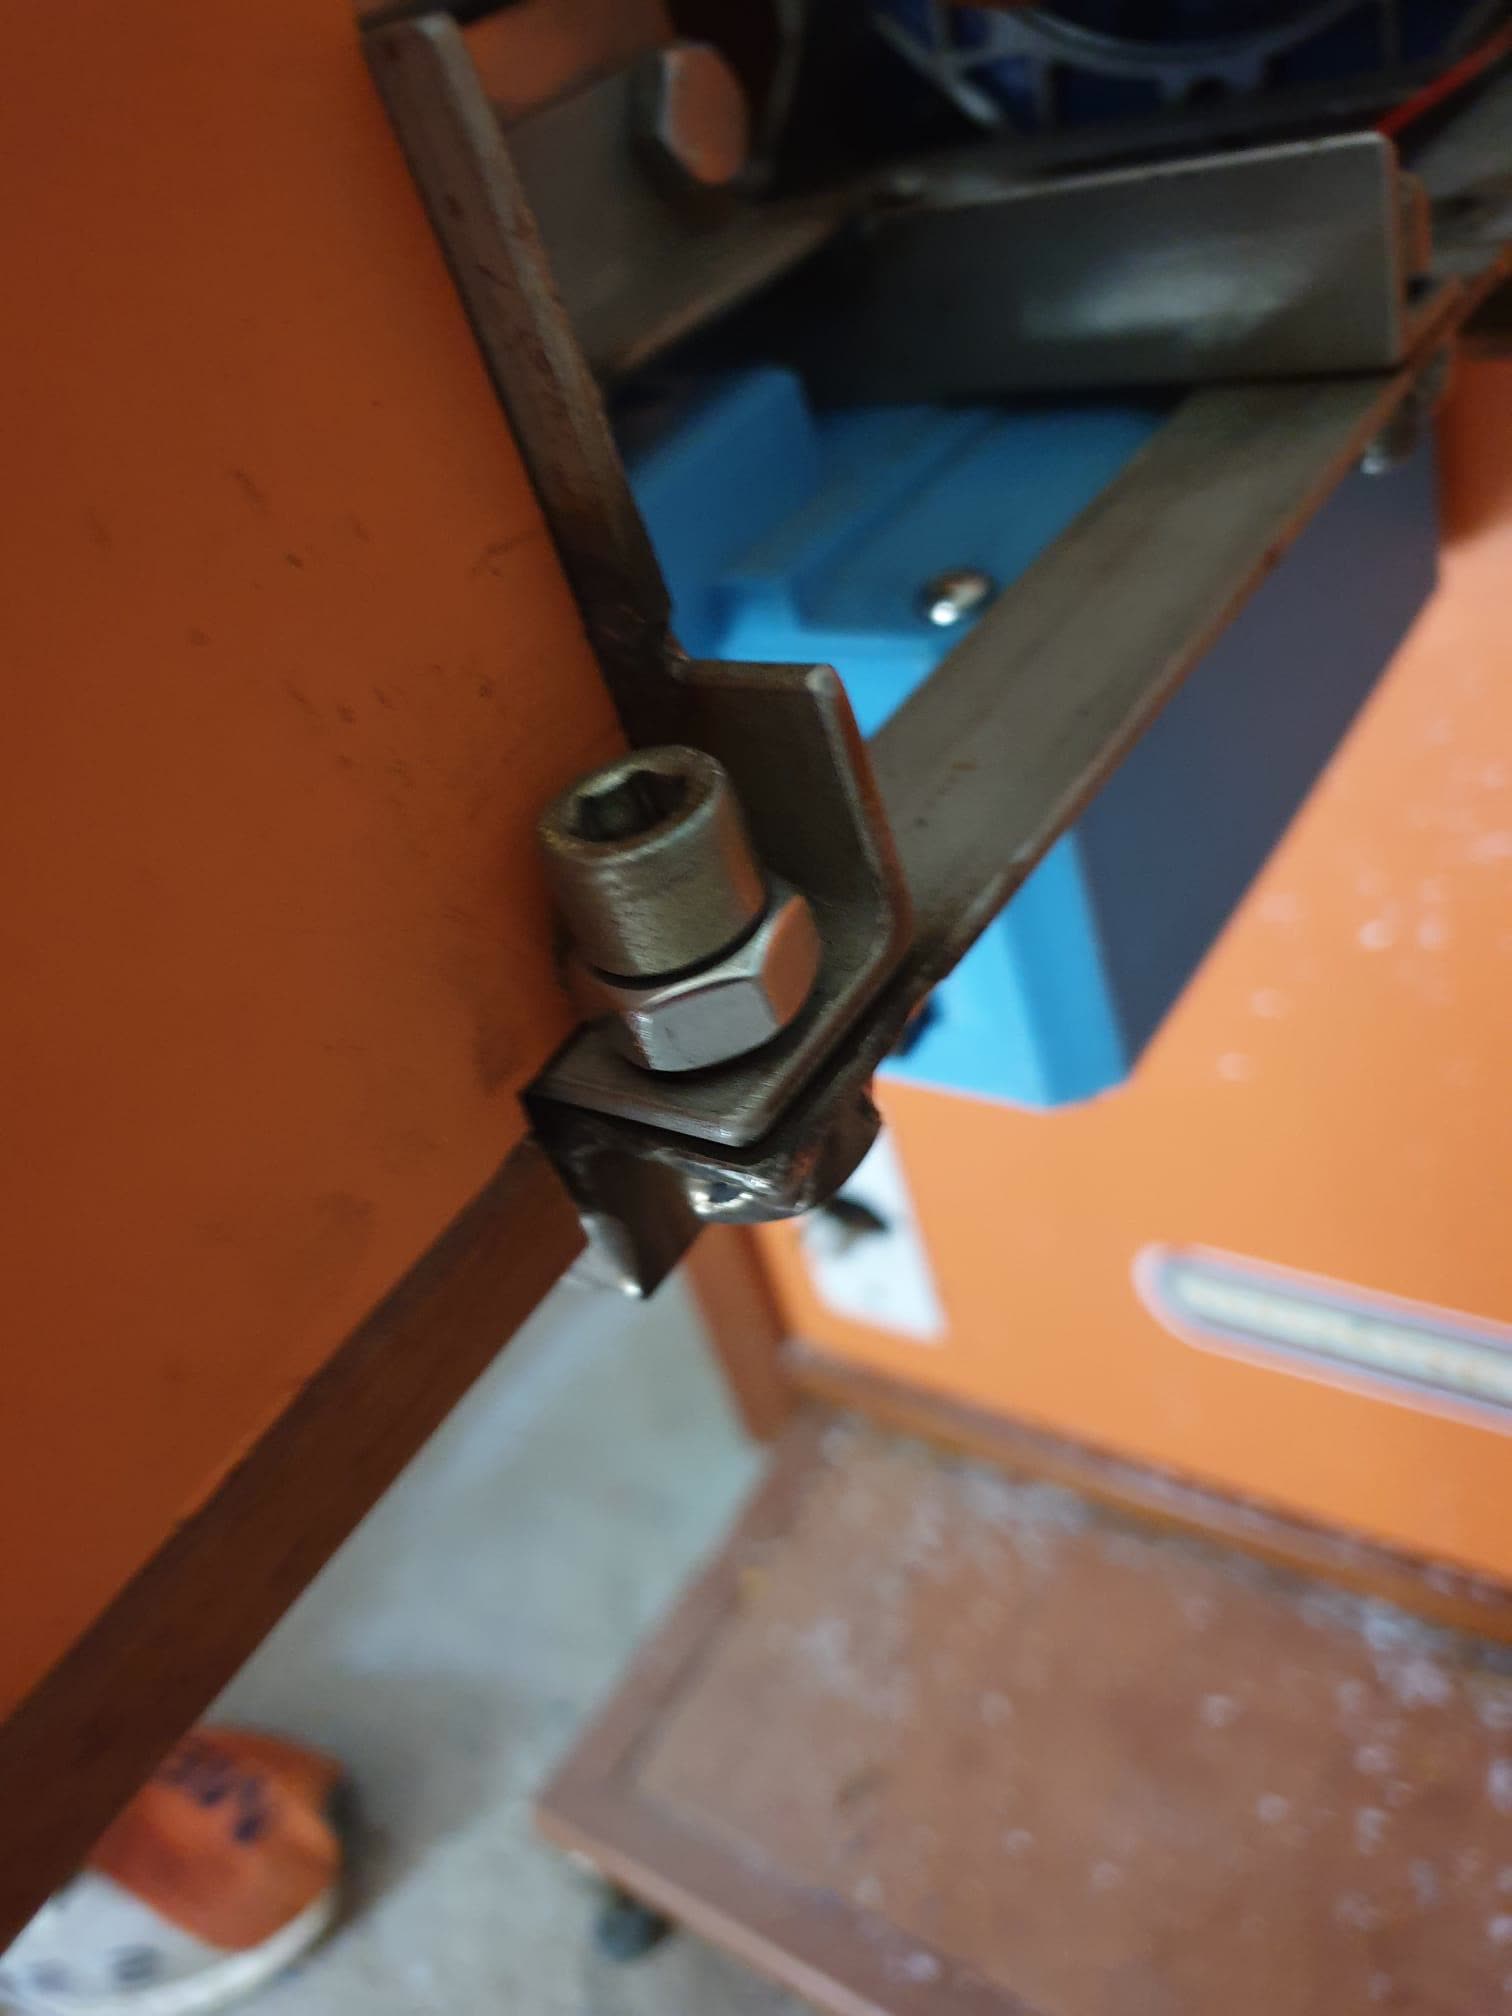
❗Important note: The front right bolt is different. This bolt has a nut attached. See picture below for the correct placement:
You will notice that the ‘beam making’ part has cords attached to it. These are to be connected to the pink box inside the core orange machine. Plug the pink box in. See picture below:
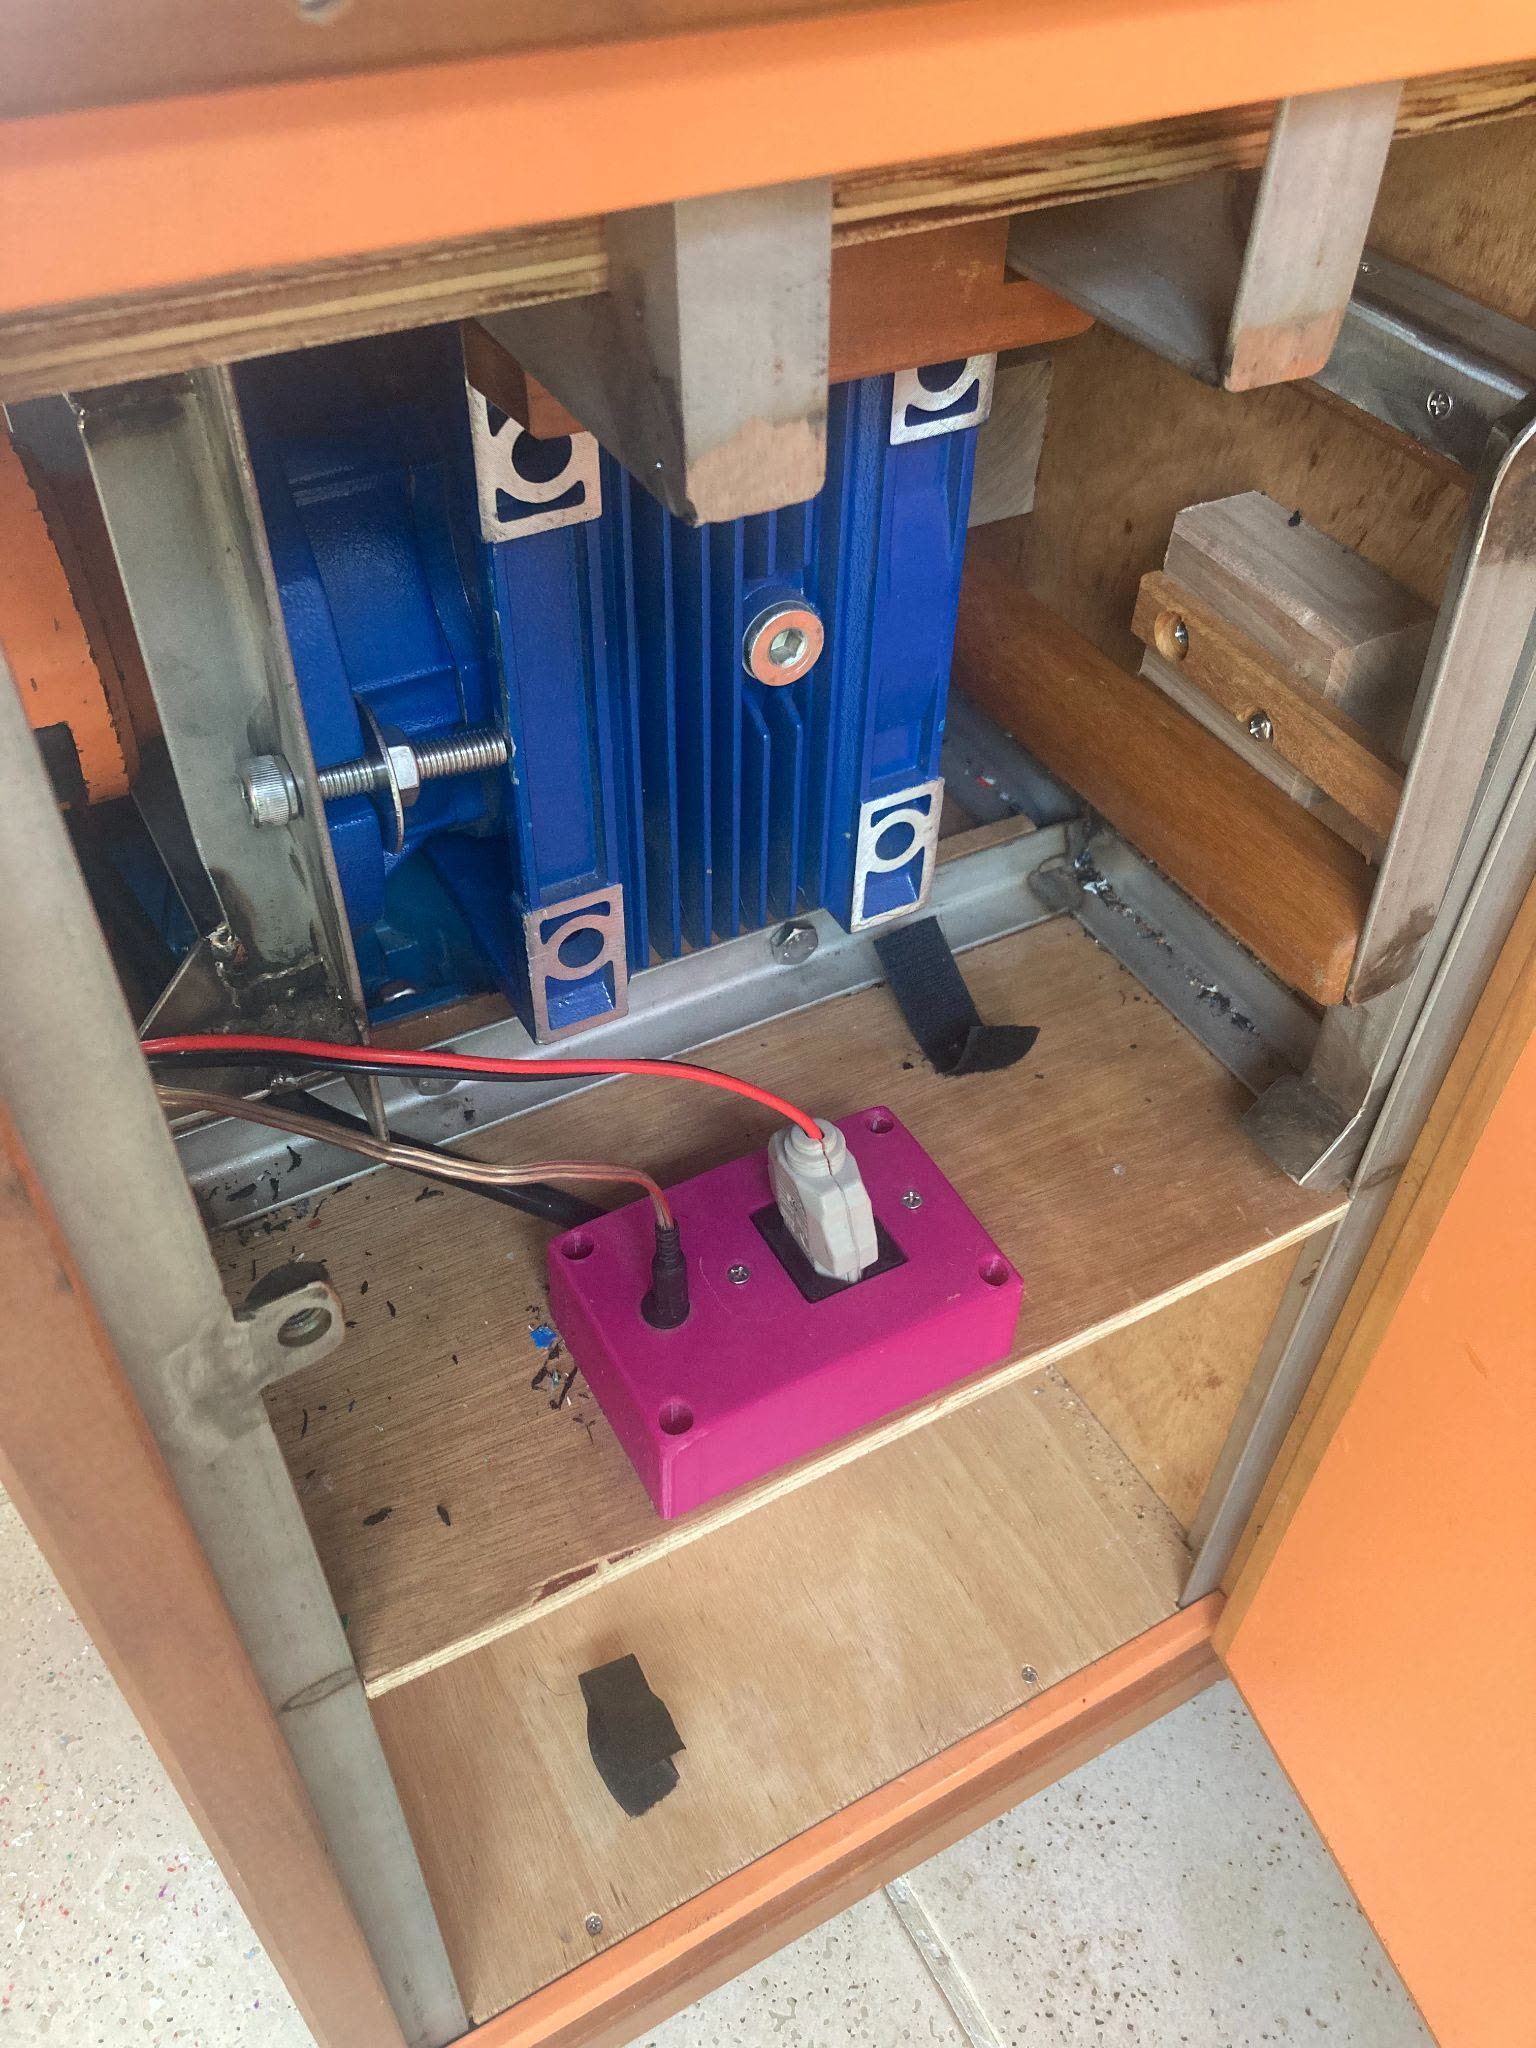
(FYI: The pink box is connected to the temperature core underneath the orange box and when the goal temperatures are reached, it sends a message to the yellow button on the panel to turn on.)
Put the orange box parts around the ‘plastic’ filter part. No need to screw them in.
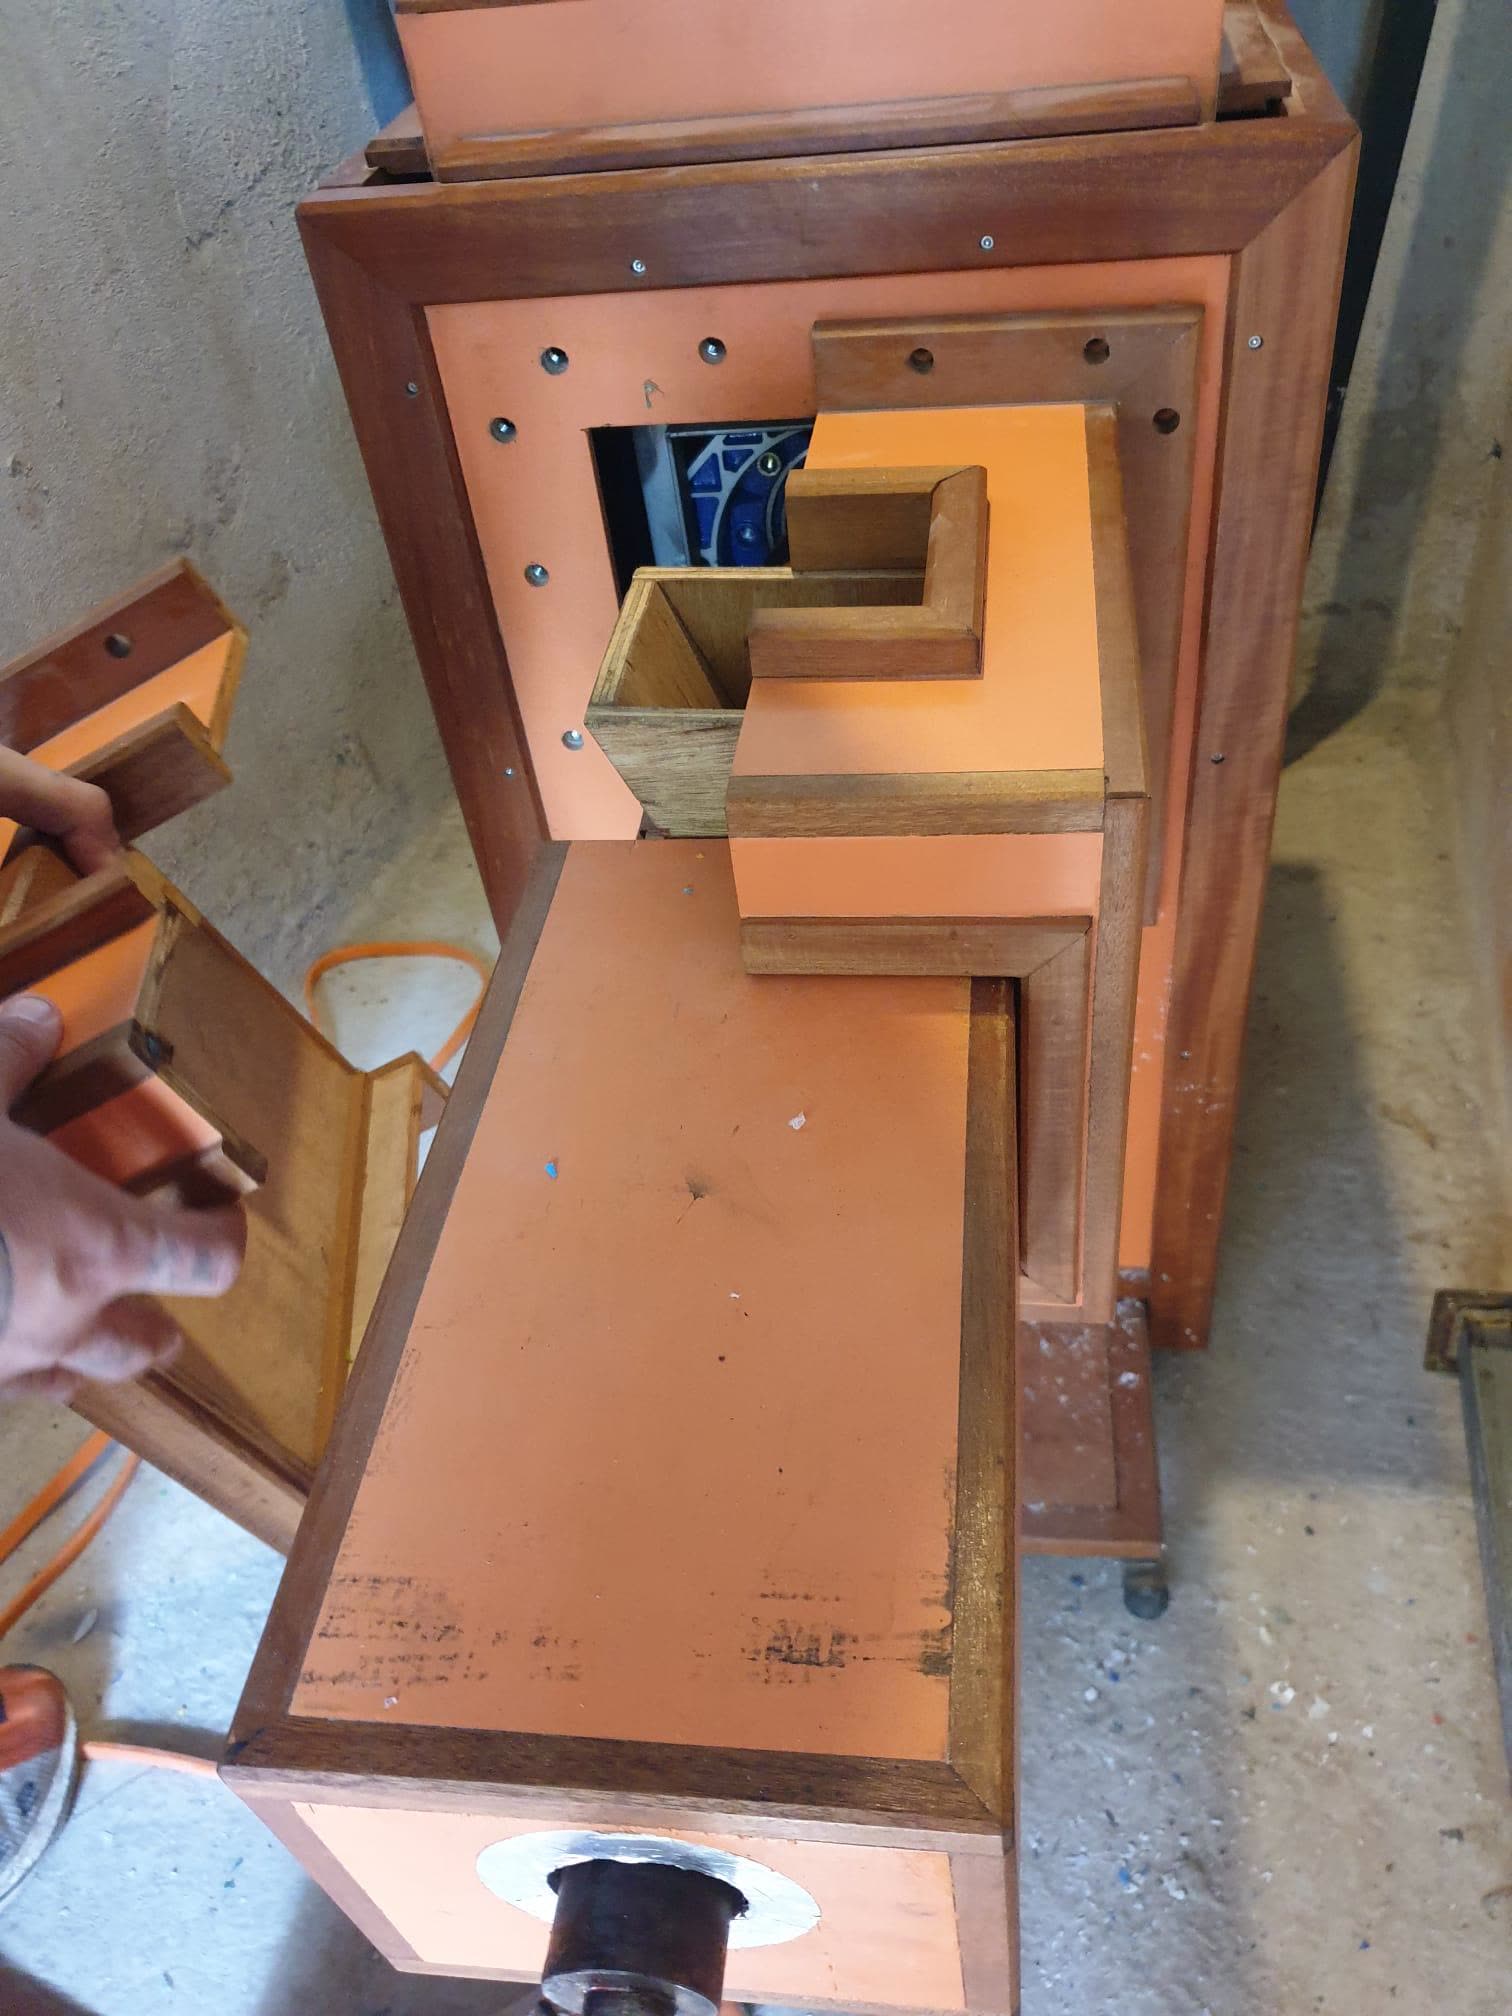
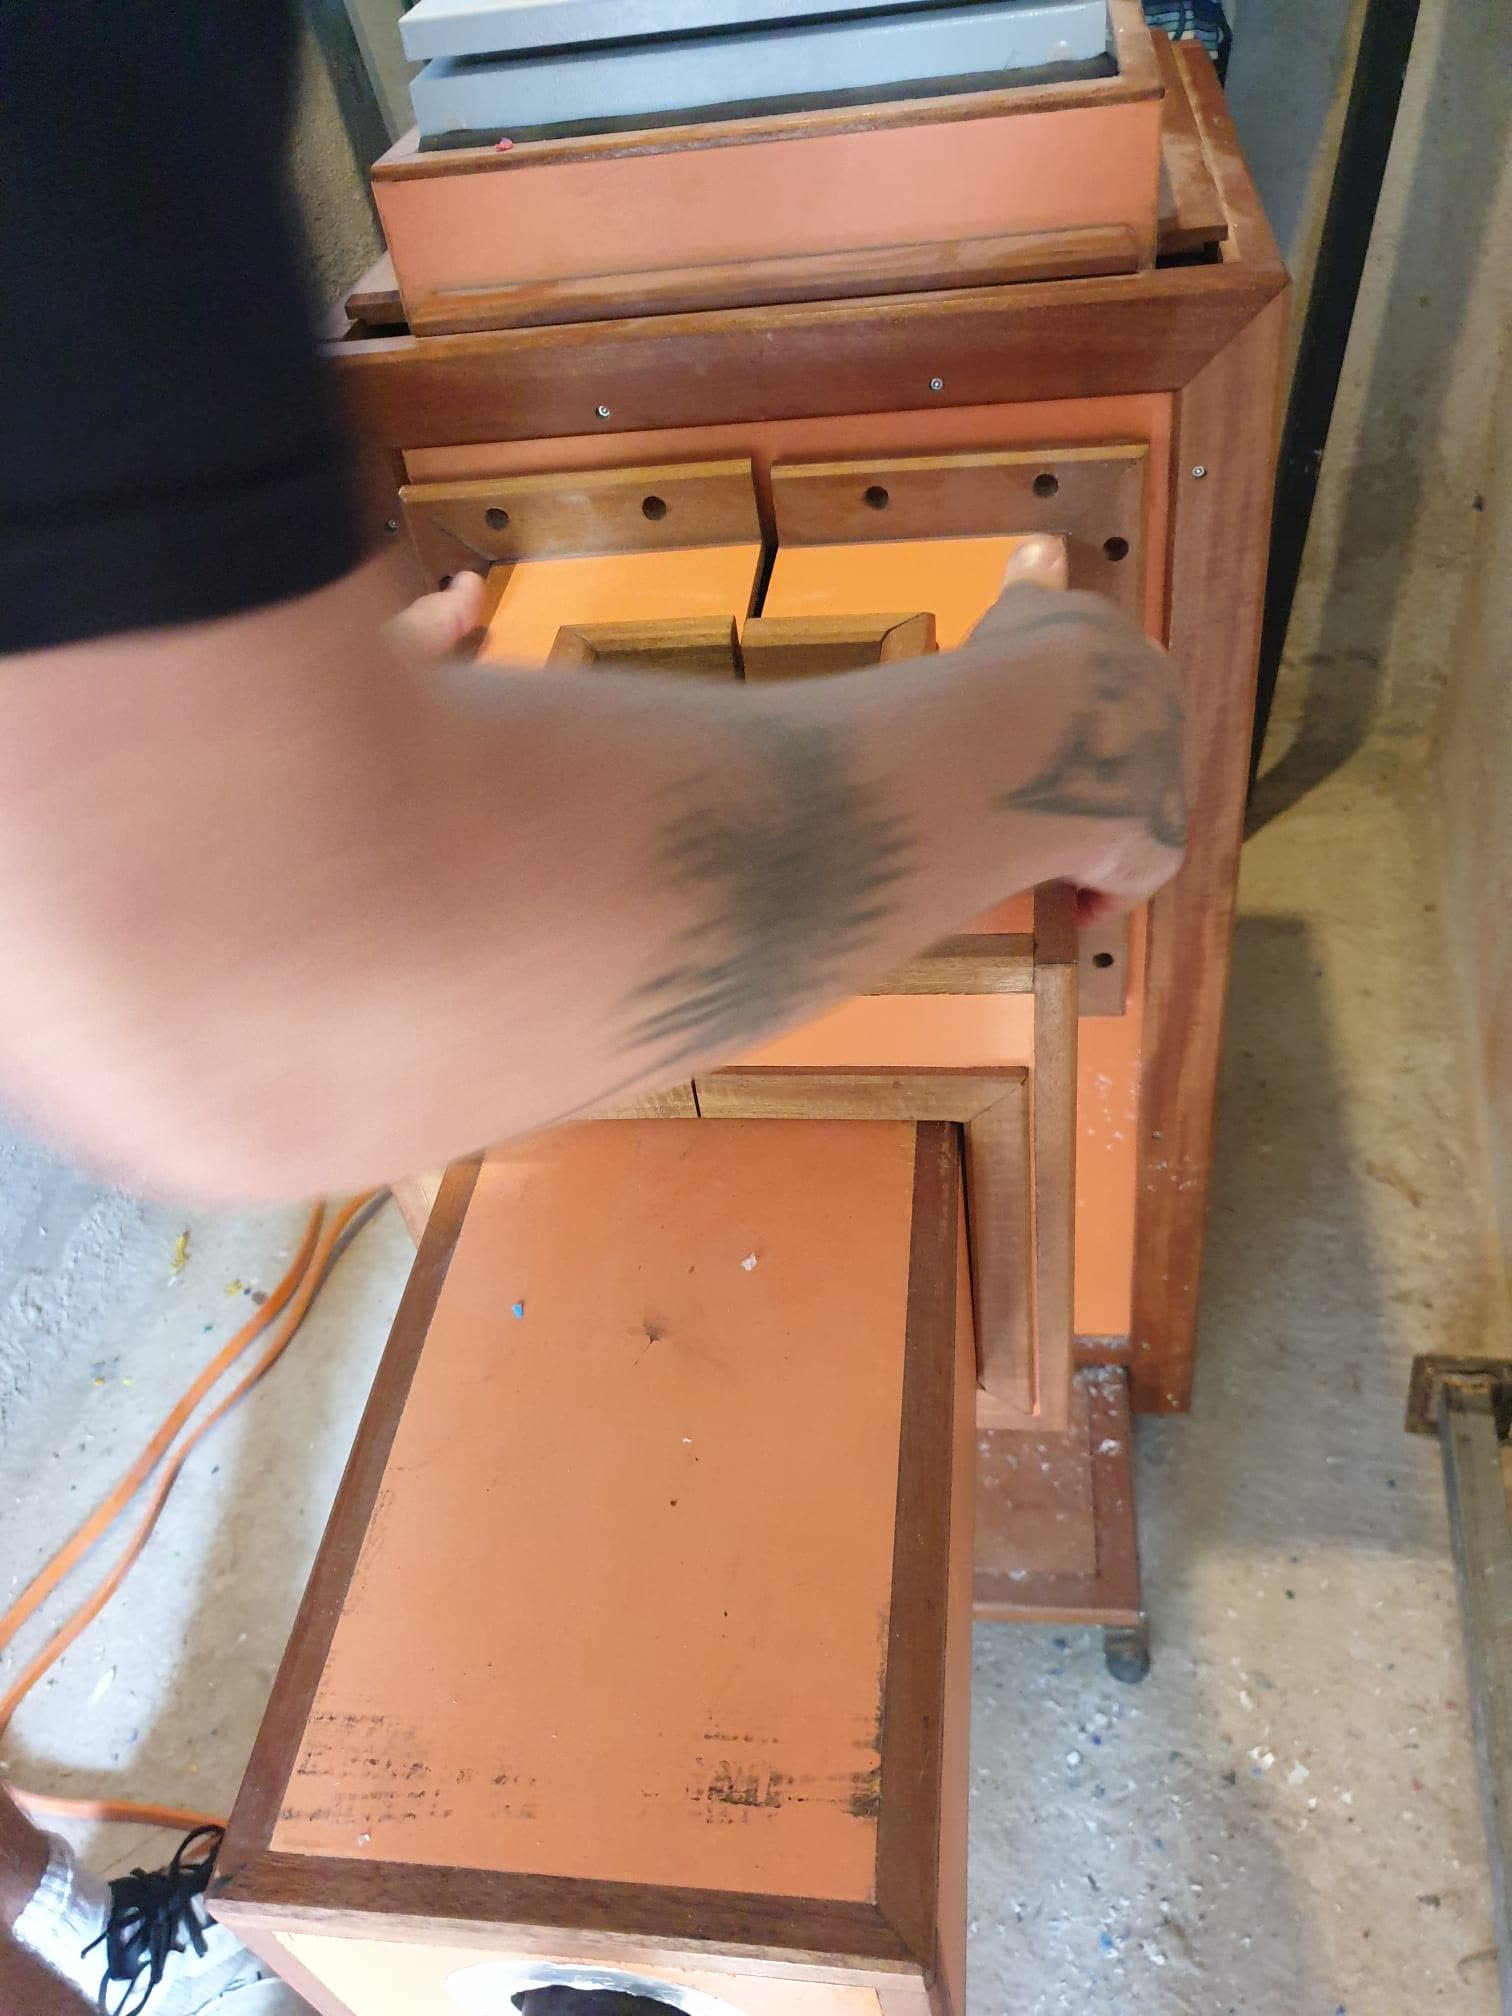
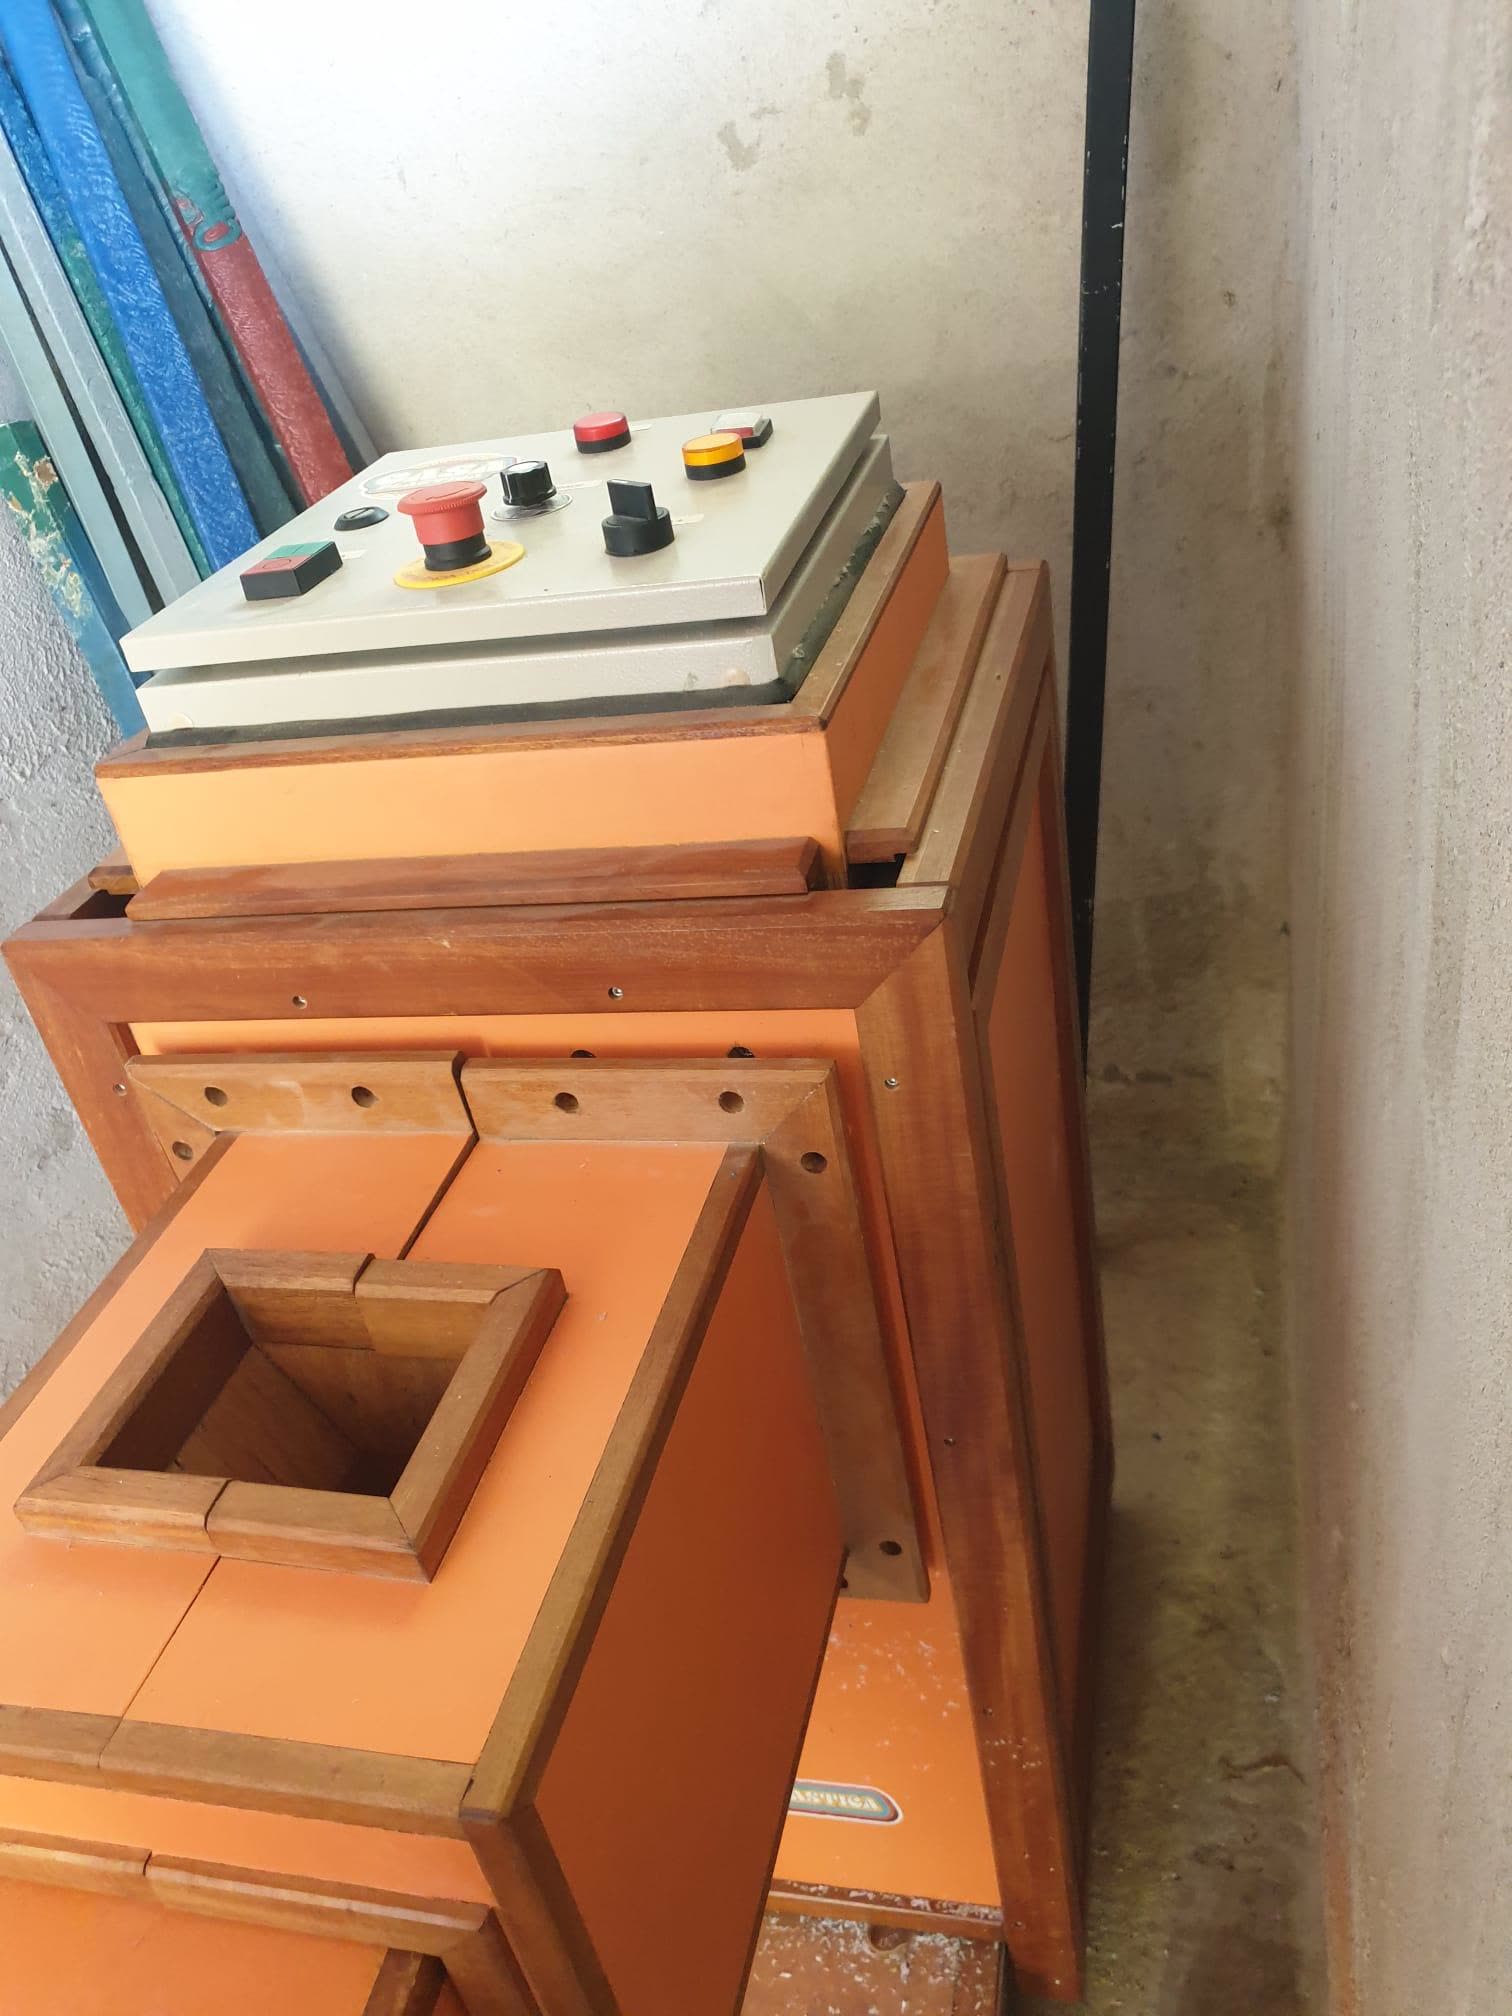
Plug in the machine and switch on the pink box (top right button). You can look at the temperature gauge to see if the goal temperatures have been met, which is covered when the wooden box is attached (see below).
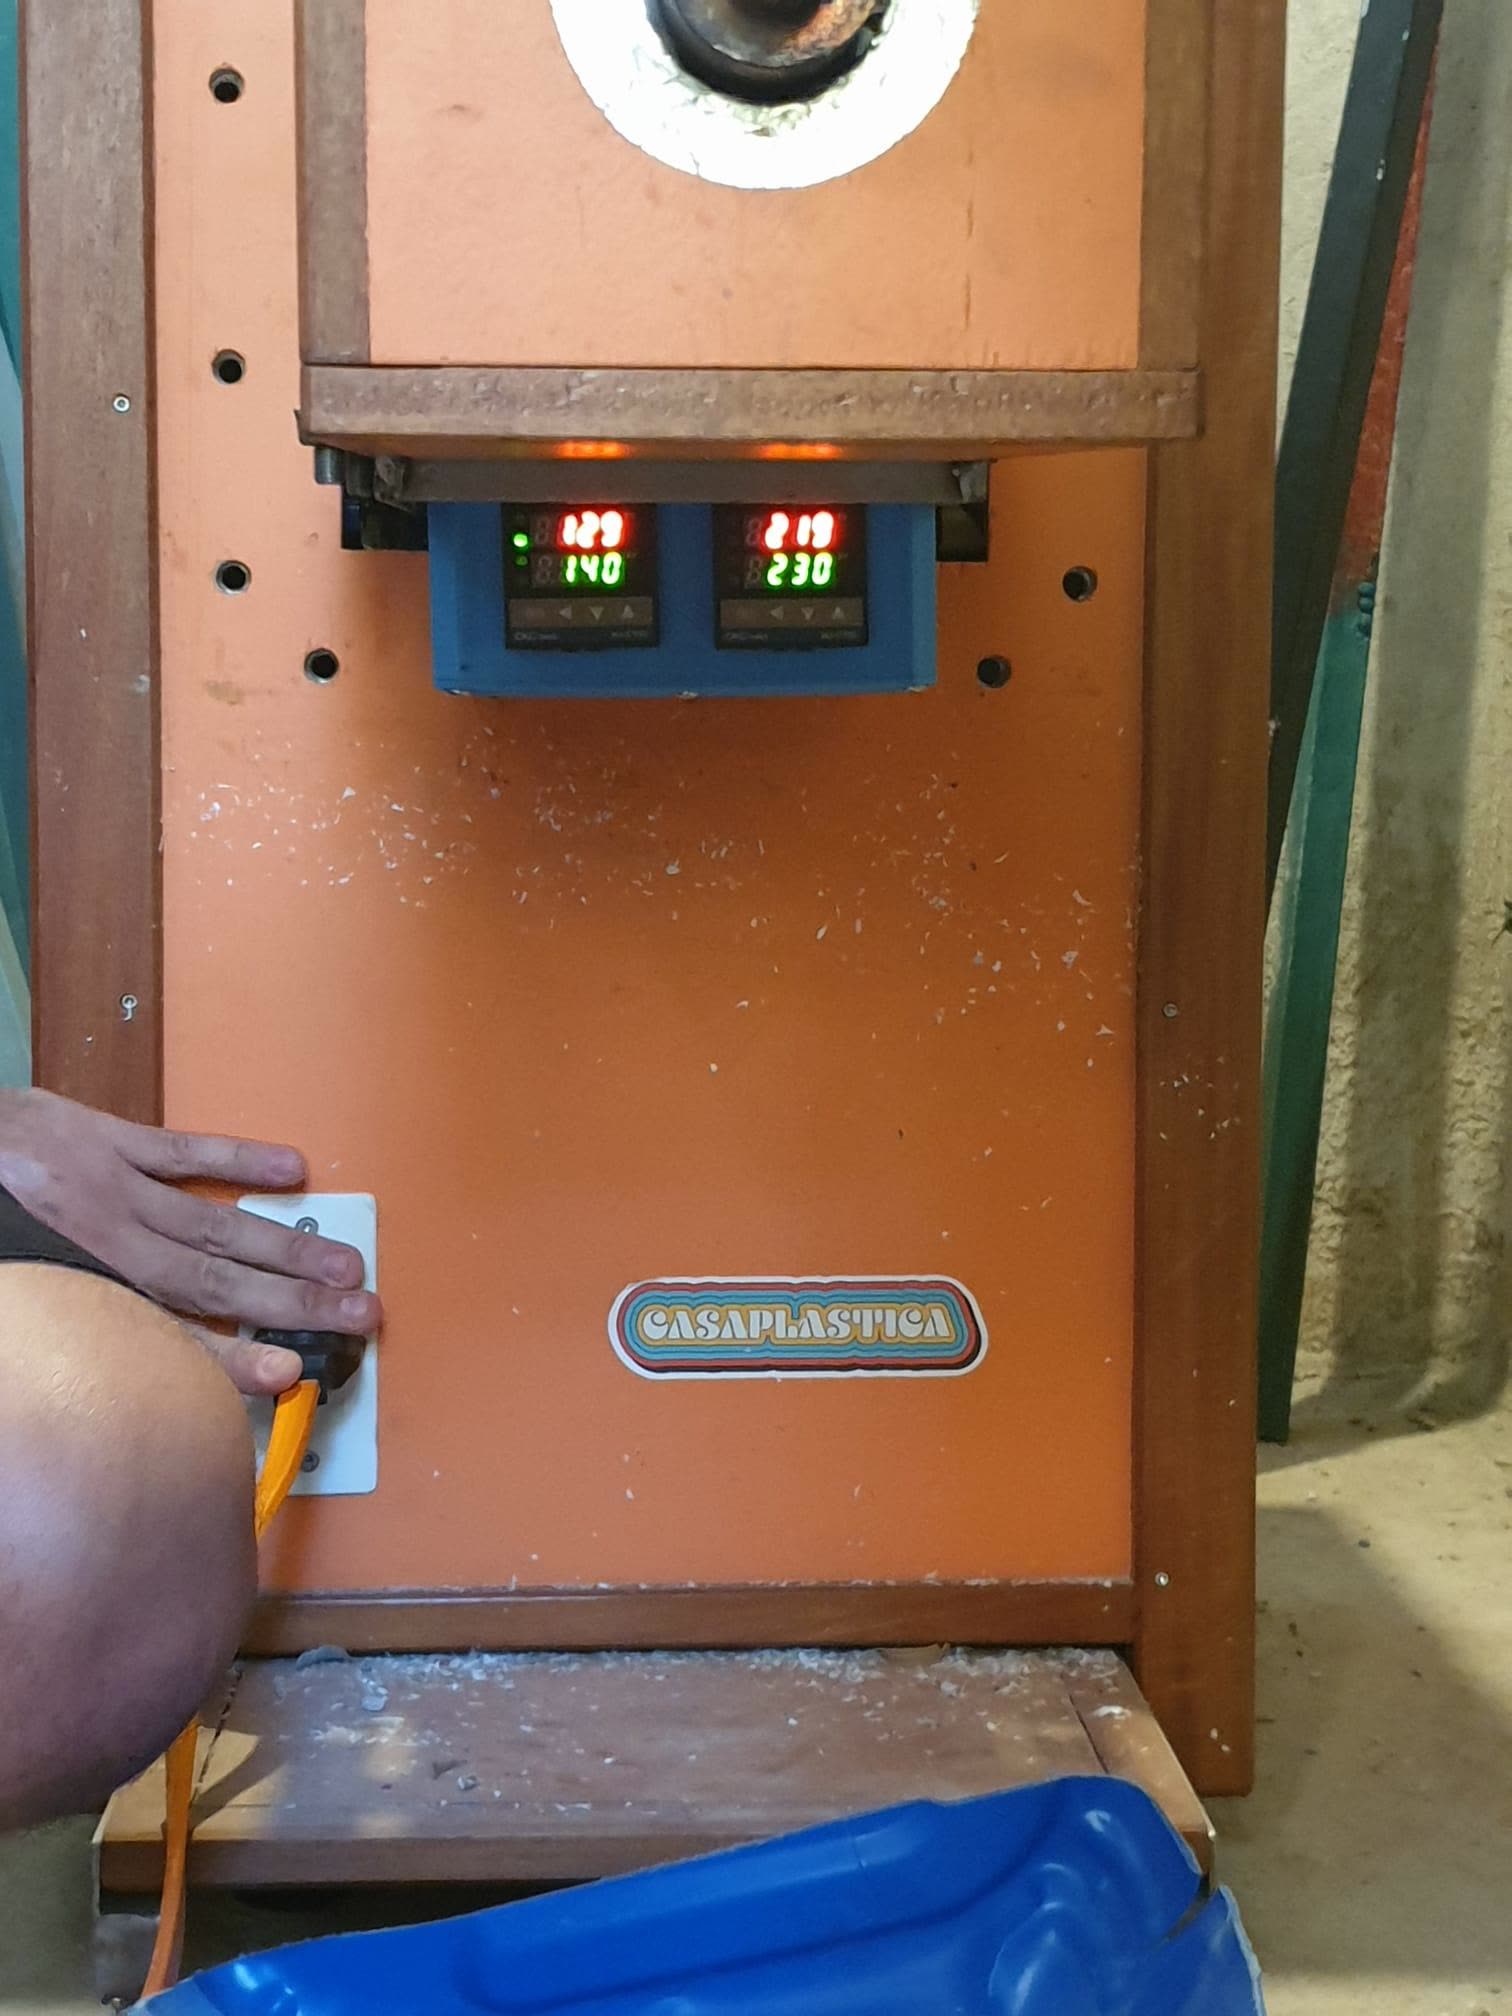
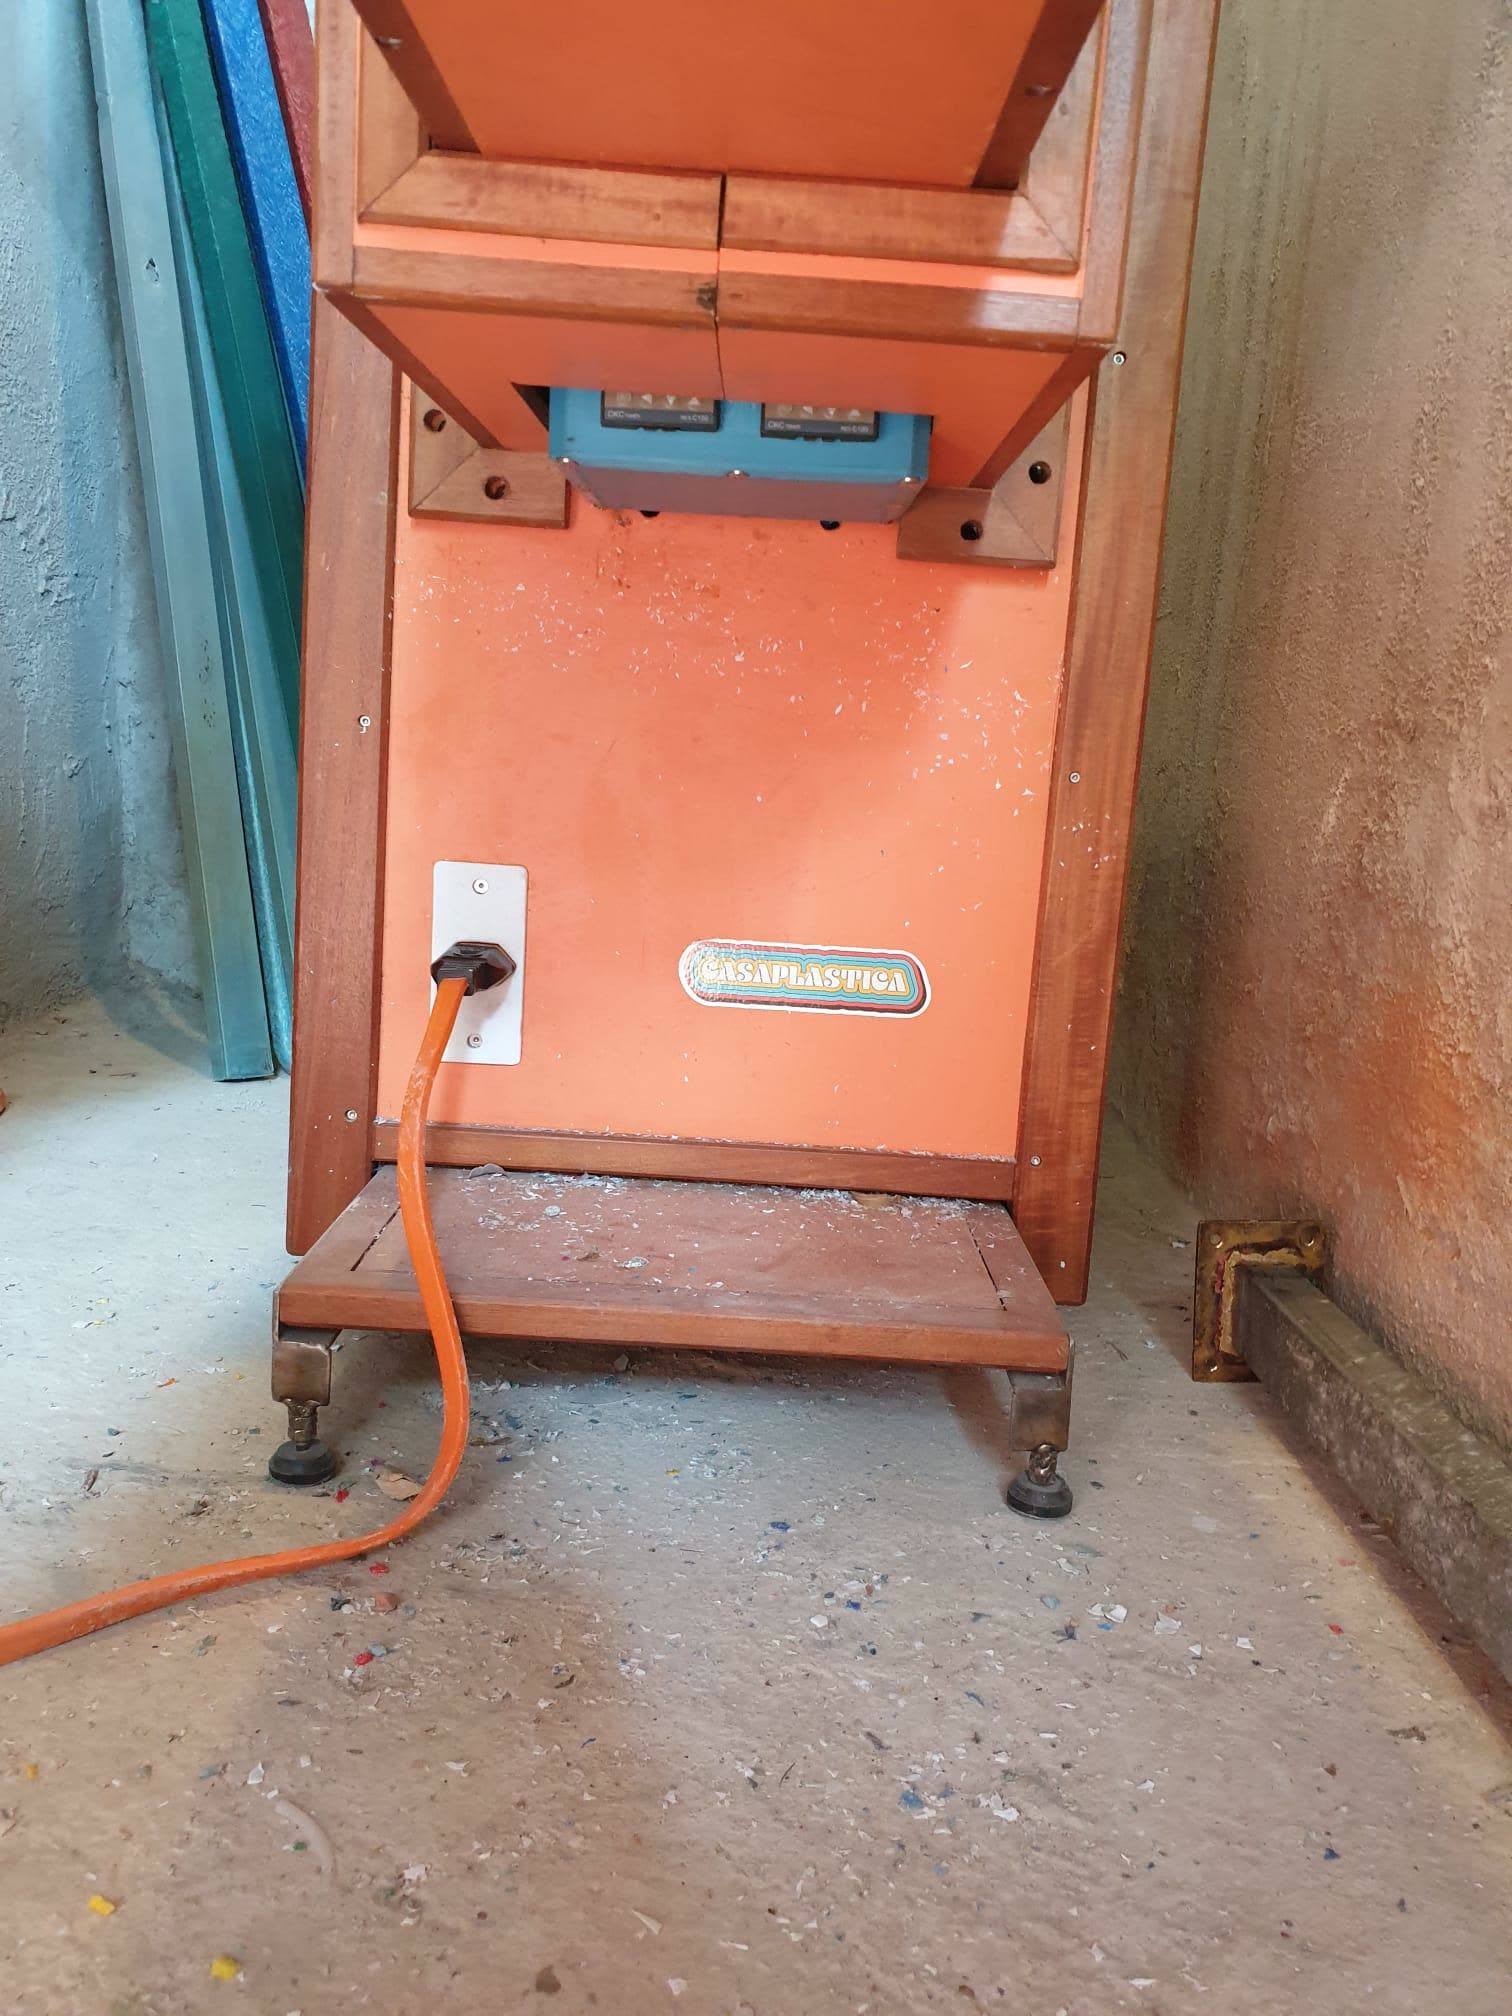
However, the best way to check if the machine is ready is to see if the yellow light is on, or by using a tool to check if the plastic in the nozzle (see below) is fluid - thick liquid consistency.
*The ‘goal’ temperature*
Now you wait for the machine to reach the goal temperatures: this normally takes on average 30 minutes. Do not rush this step. It’s better to wait a little longer until you’re confident it’s at the right temperature. If it’s too cold then the plastic will not melt properly and it could clog the machine!
How the temperatures are arranged in the machine (a little bit of extra background knowledge):
The machine is split into two parts which heat up: phase 1 and phase 2. These ‘phases’ correspond with the left and right temperatures that are shown on the temperature gauge underneath the machine.
The temperature gage has 4 sections to it that make up a 2x2 grid:
Phase 1 temperature |
Phase 2 temperature |
Green number (represents the current temperature of the machine) |
Green number (represents the current temperature of the machine) |
Red number (Goal temperature: 140 degrees) |
Red number (Goal temperature: 230 degrees) |
Note: The ‘goal’ temperatures will be set for you, they are not adjustable.
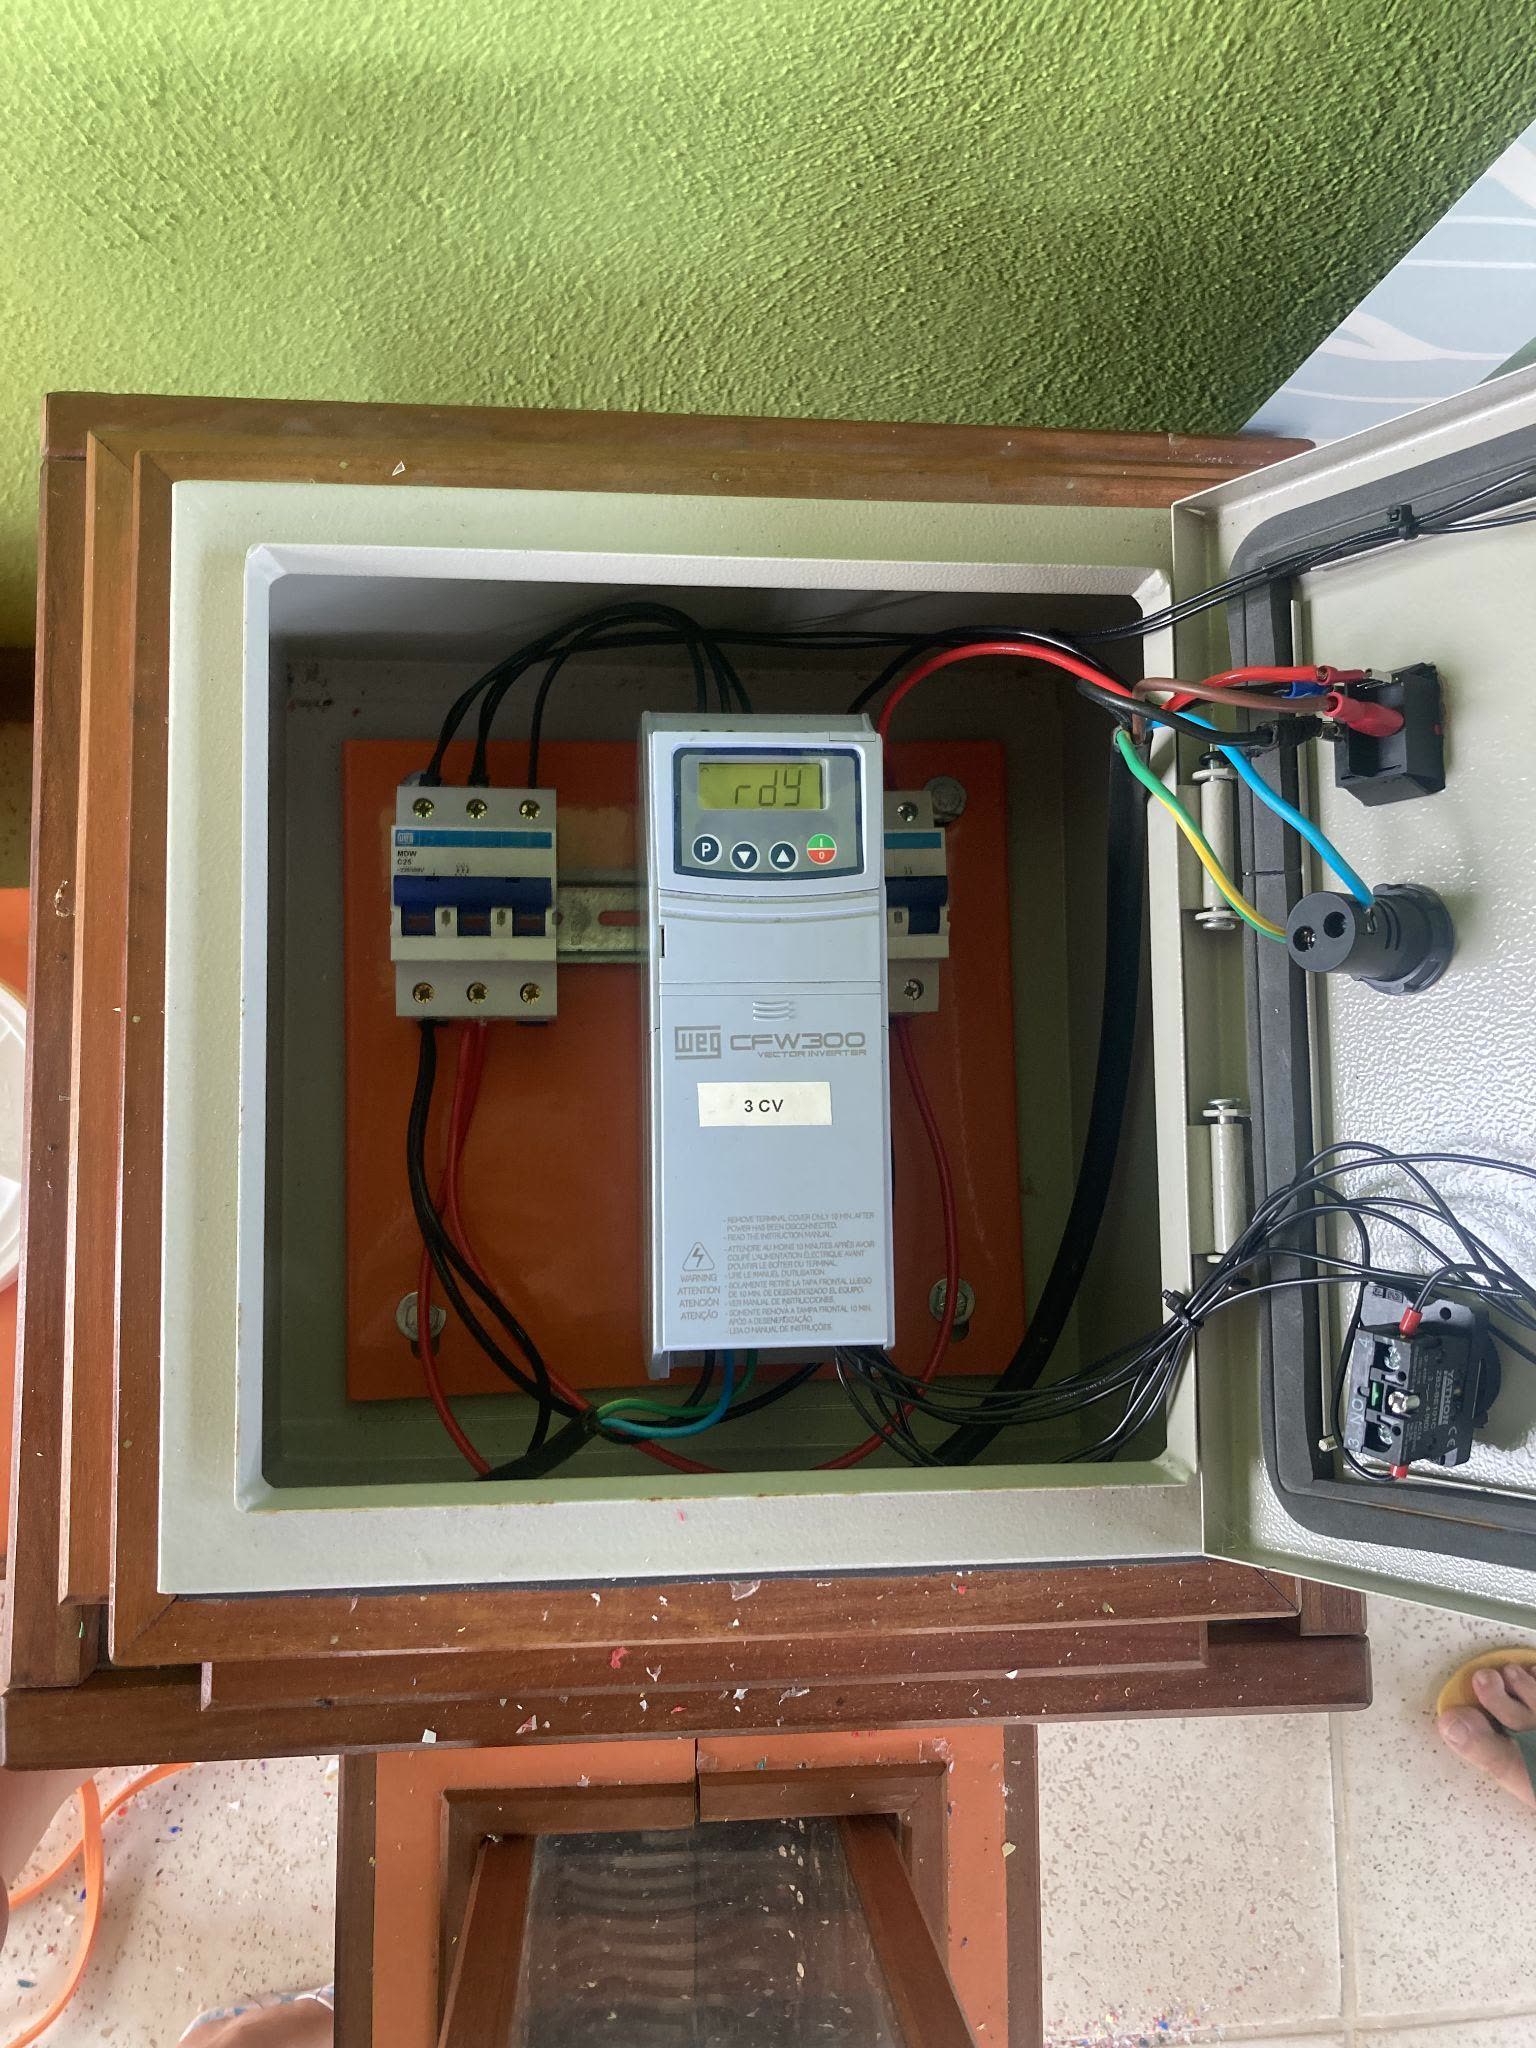
Troubleshoot: If there is an issue with the machine, check the box underneath the control panel by twisting the bolt lock. If there is an error then it will say ‘F1/error’. Reset the machine by pressing the green/red button. See picture here:
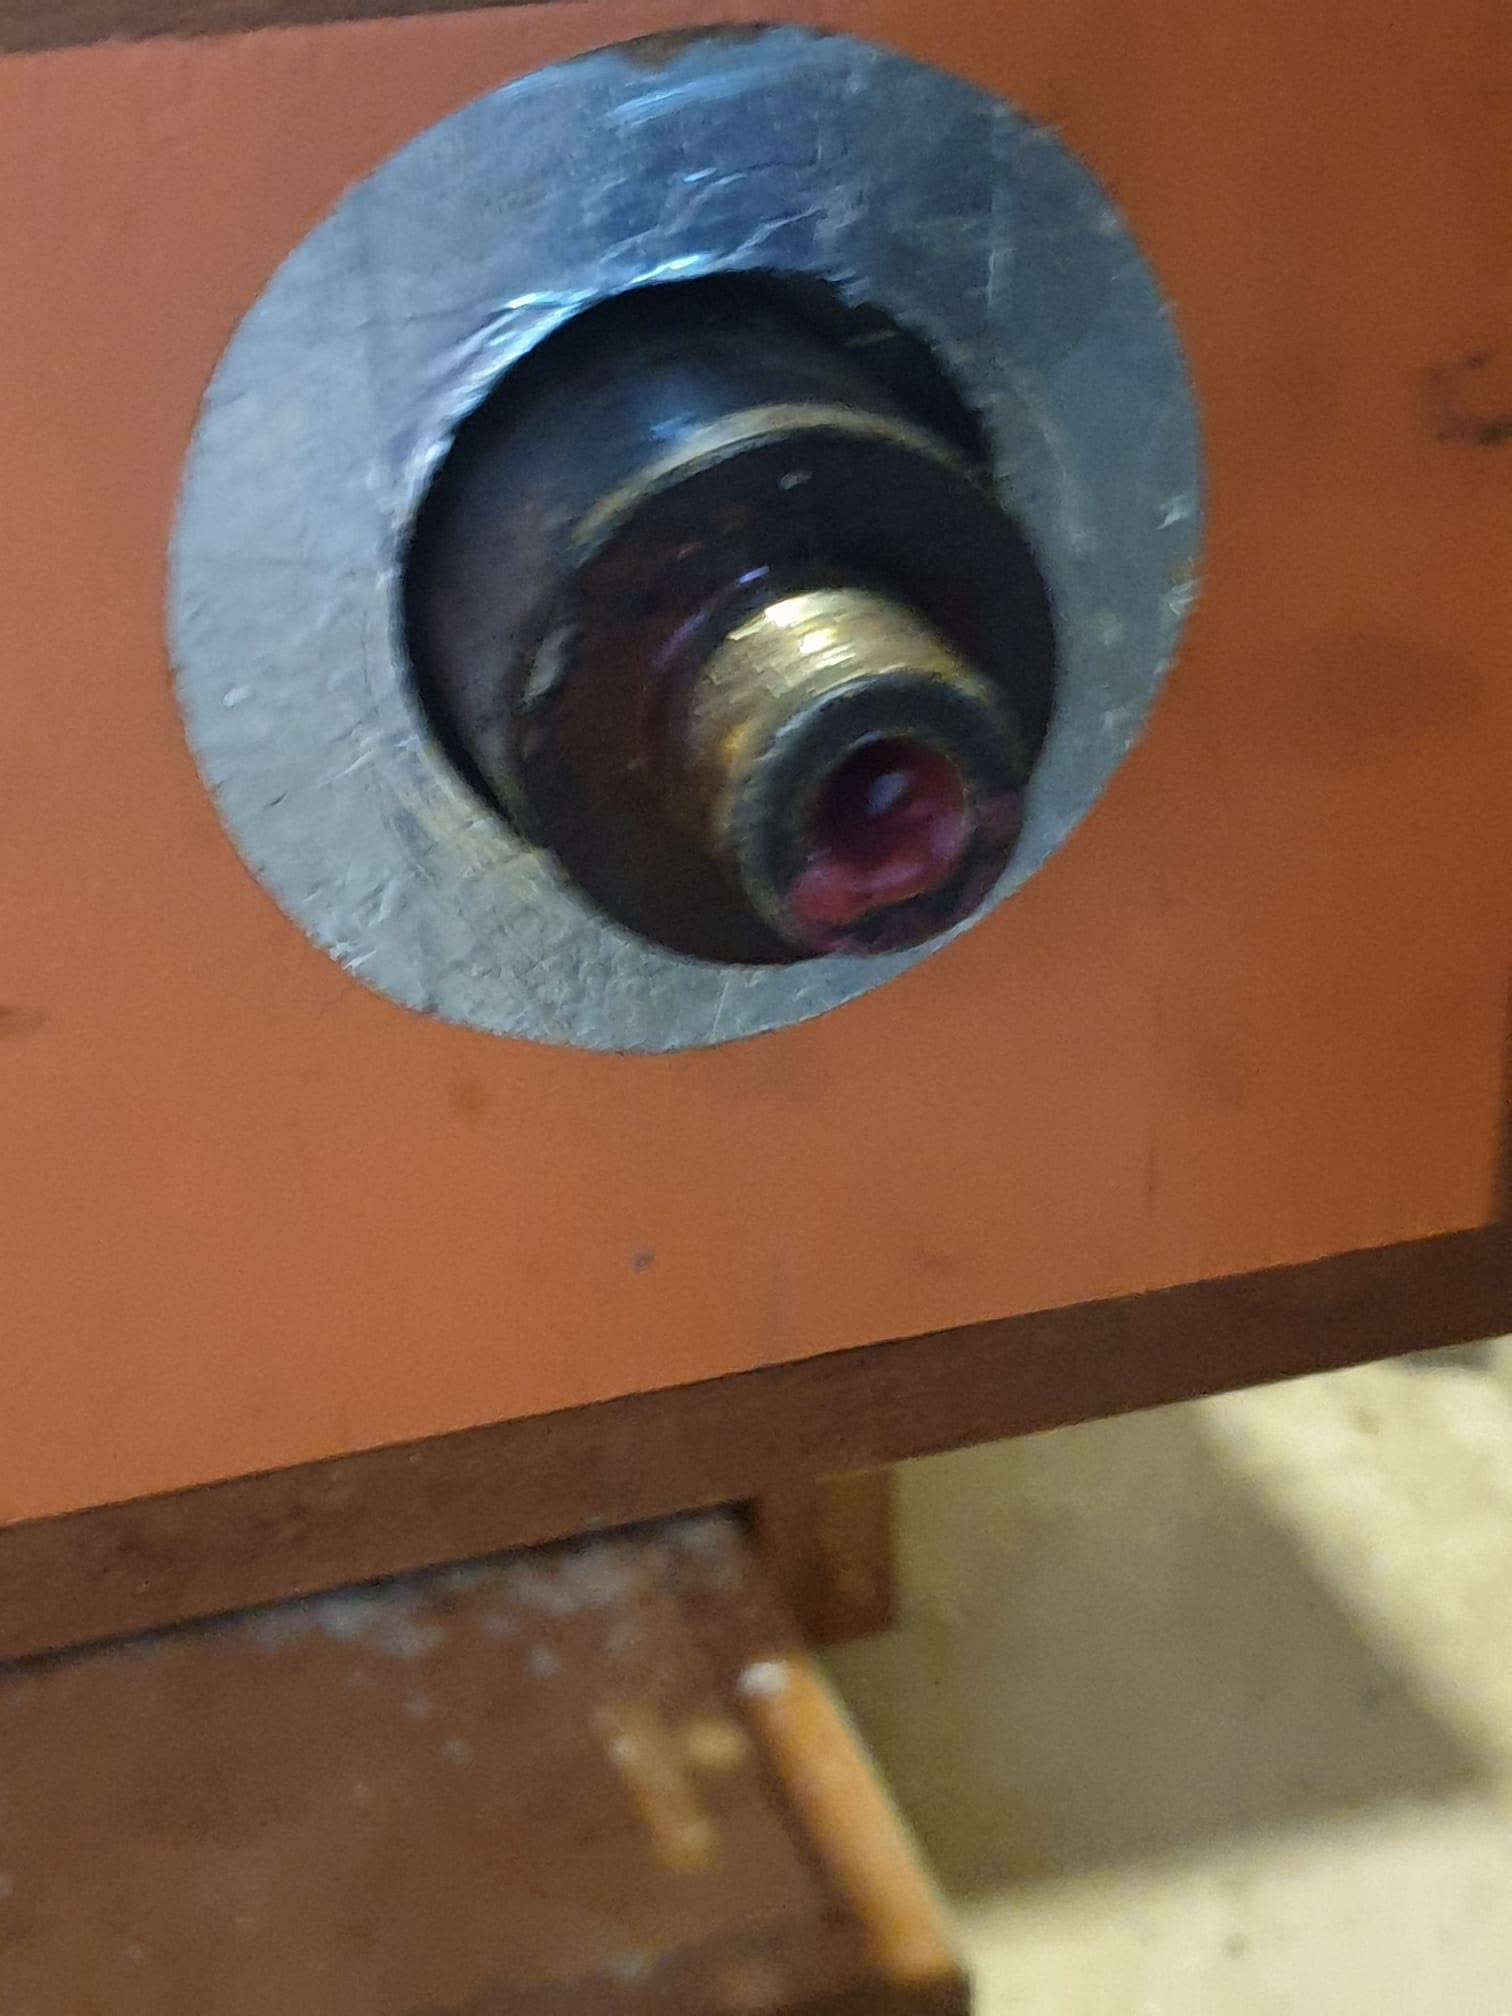
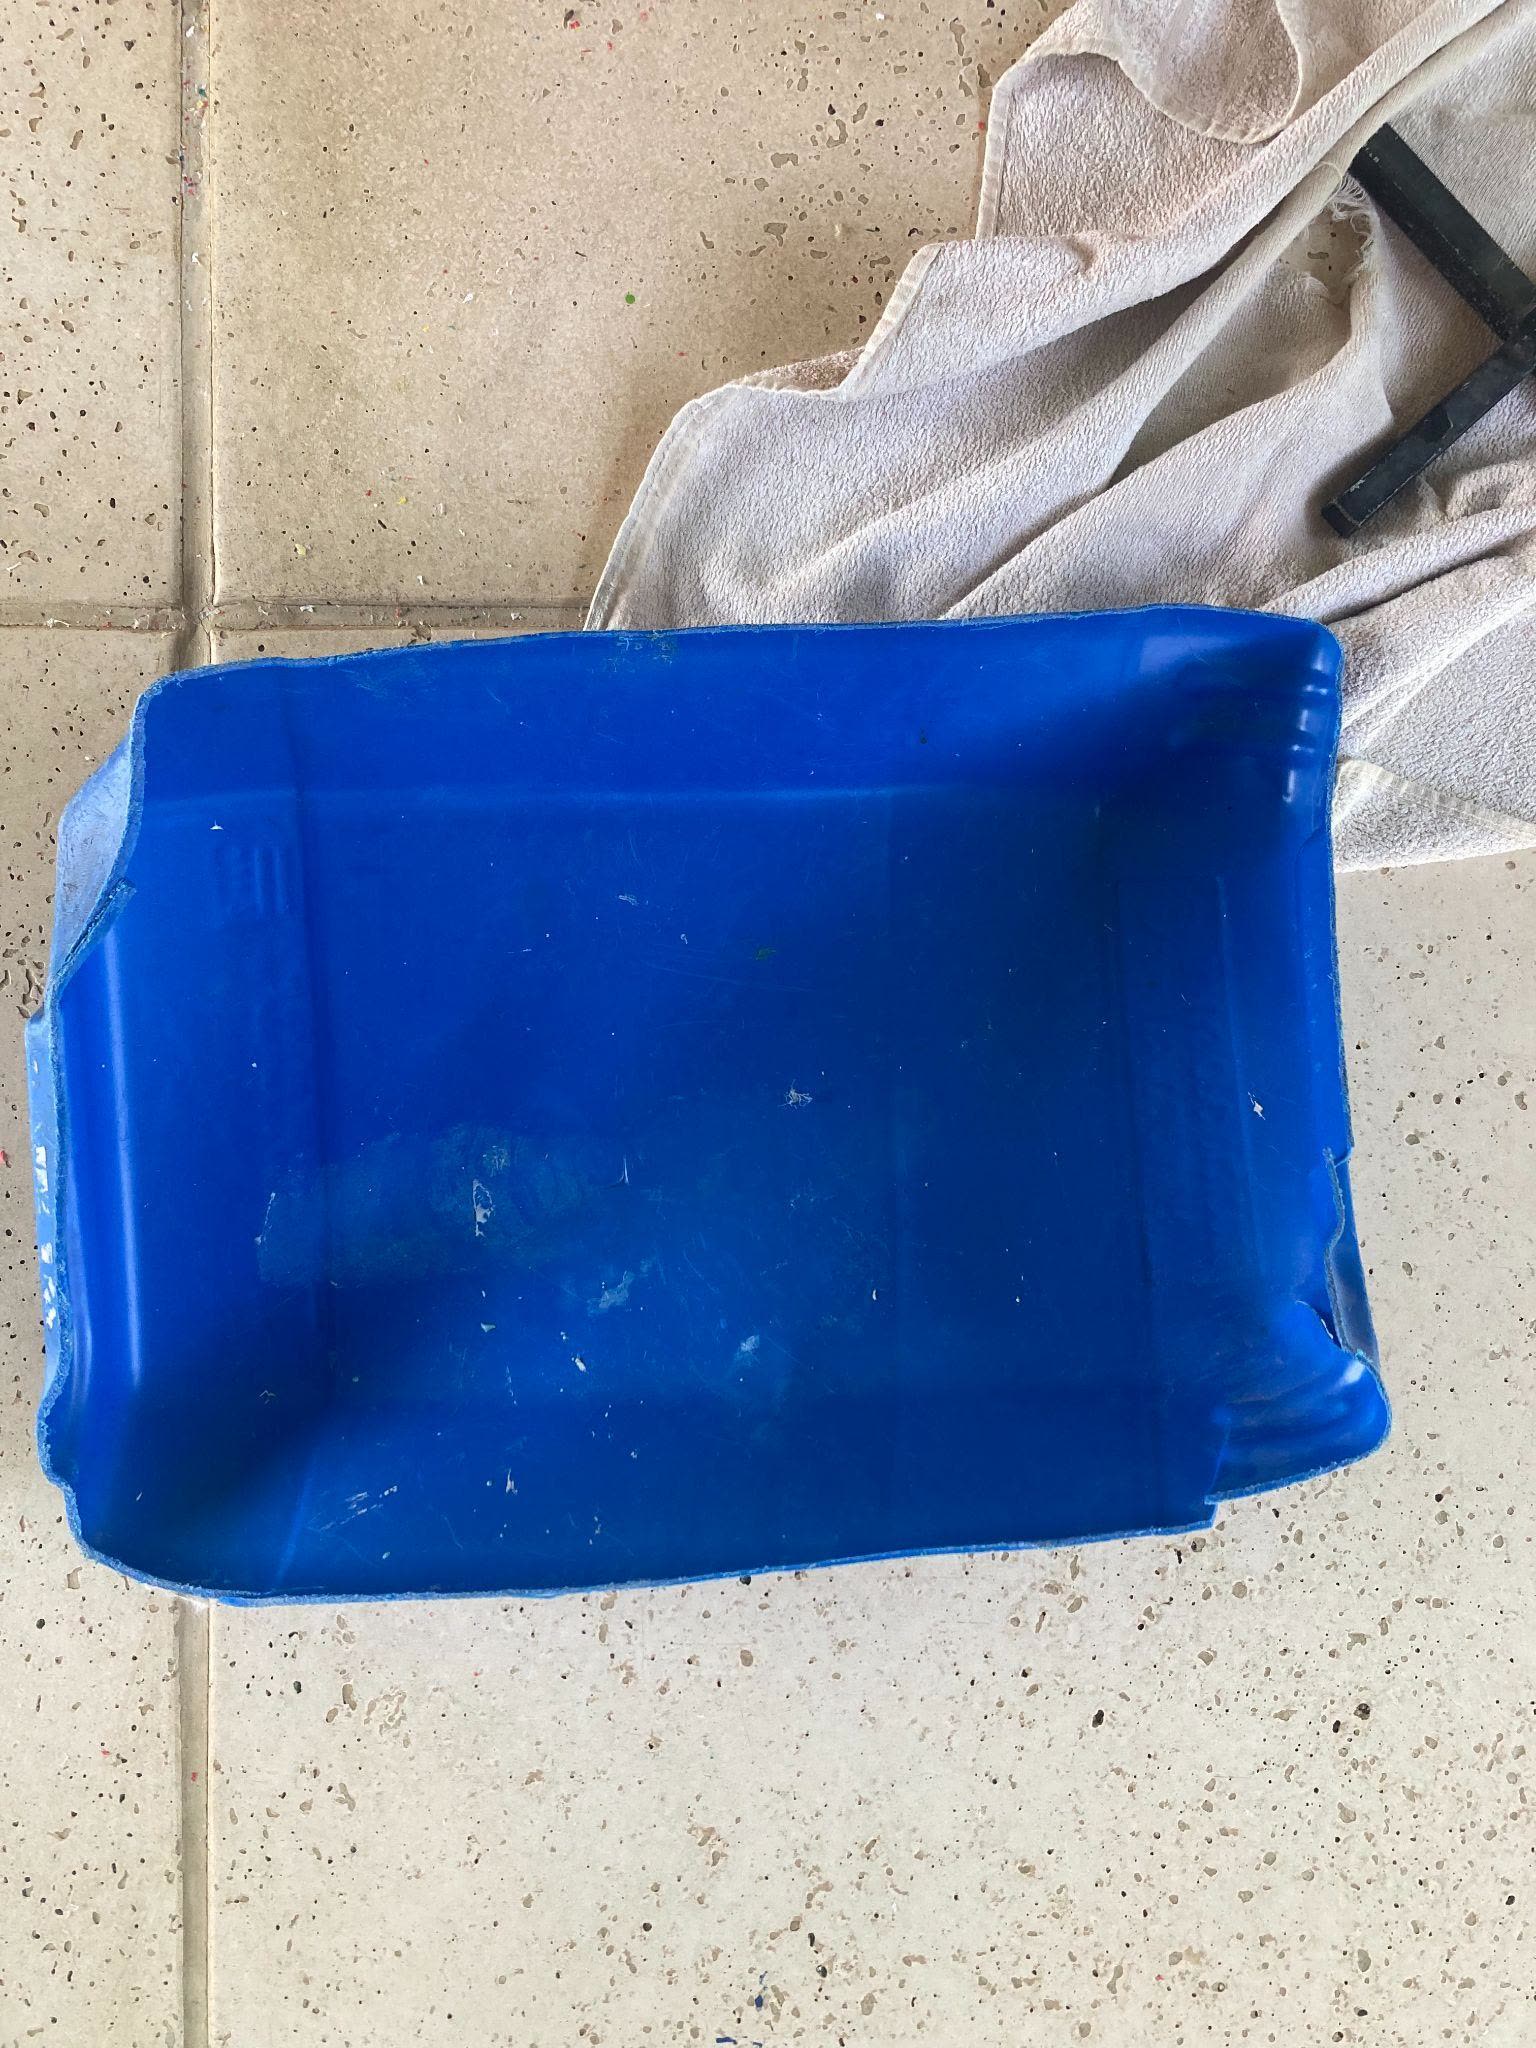
Turn on the rotator, by pressing the green button (bottom left), so you can clean the residual plastic left in the tube rotating part (see below). Make sure the speed is nice and low and do this on the blue tray so that the plastic does not just hit the floor.
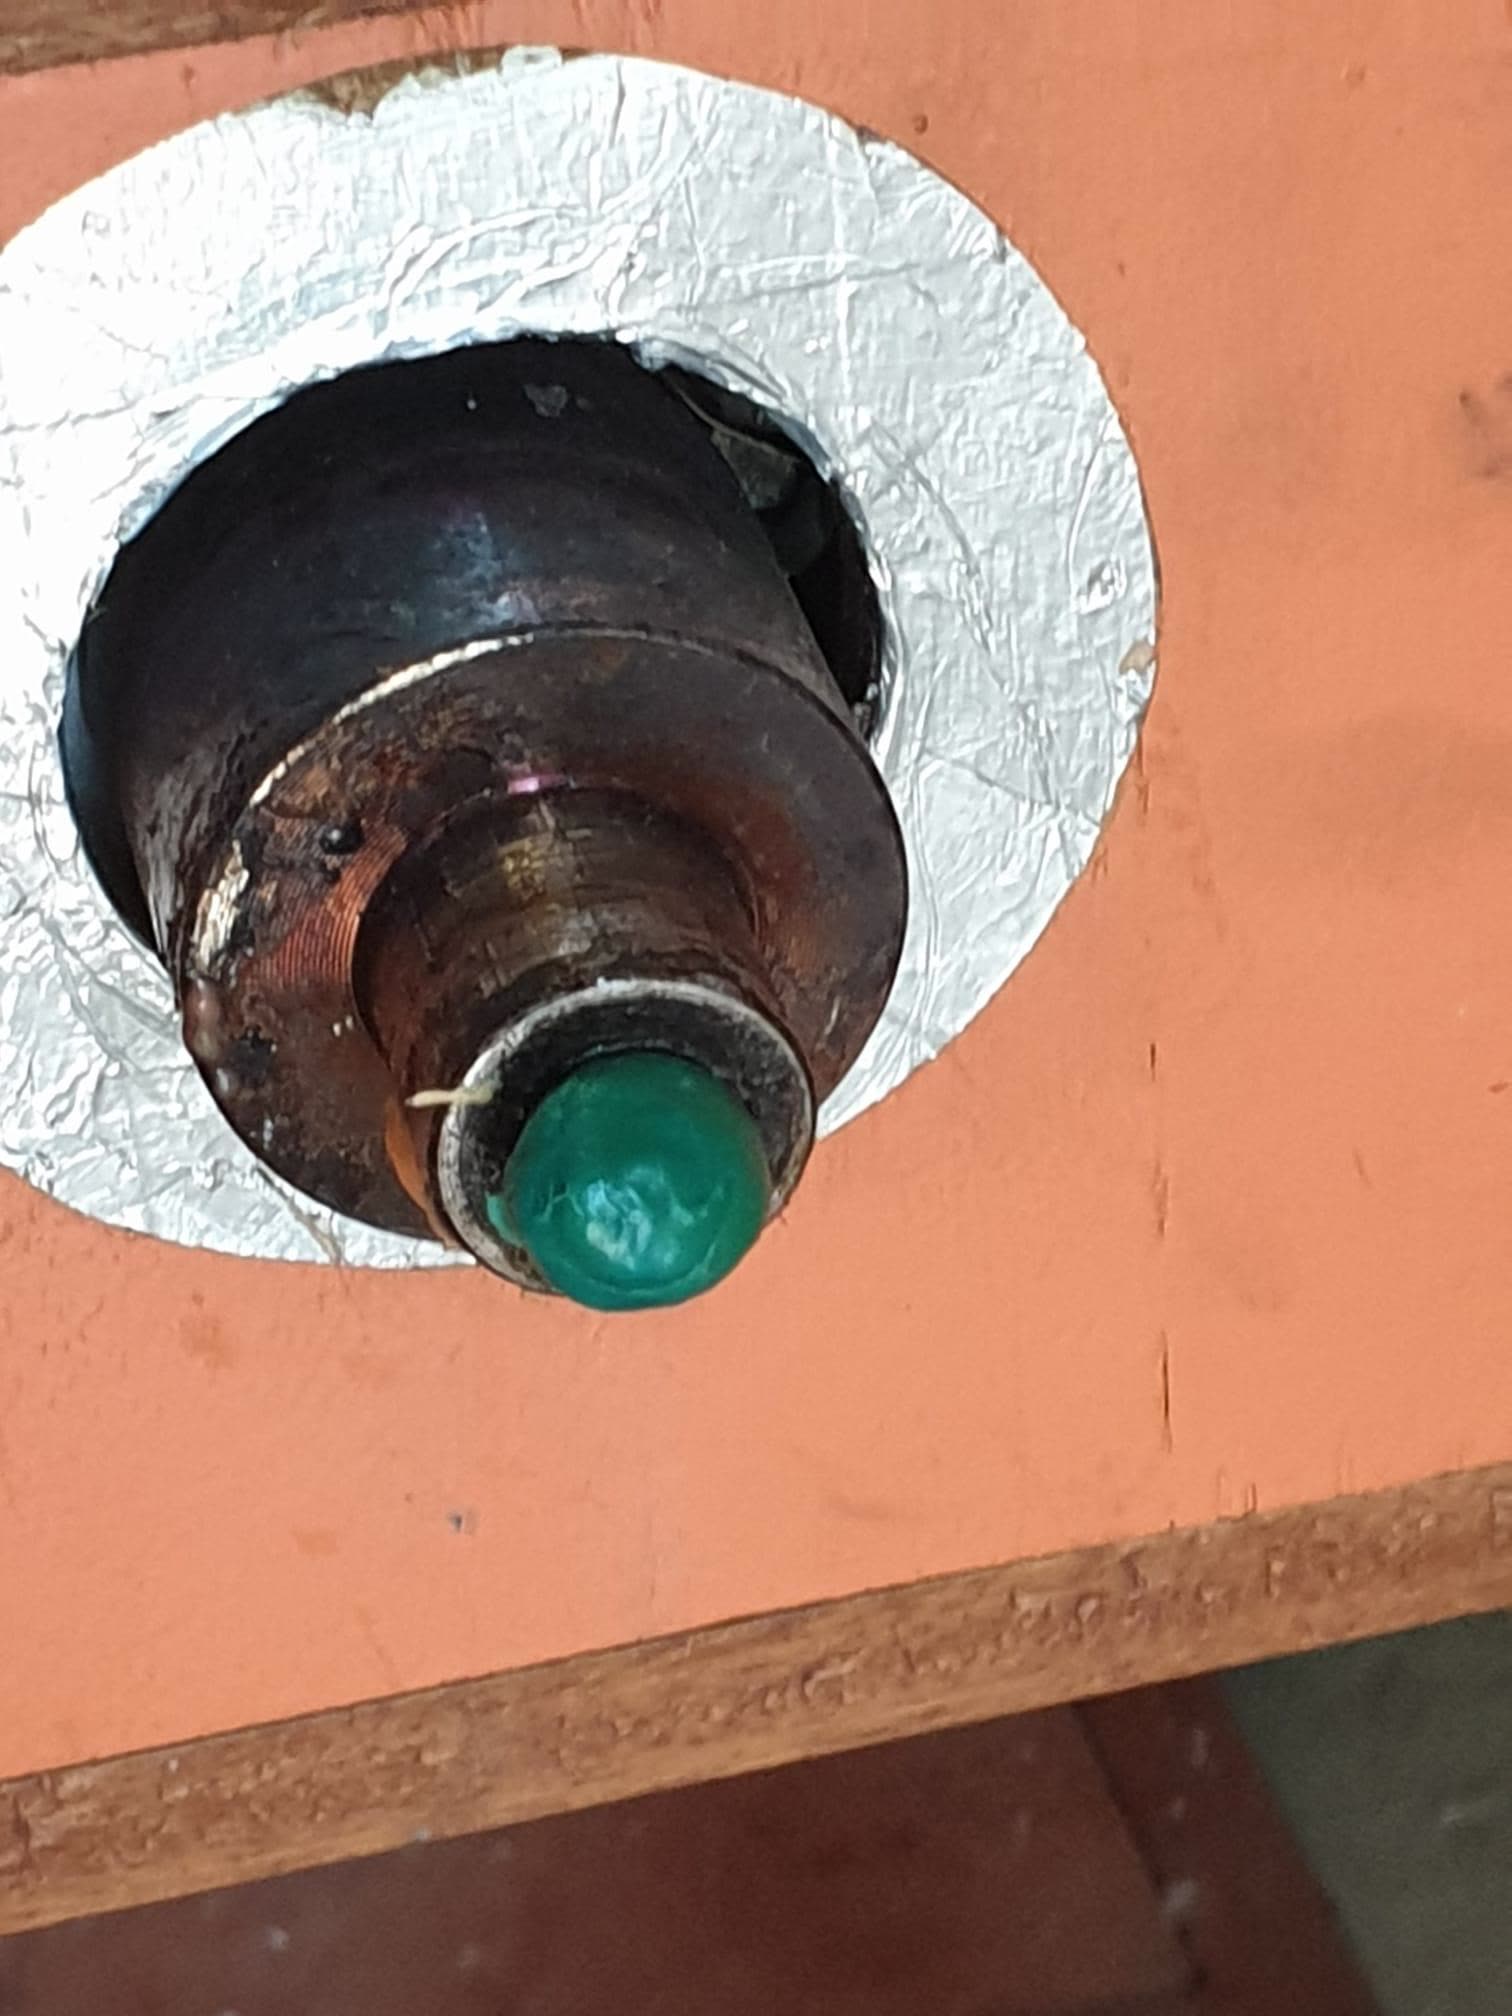
While
you are cleaning the machine of previous plastic you can prepare the
mold.
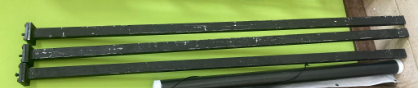
You should have 3 black molds to use. Once you’ve used
one mold to create a bar you remove it, cool it down and put another
new mold in straight away. You do not need to wait for the machine
to cool down.
Preparing the mold bar:
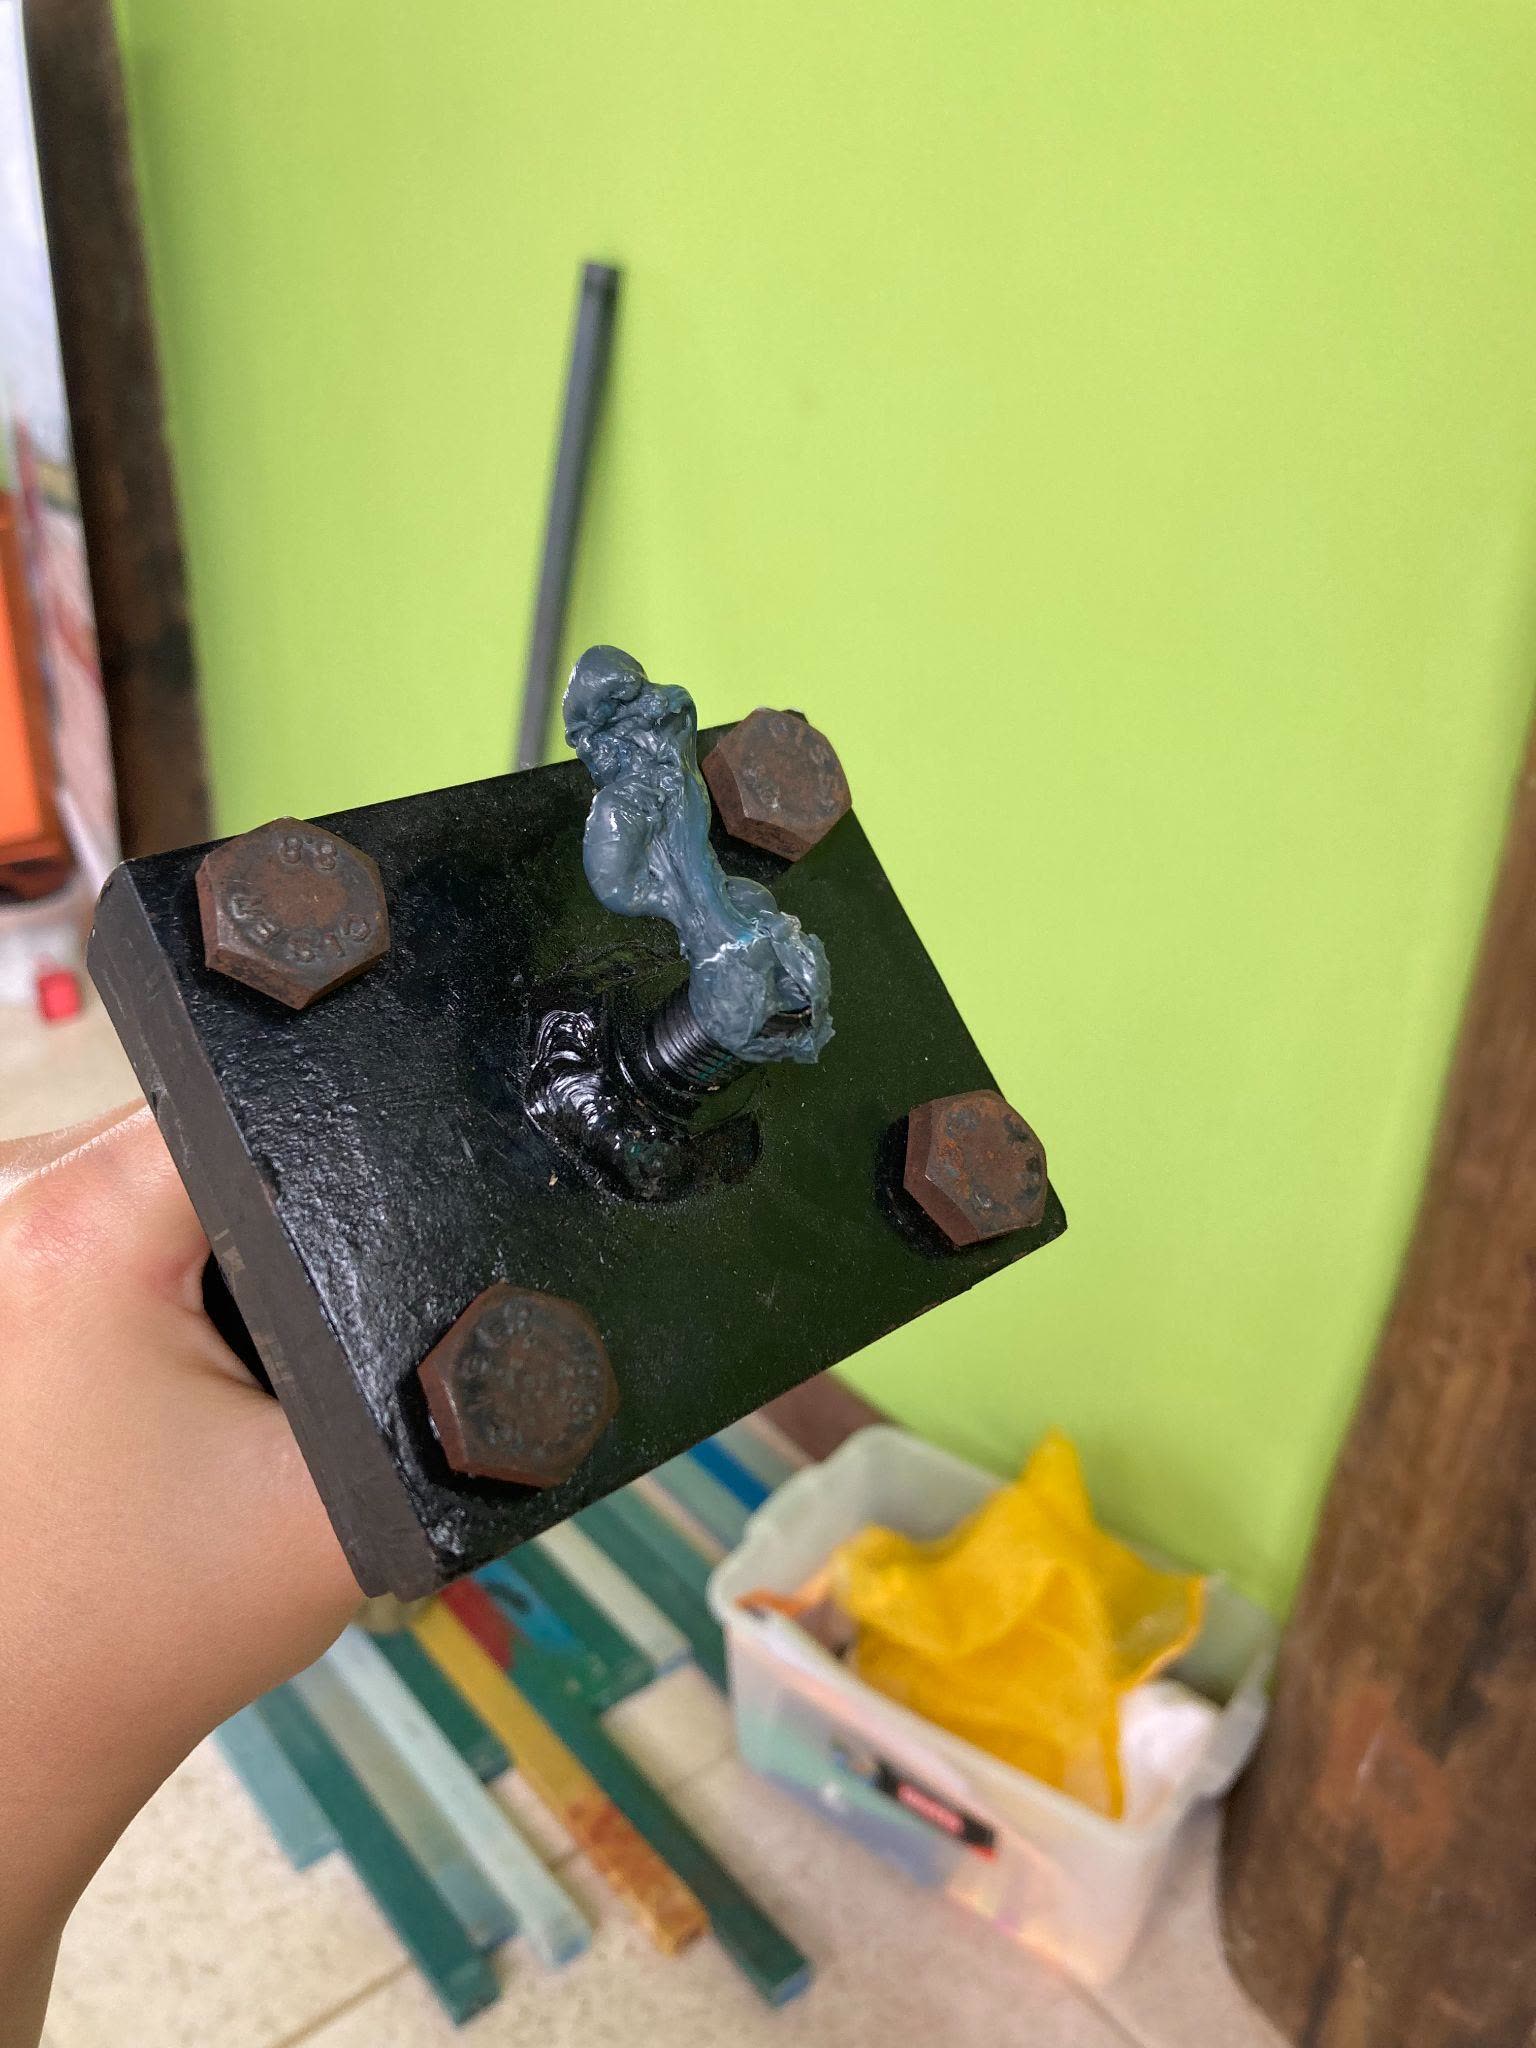
Clean the end: Make sure the screw on the mold bar ‘head/plate’ is clean and free of any residual plastic. Do this for all of the molds.
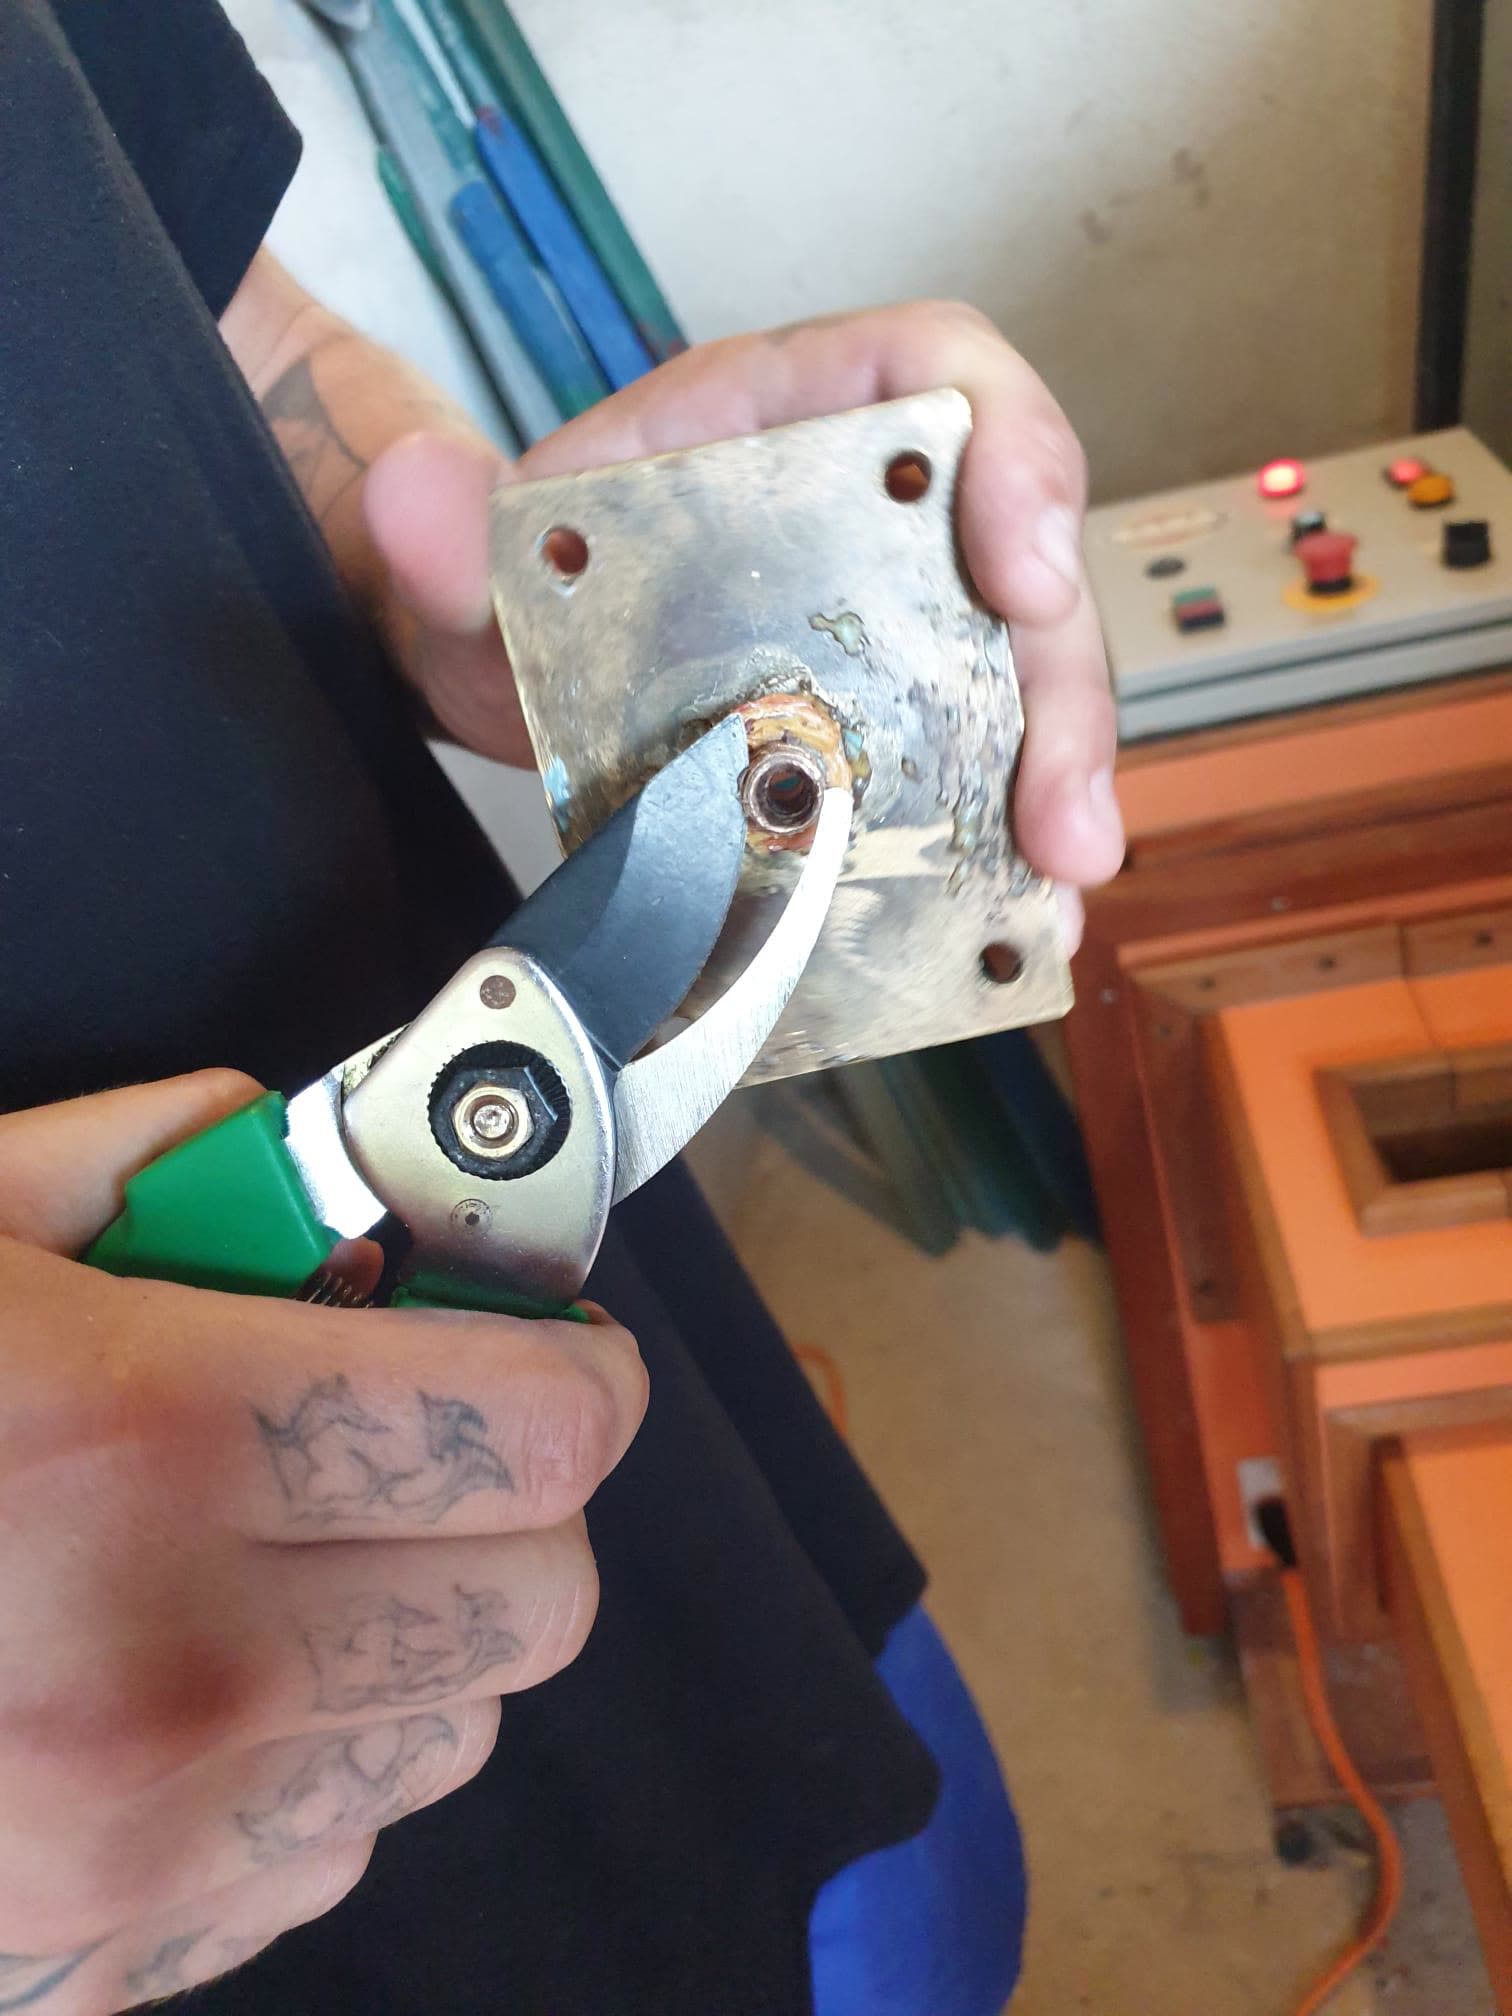
Attach the mold bar plate to the end of the bar and use the designated 4 bolts to secure it in place (if not already done)
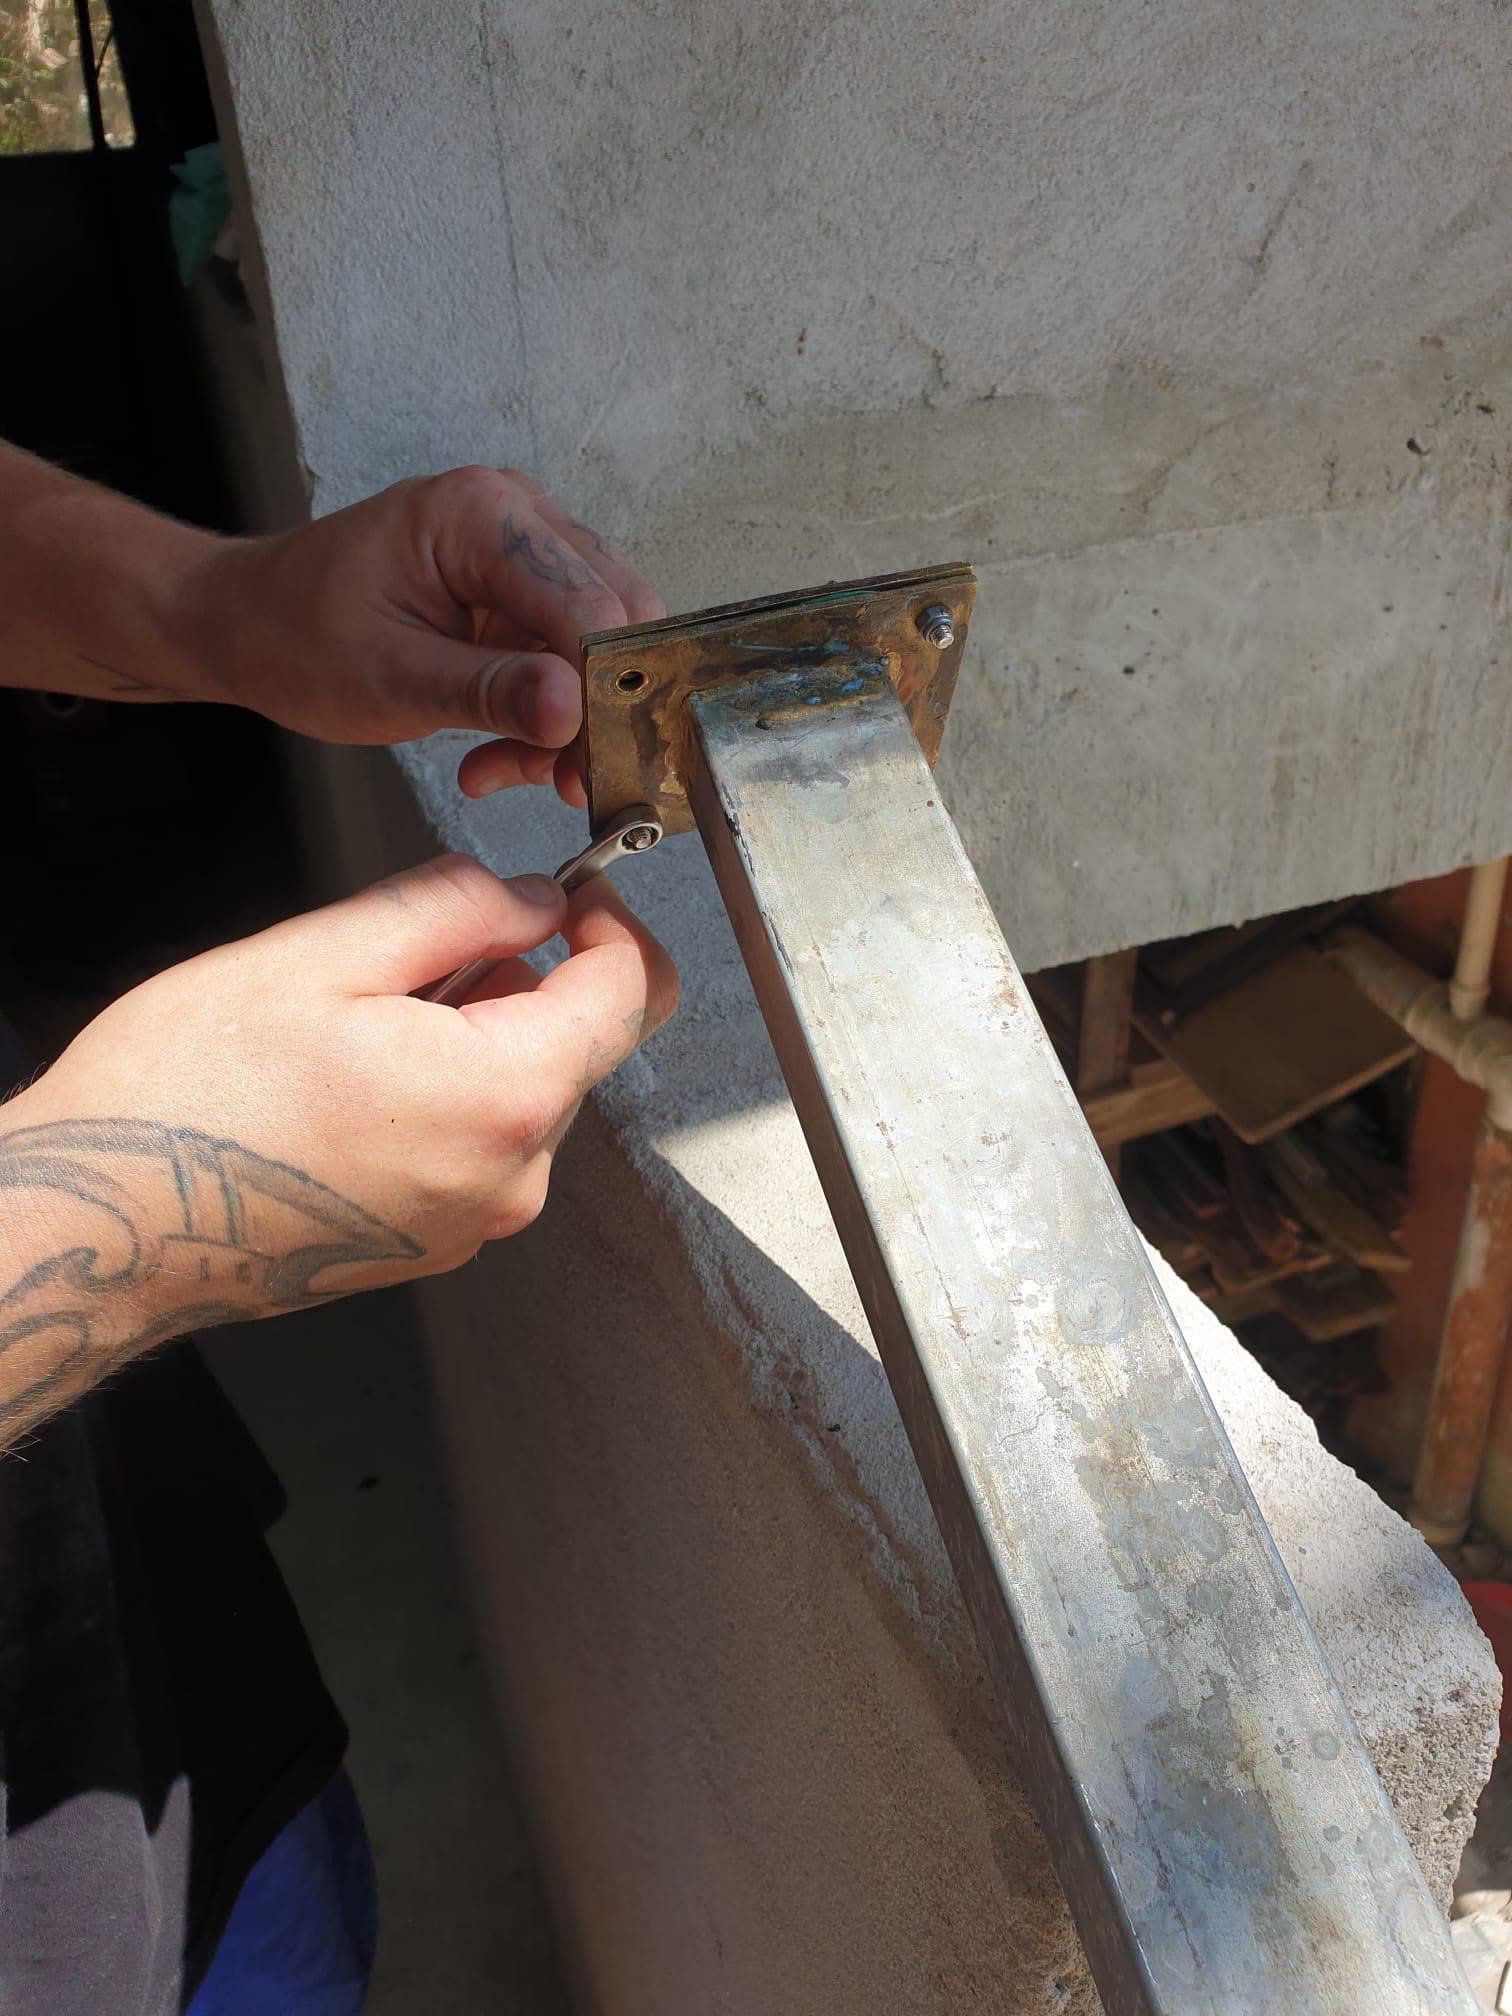
Note: the black mold bars only require the bolts without any nuts or washers
*Checkpoint*:
Make sure each of the following points below are met before attaching the mold bar:
Goal temperatures are reached (orange light is on and the plastic at the end of the nozzle is fluid);
Mold plates are clean;
The previous plastic that was in the machine has been cleaned out;
Check that the mold is not ‘bent’ - when the plastic enters the mold the pressure is super high inside. This can sometimes ‘warp’ the mold, causing it to bend and swell. Don’t worry if it does this, it’s completely normal but to combat this, you can turn down the speed slightly to reduce the pressure. If the mold is ‘bent’ then you can grab a hammer and slowly and gently hit it back into place.
Starting the Beam Making Process
Important things to note before starting the process:
There should always be TWO PEOPLE doing this job. It might feel pointless but this is to ensure safety. In case of any problems, the second person can then press the emergency button - better safe than sorry;
Please DO NOT MIX 2’s and 5’s. Both type 2 and type 5 plastic can be used in the machine, but you need to decide which plastic you’re using for the bar and then stick with it;
The machine needs a continuous flow of shredded plastic pieces, so make sure the plastic funnel is always topped up. (If it gets too low then the connection point between the two machine parts won’t be as tightly connected and can come loose);
If the machine starts making weird noises, just turn it off and let it cool down;
Have gloves or a towel nearby! This will be needed when unscrewing the mold bar as the temperature it reaches is high and you can easily burn yourself.
You will also need a water tub. When the mold bar is removed, it needs to be briefly placed in water to seal the end and then placed on the floor to cool down.
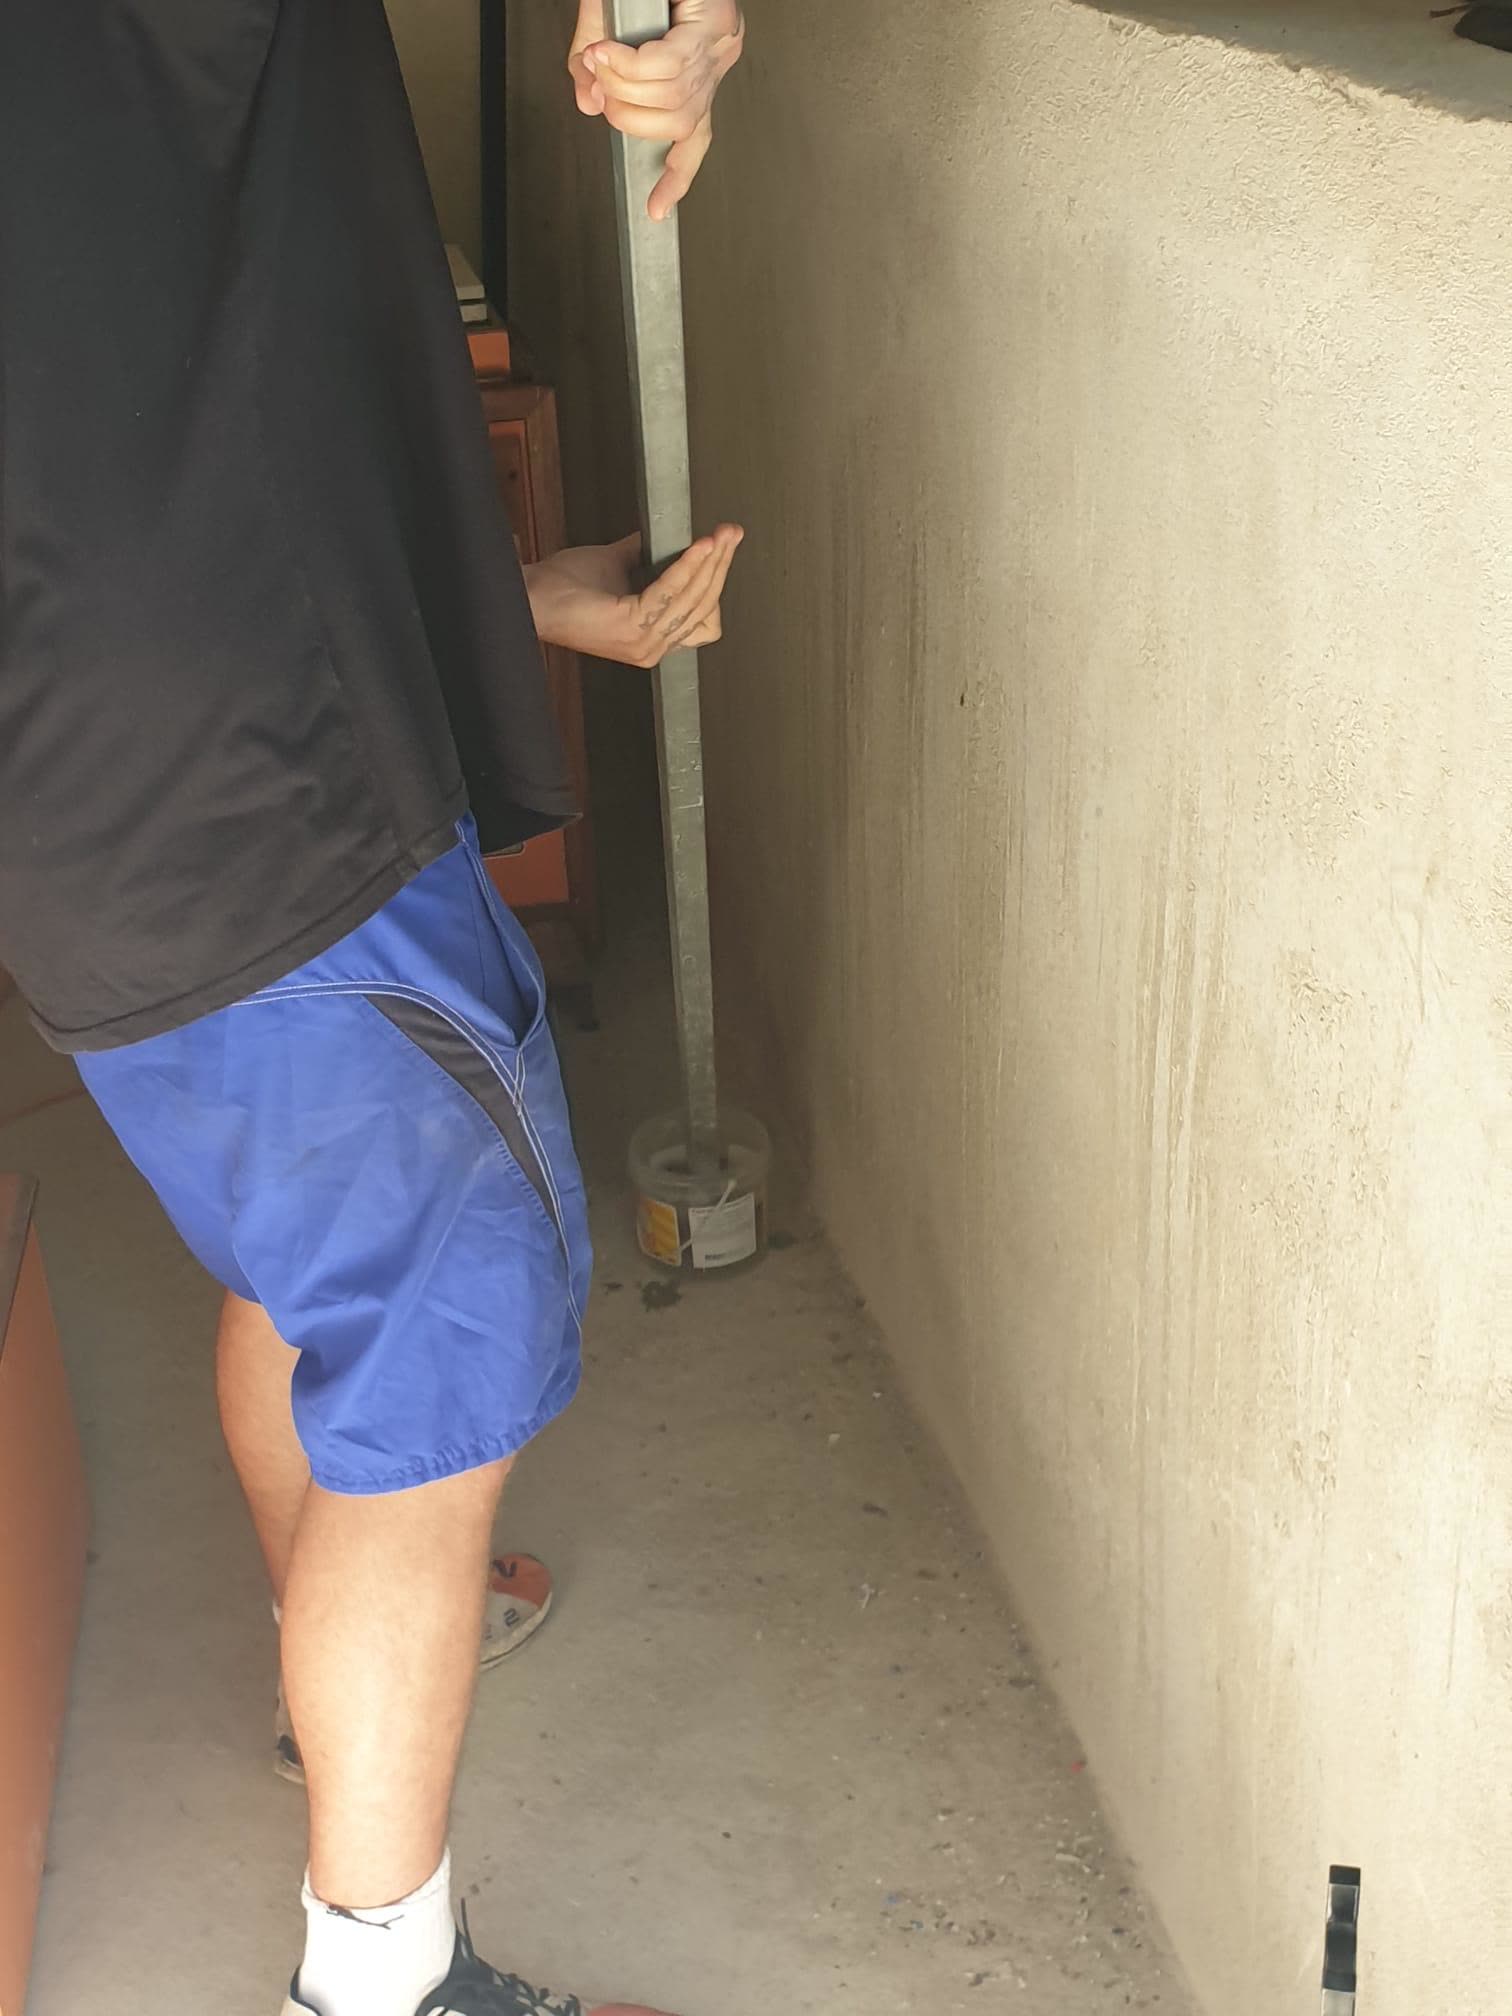
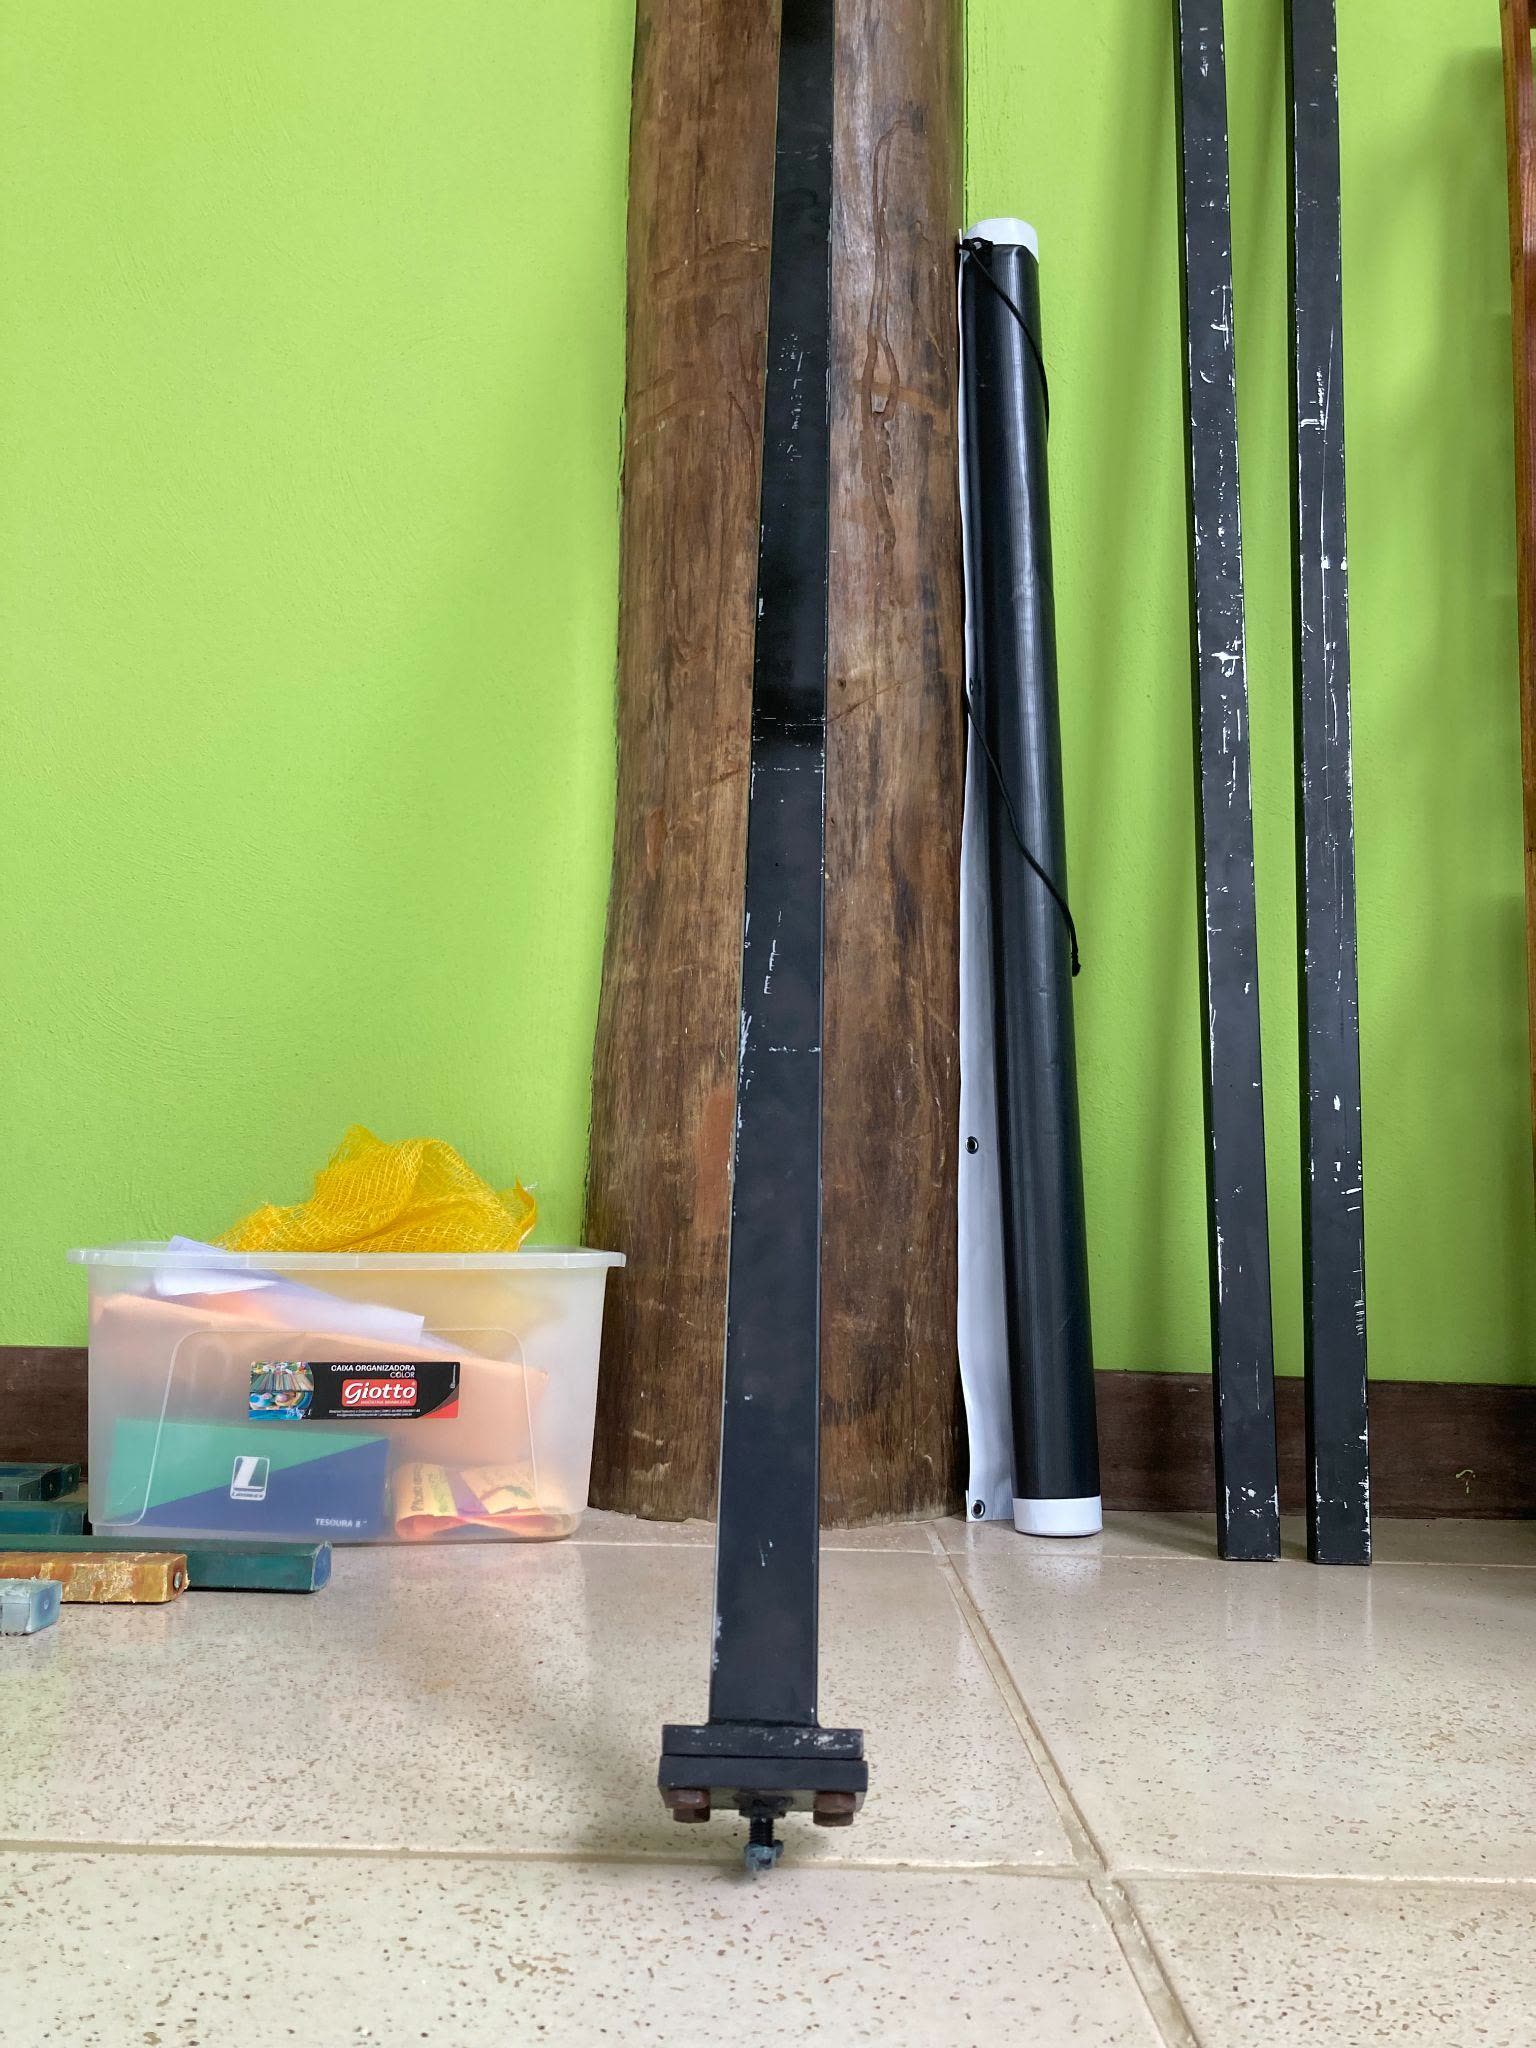
In order for the beam mold to be leveled you will need the black stand (see below).
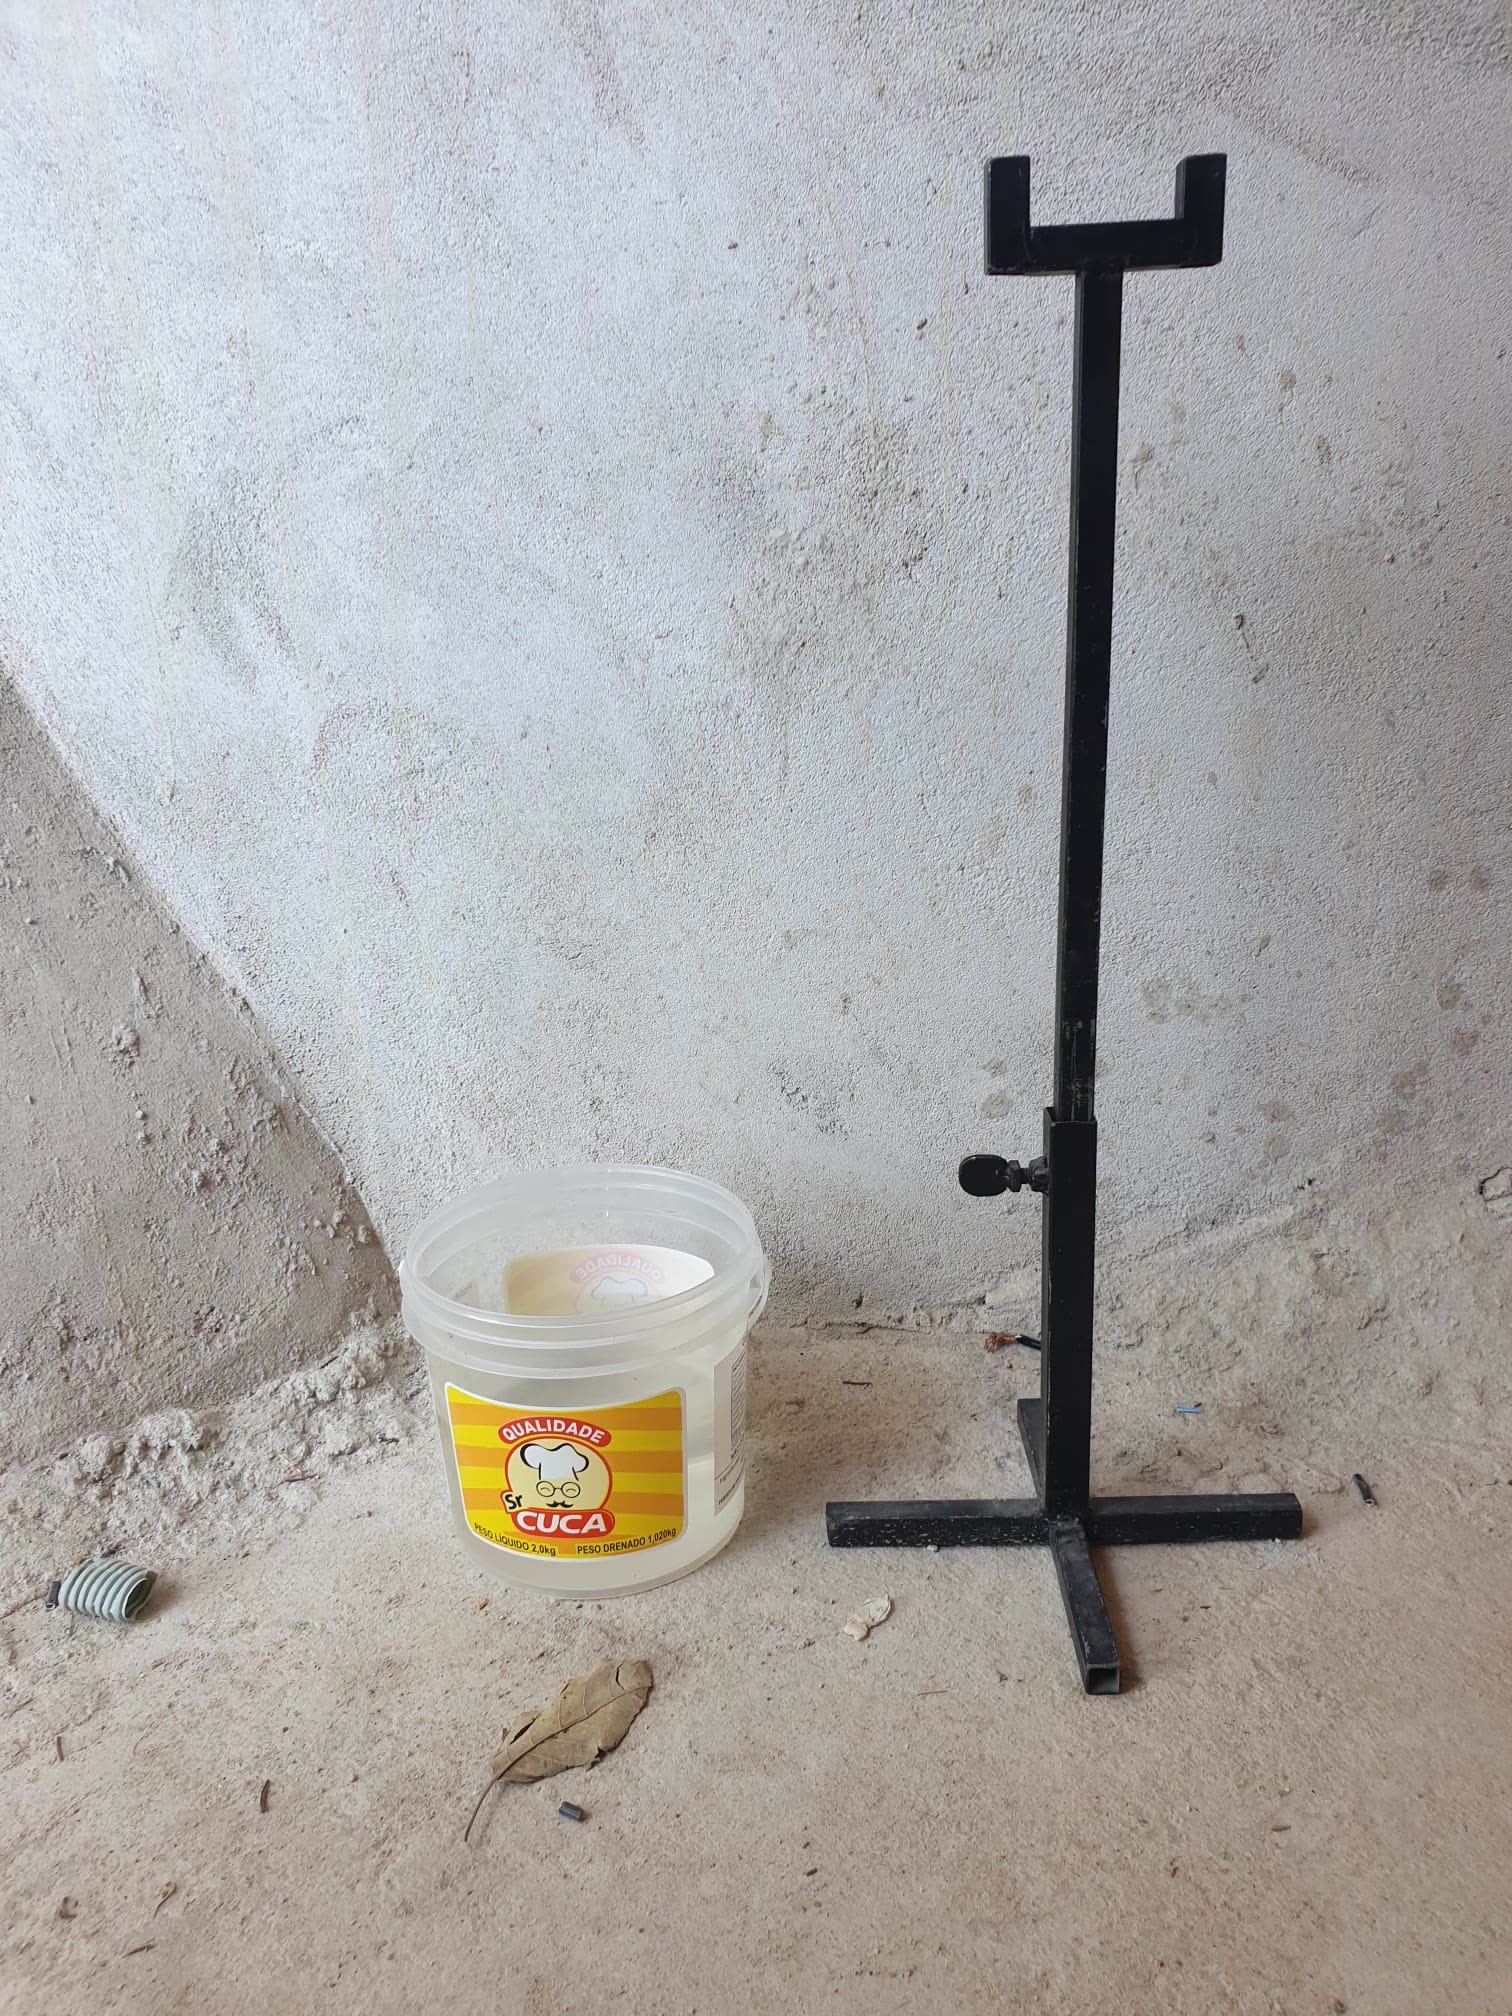
Turn
the machine on and put the speed to 100! The direction knob should
be to the left.
Screw the mold in place and prop the rest of the mold bar onto the bar stand.
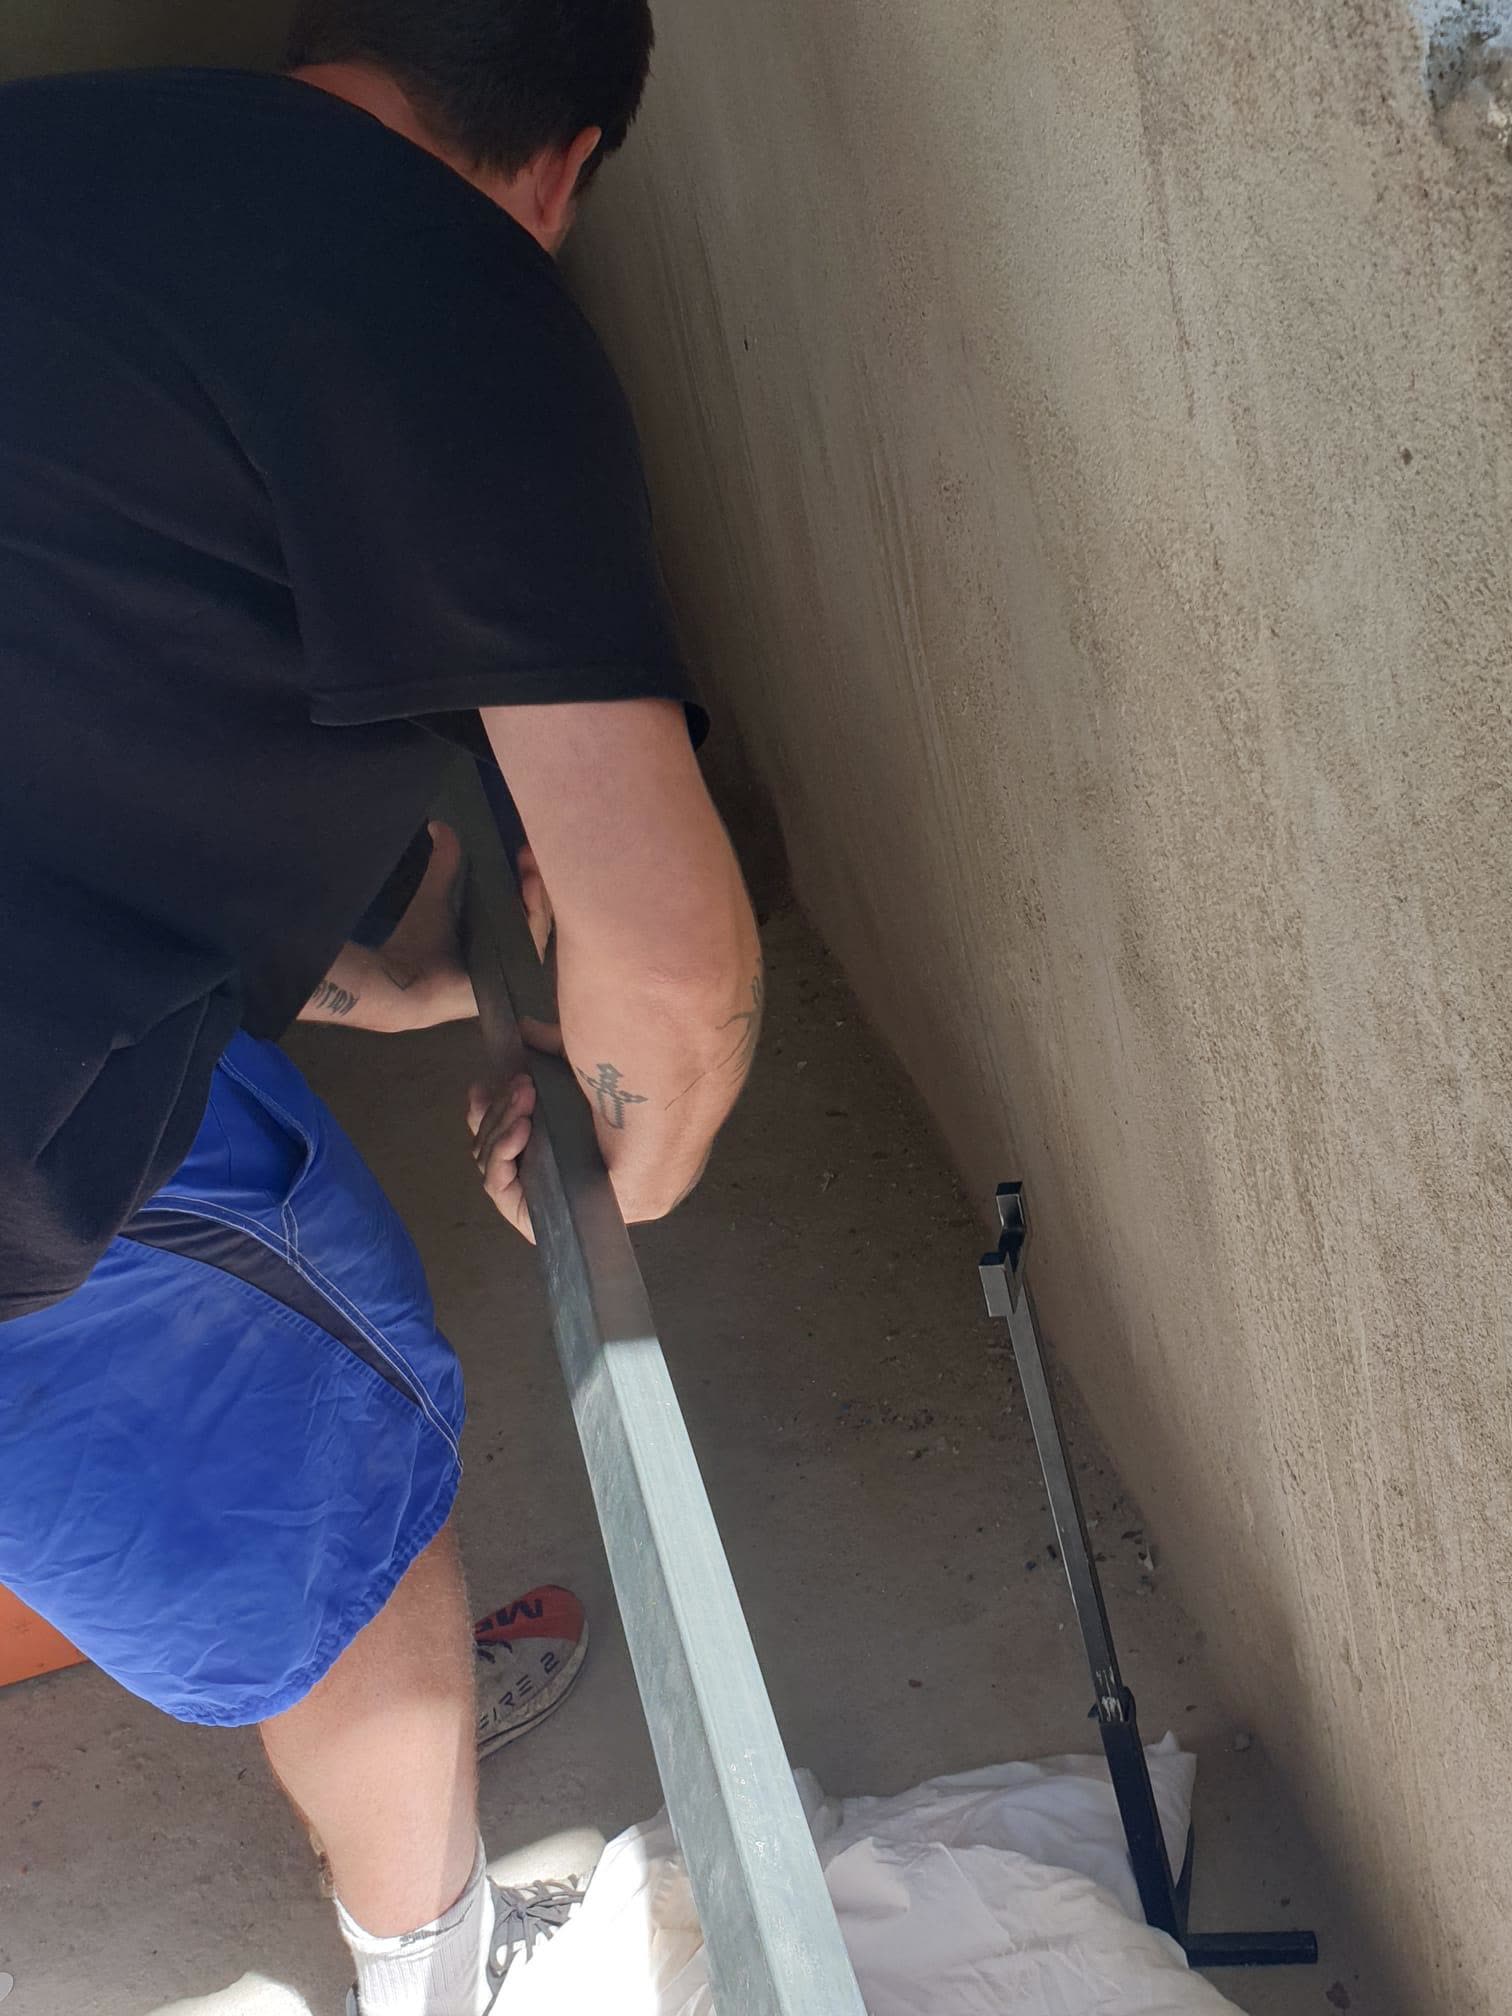
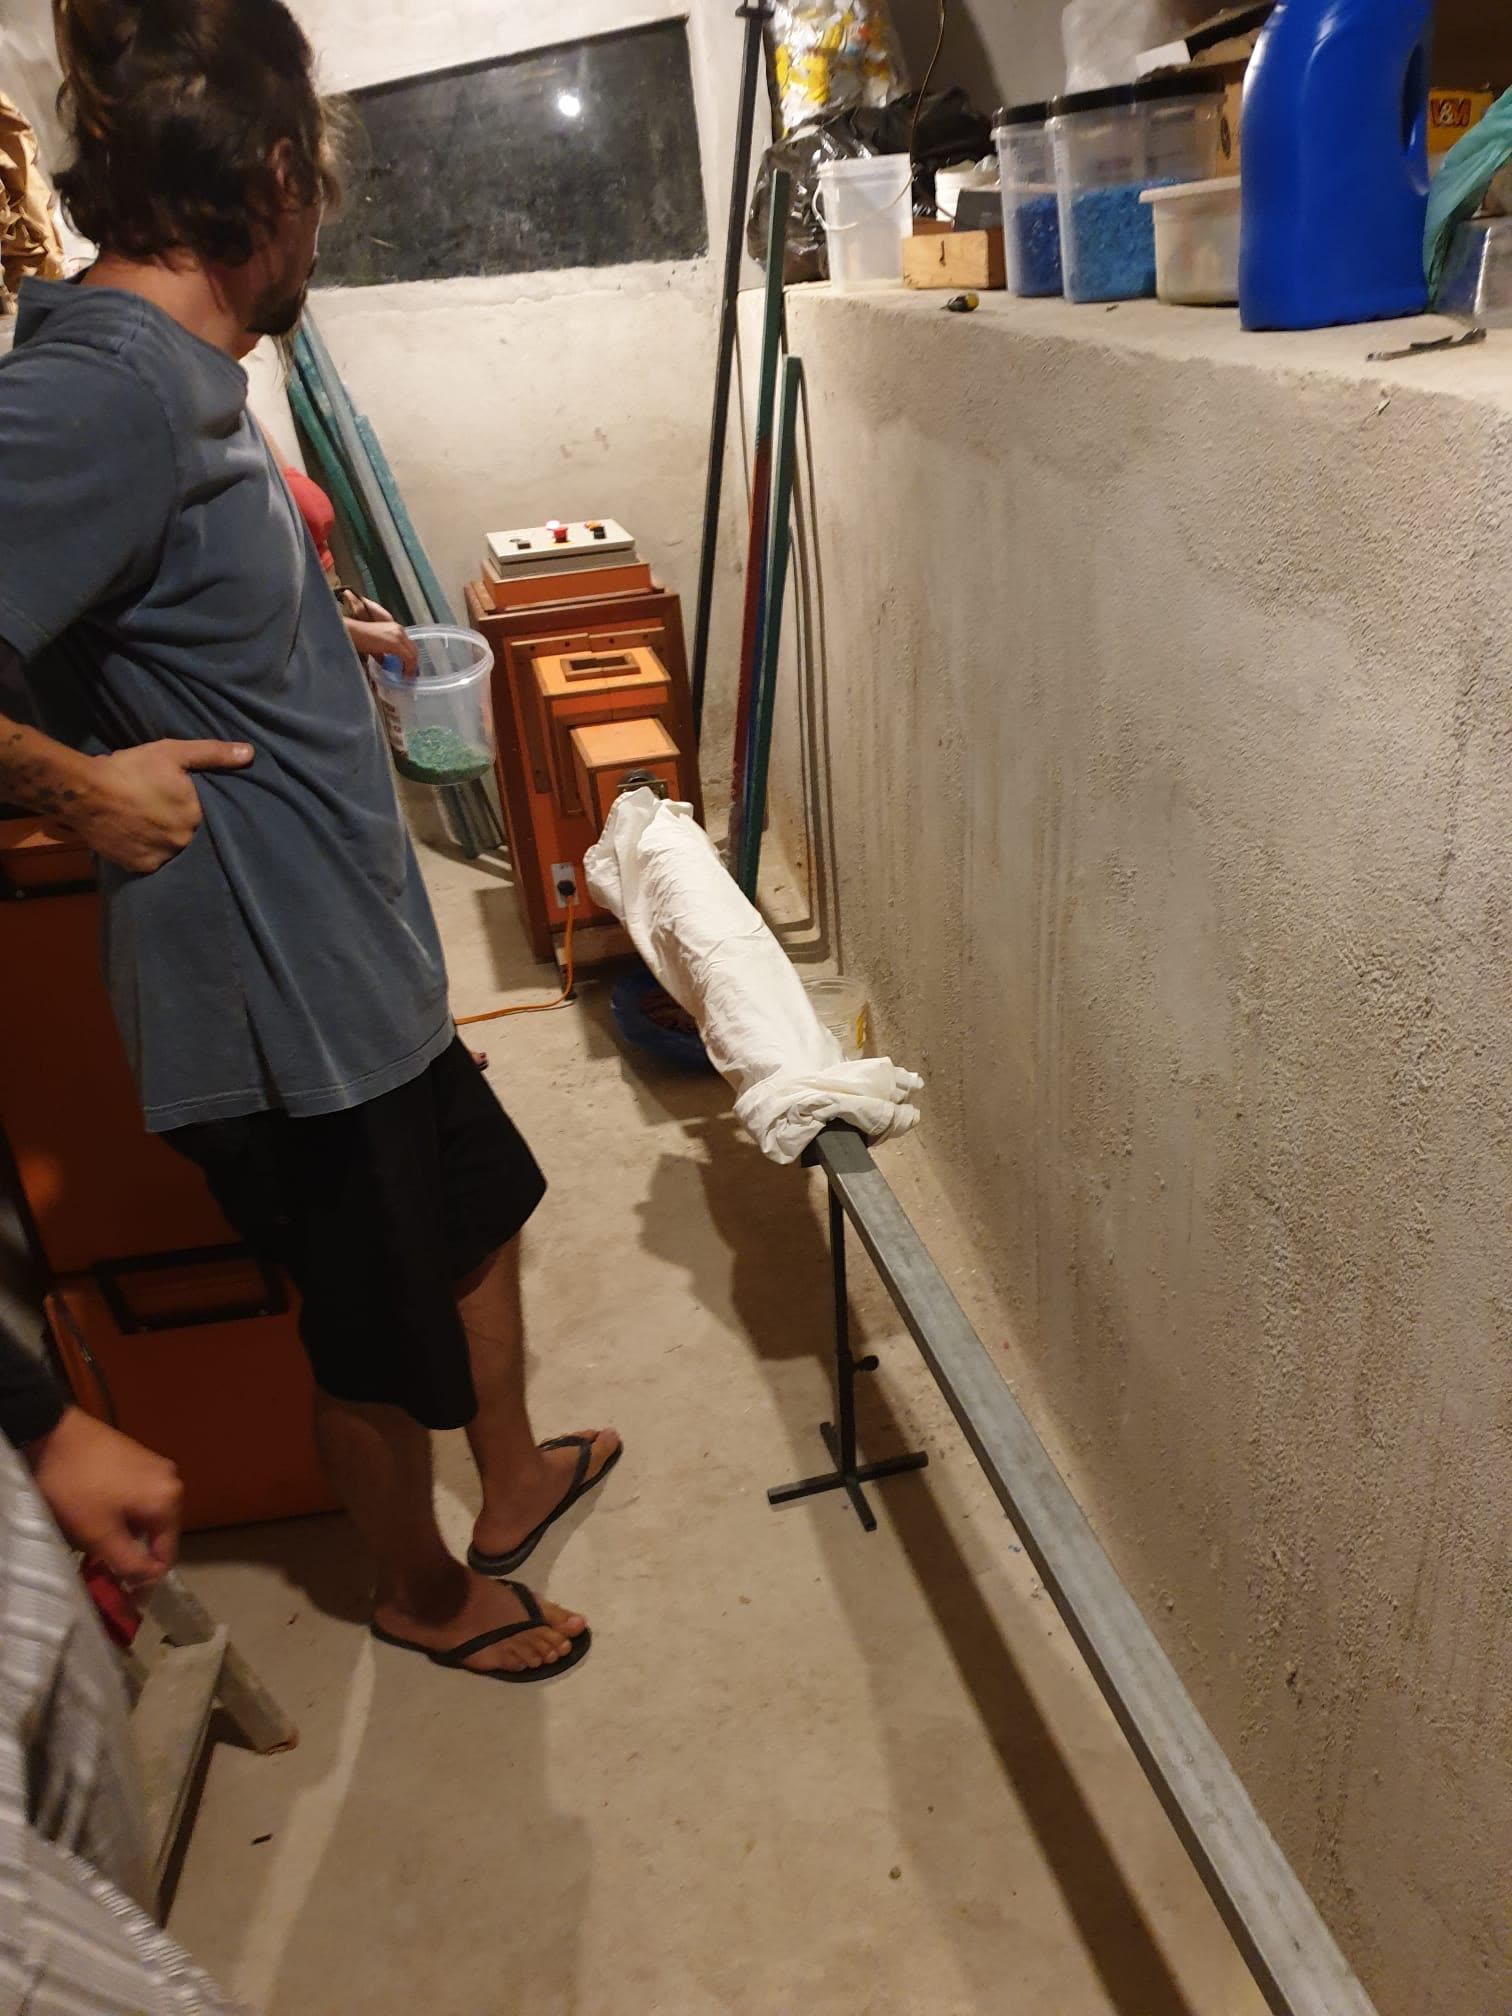
Keep
the speed at 100!
Wait for the plastic to move through the mold. It takes about one hour to fill the whole mold. You can check where the plastic has reached inside the mold by using a tool to lightly tap the mold at different points. There will be a shift in the sound. Points that don’t contain plastic will have a high pitch and points that do will have a lower sound.
Taking the Mold Out
If everything has gone right, the plastic will have reached the end of the mold (or the desired length) and now you can turn the machine off and unscrew it. However, sometimes there are other indicators to stop the process:
The machine will start leaking where the beam mold connects to the machine (as shown below);
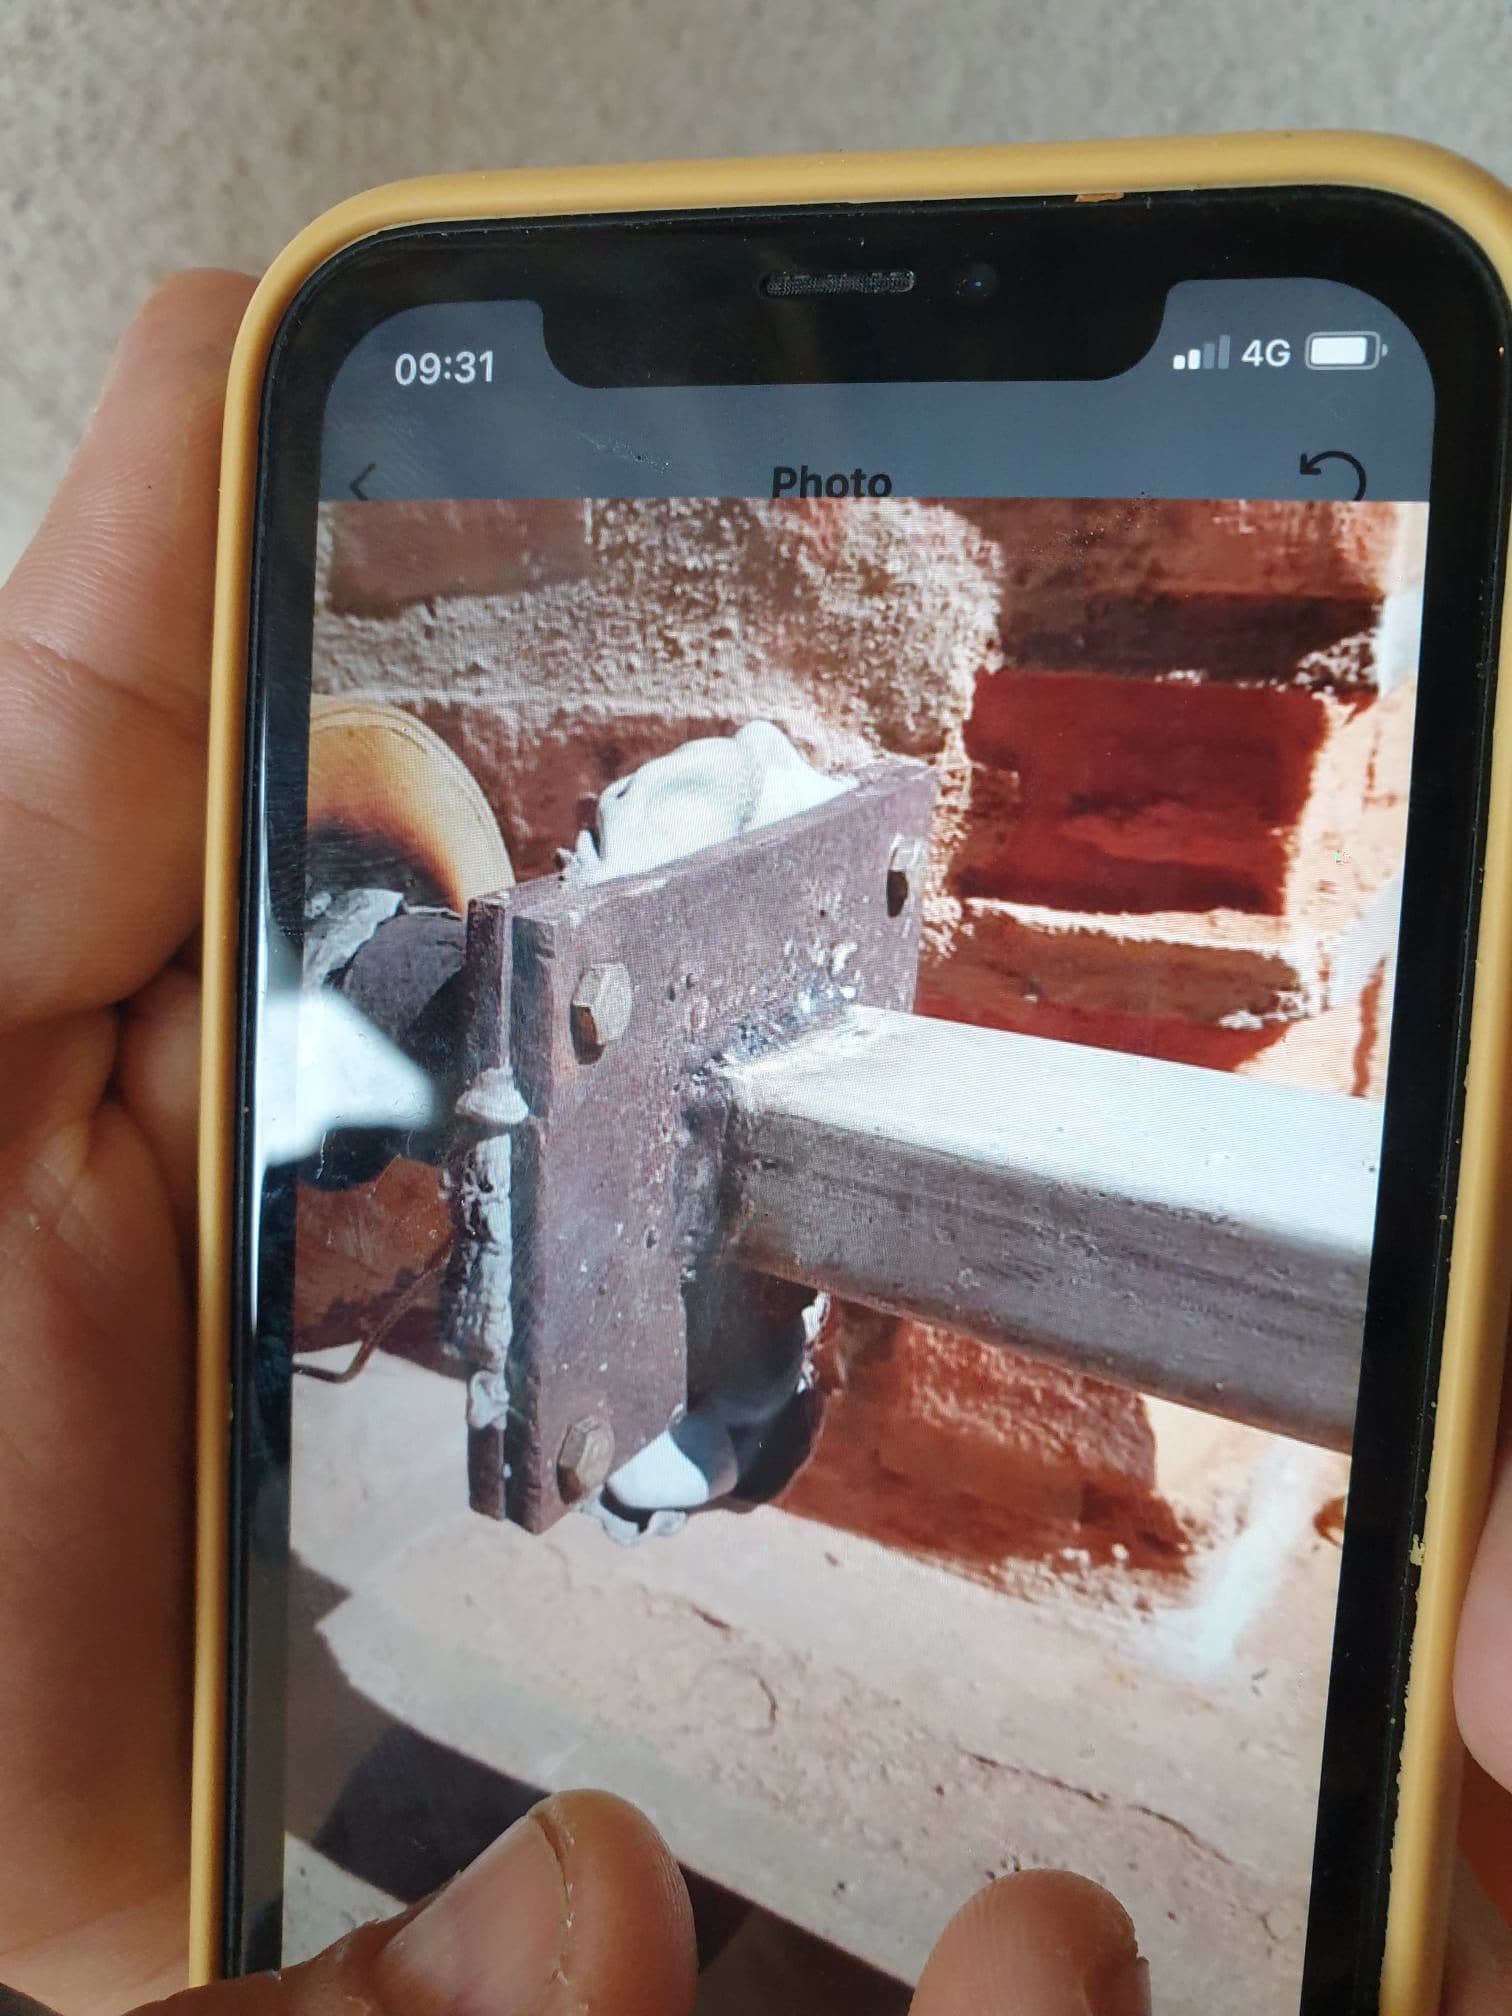
The sound of the machine will change slightly, it will ‘hiss’ more and it’ll sound like it’s working harder.
When you think that the beam is done you can detach it.
Make
sure you are WEARING GLOVES or have a TOWEL to use to touch the
mold, as it will be very hot.
Using
gloves or a towel, one person will twist and remove the mold and the
other person can assist by holding the other cooler end of the mold
bar.
The
person that is unscrewing it must then put the screw end straight
into a tub of water for about a minute before placing it on the
ground to cool. Place the mold ‘upside down’ to cool, with the
screw end towards the ground so that when the mold cools, it will be
easier to remove the beam. (see picture below)
Once
the mold is placed on the floor to cool you can then find another
beam mold and screw it in to start the process of making another
beam!
Note: Make sure that the new mold is also clean before screwing it in, as if it has any residual cold plastic it won’t screw on properly.
Once
the beam has cooled (overnight or a couple of hours) you can unscrew
the bolts on the plate and hopefully the beam will slide right out!
If it needs a bit of a push feel free to use any tools/sticks to
apply pressure on one end to push the beam out. Or try using a bit
of soap on the inside of the mold to slide it out easier!
And that’s it! You have a beam made out of the plastic you collected!
Shredding
Assemble the shredding machine
Normally the blue and métal base are still on the machine
If not, fix the blue part on the metal base with the screws with washers (as tight as possible)
And then fix the metal part inside with four screws also
Put the black rubber cross
Packing the Machine
The smaller case is for the extrusion pieces
The bigger case is for the shredding pieces
Inside the machine there is also space for storring (see pictures below)
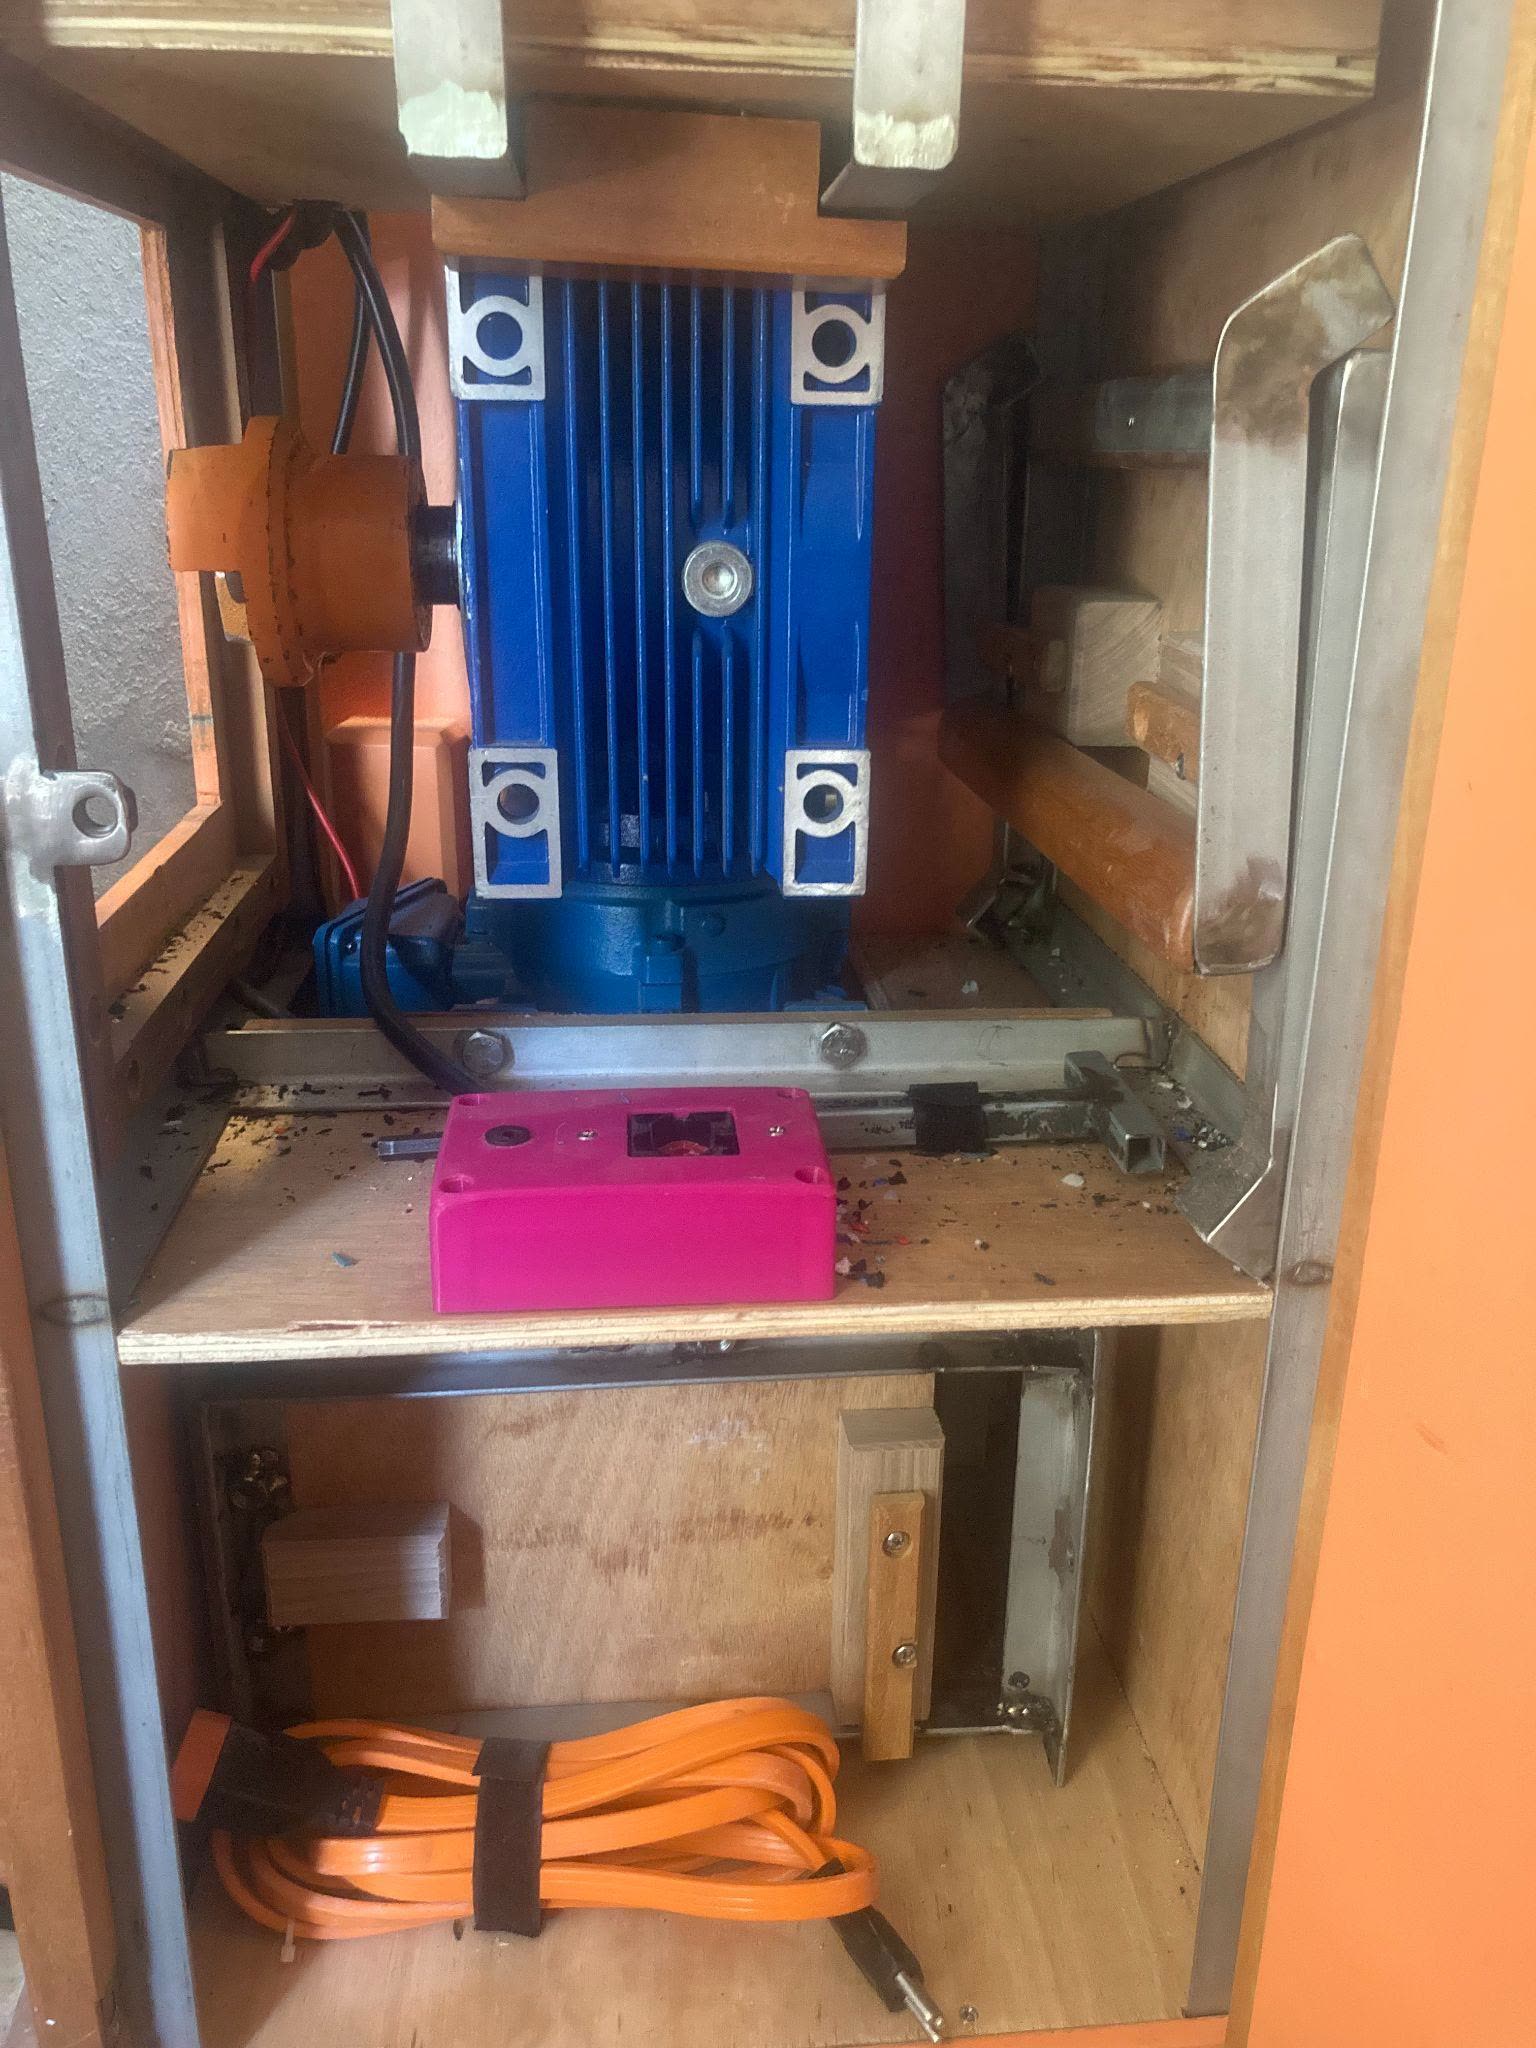
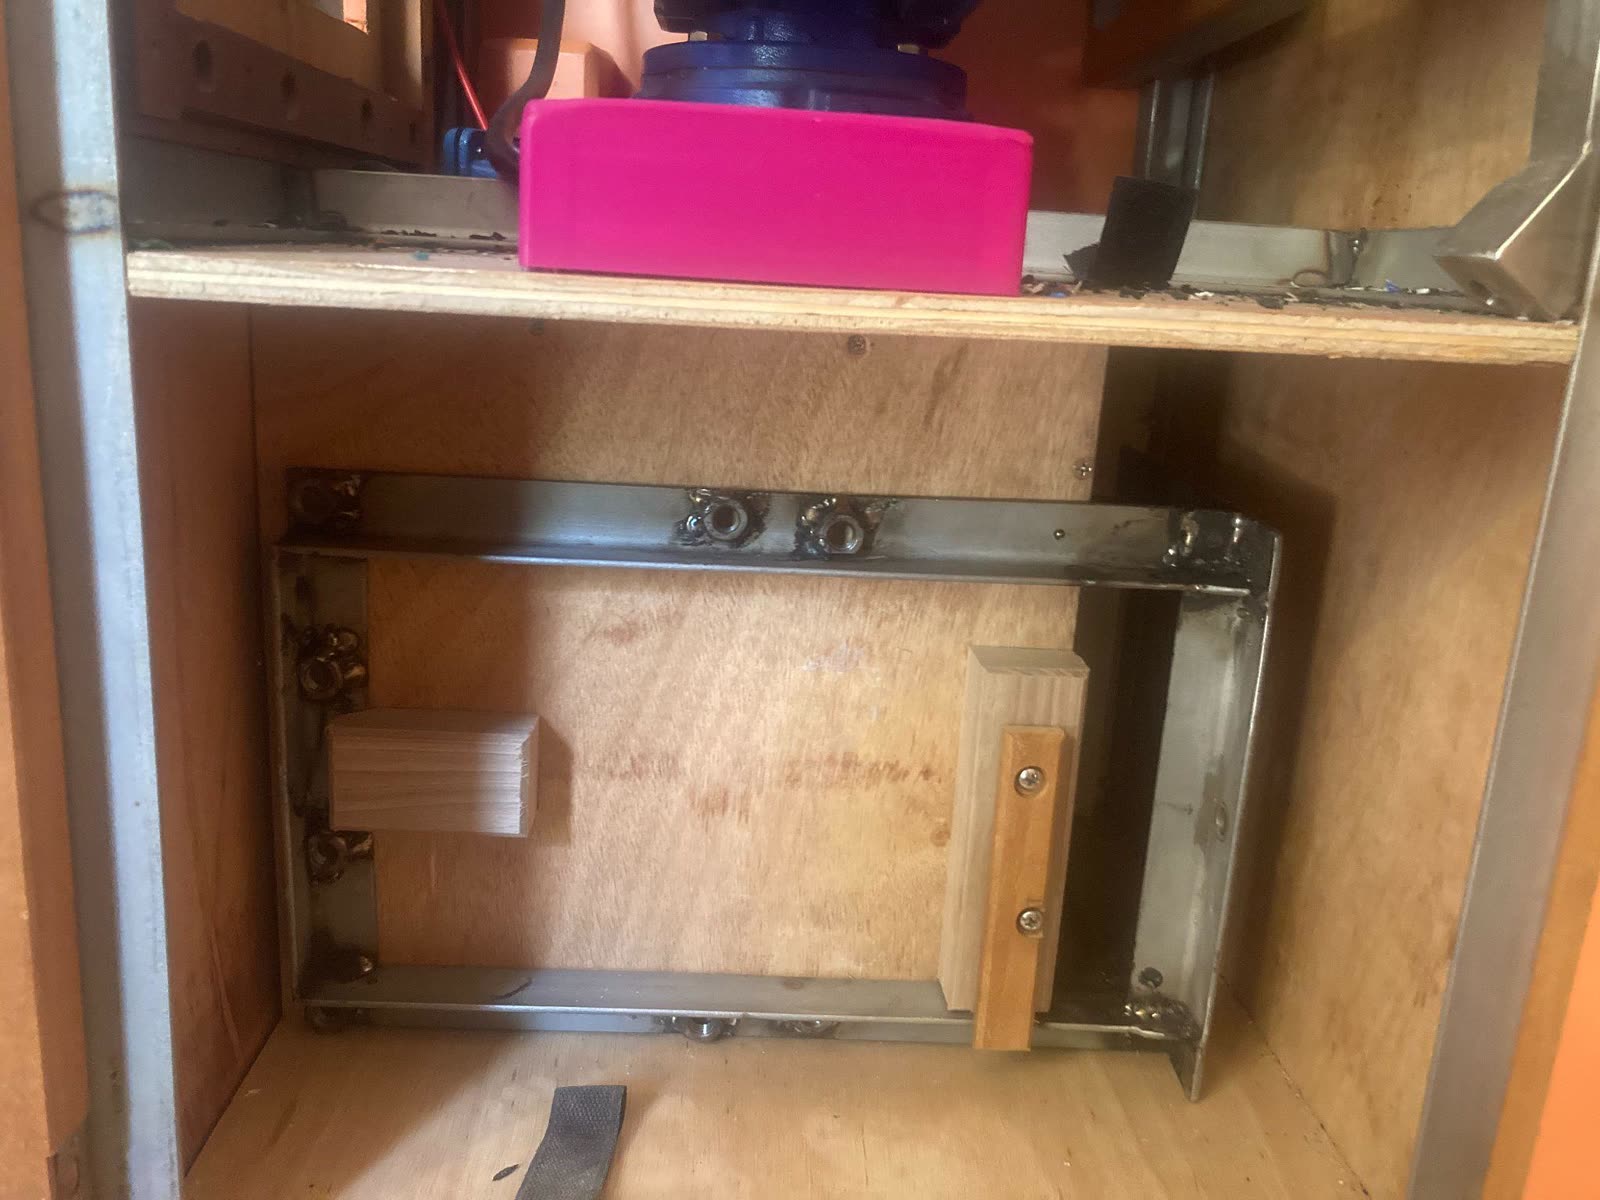
The machine is also equipped with two handles, which are also normally stored inside (see below)
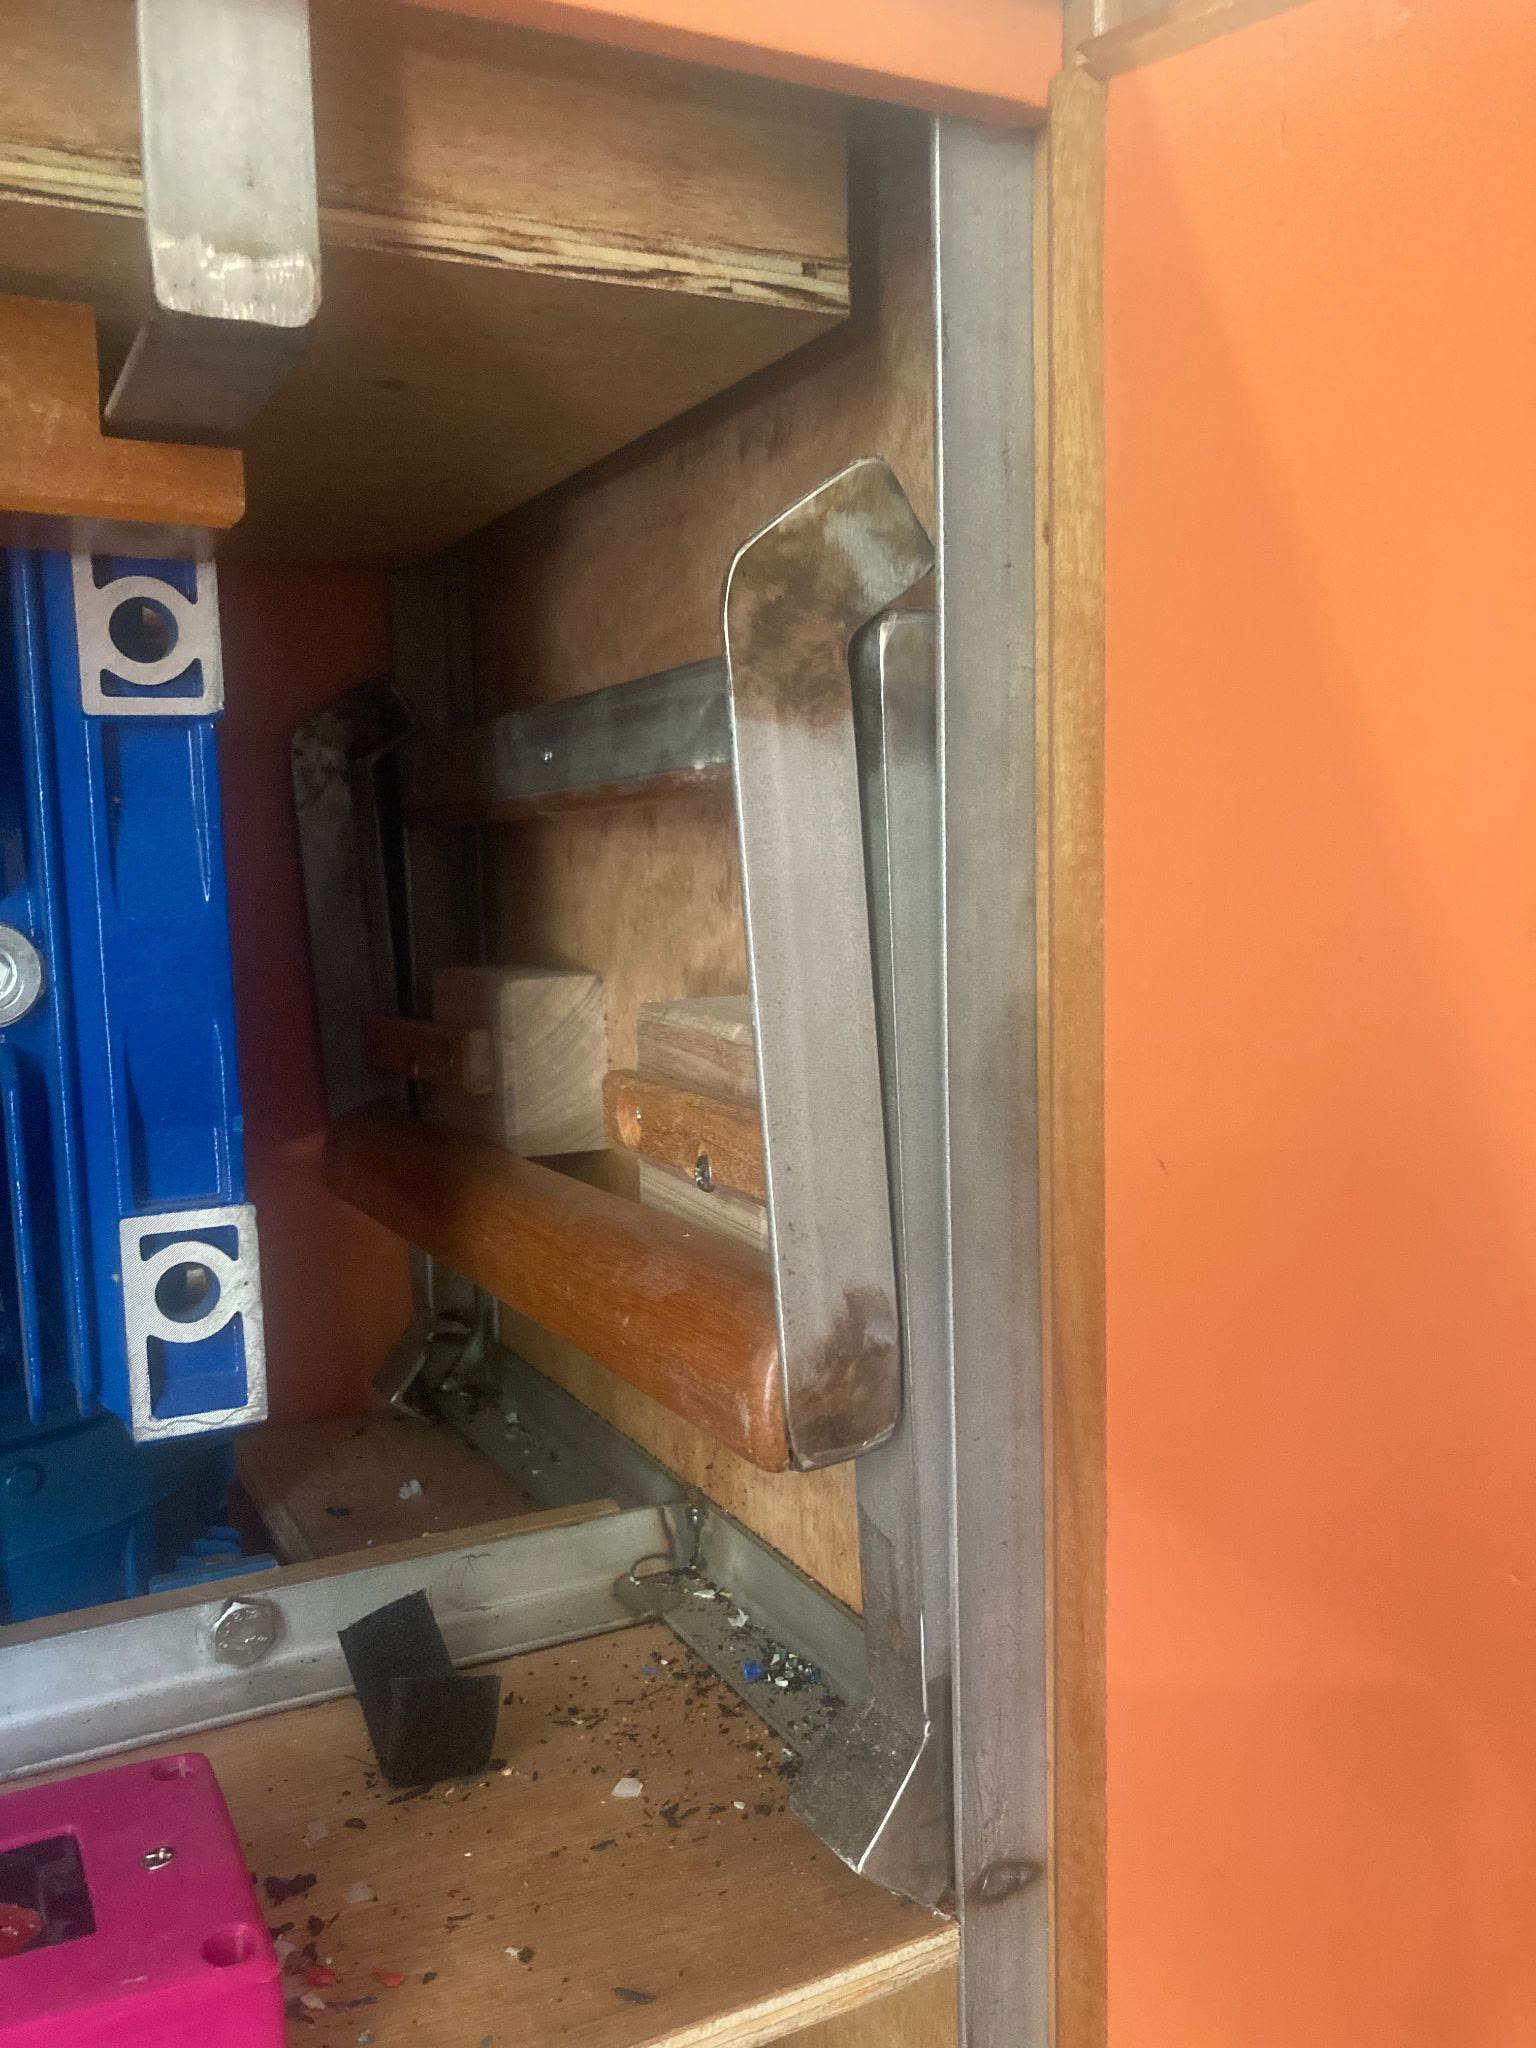
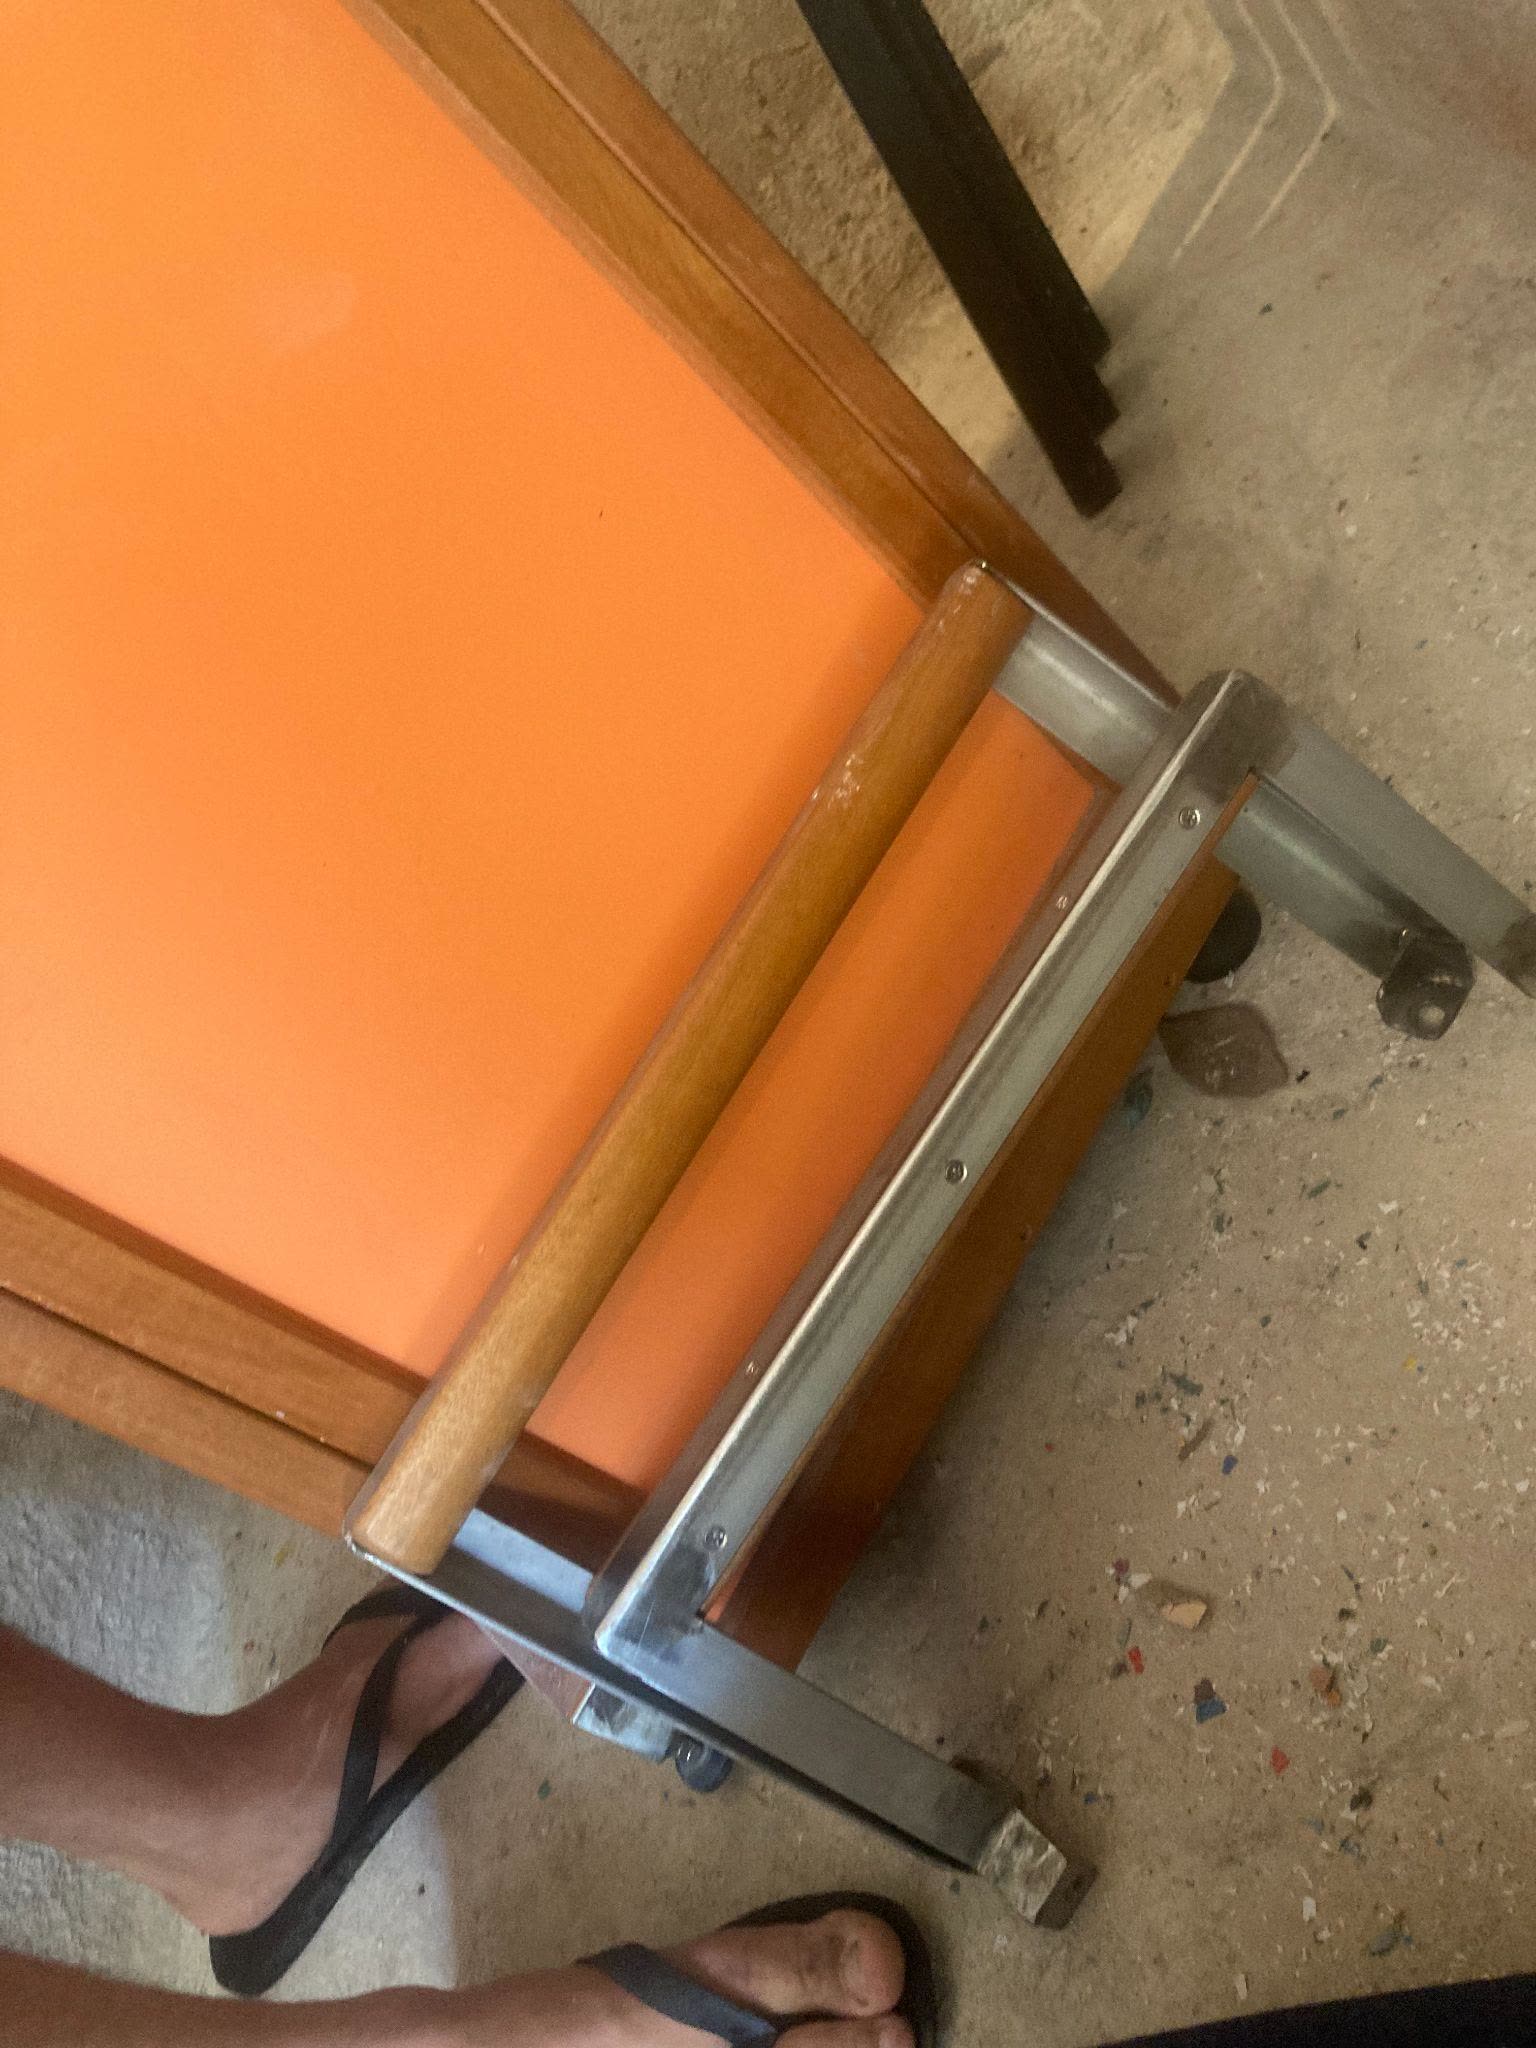
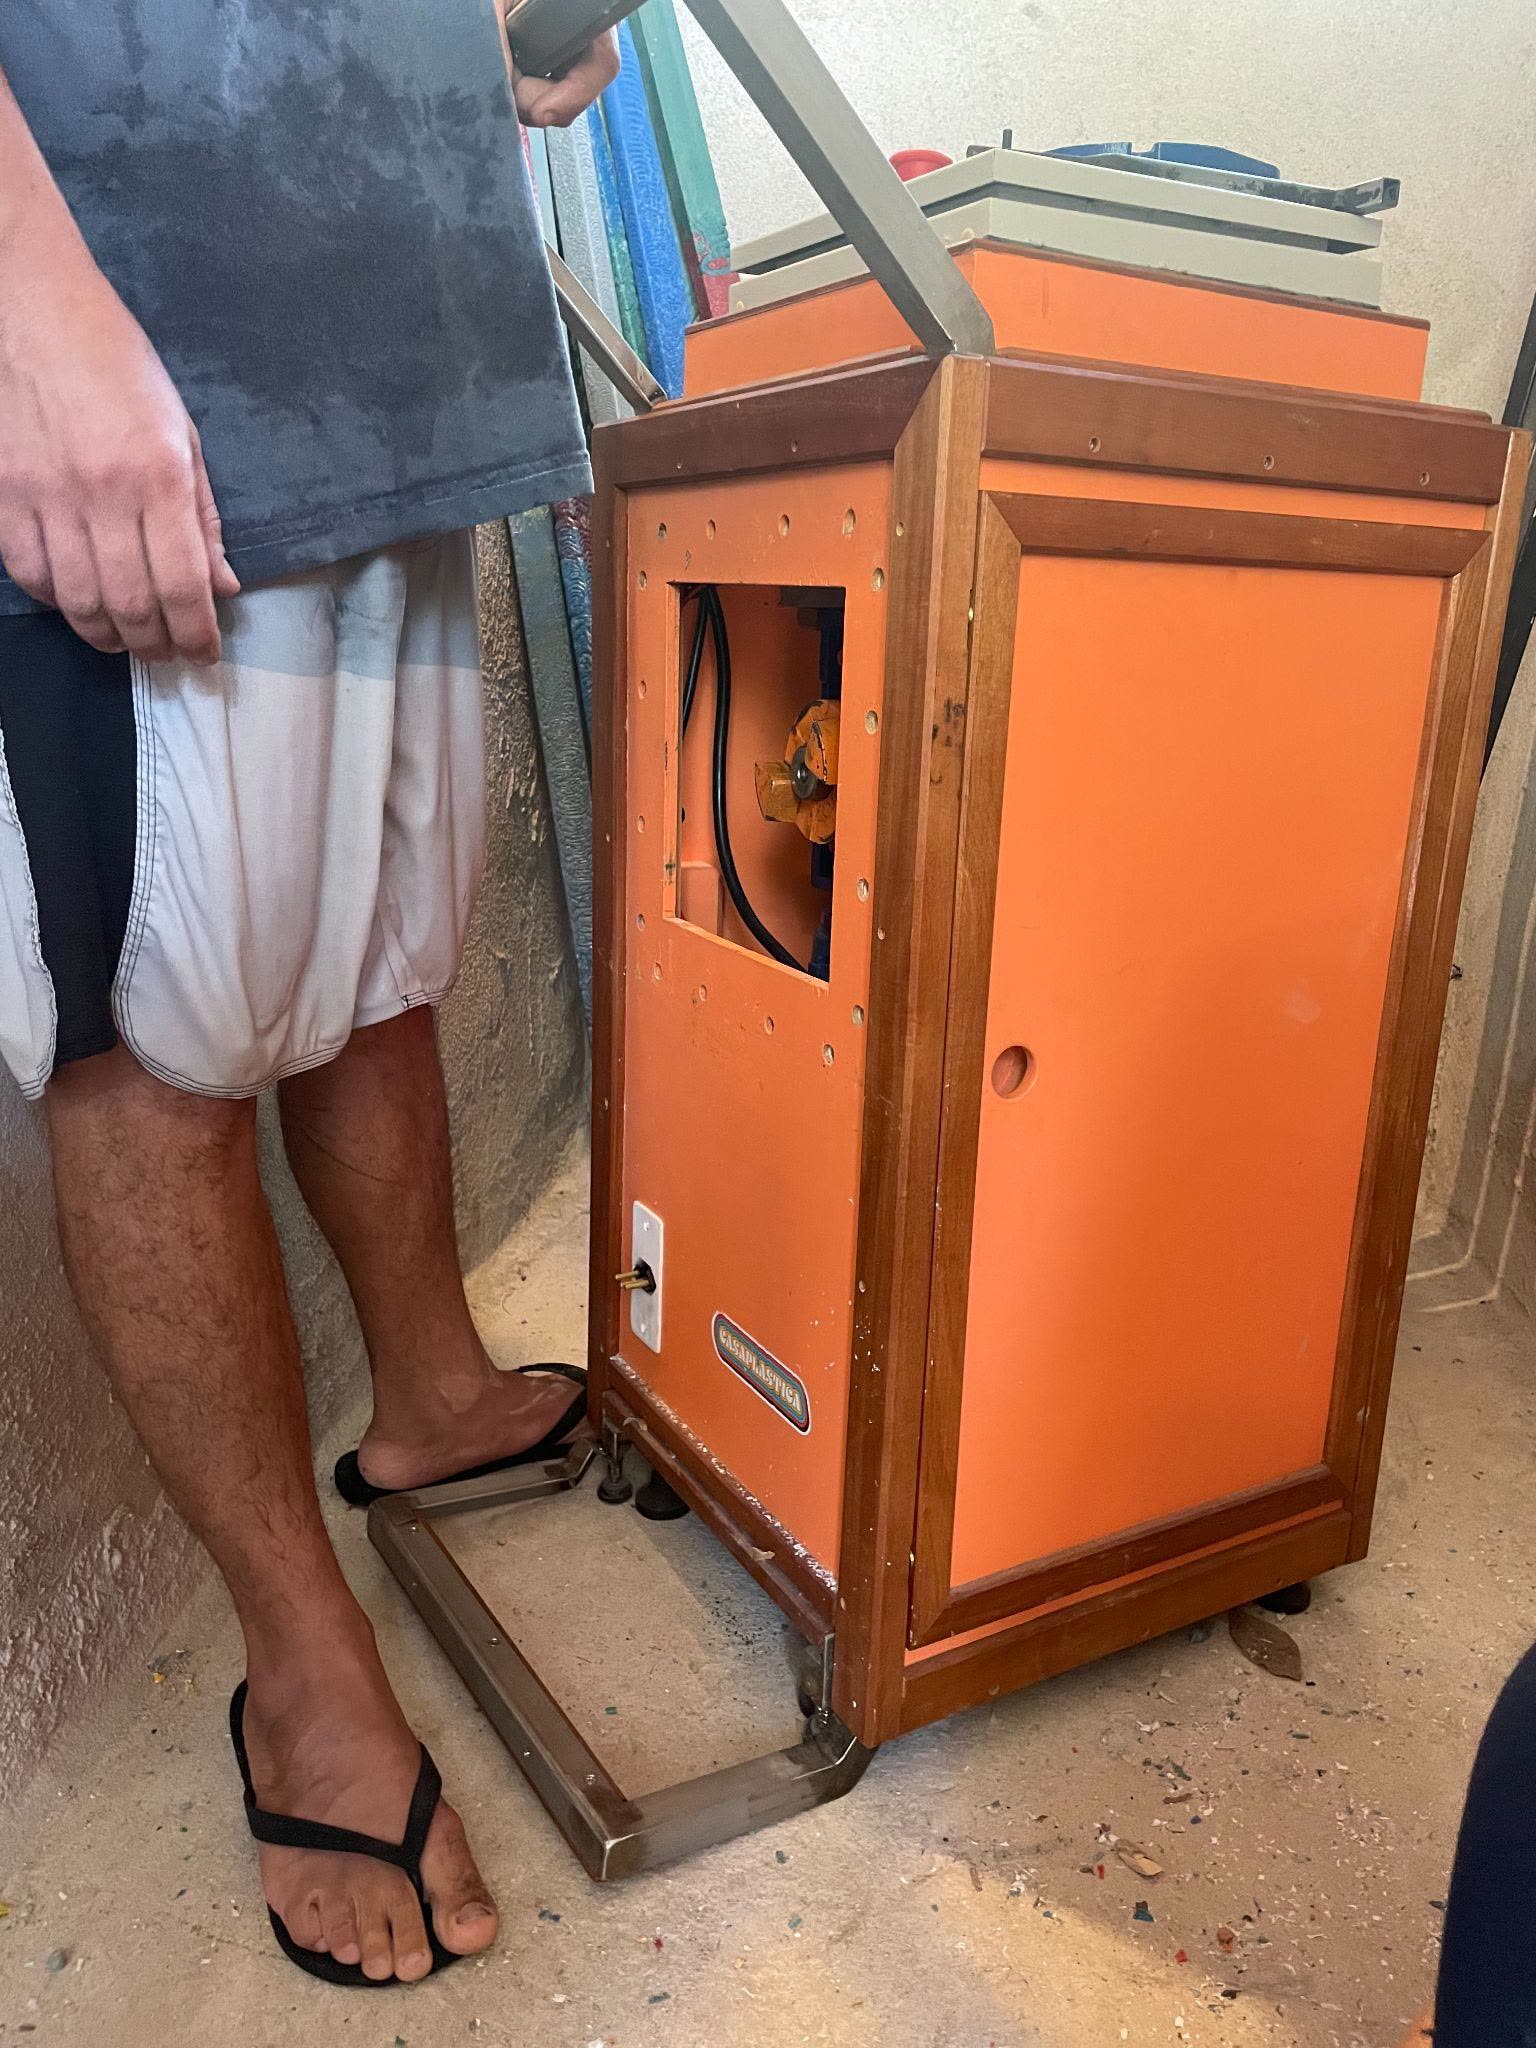
Disassembling
Unscrew the four bolds
Unplug the pink side plugs (two)
Put into the box (slide the thing up)
Put the other cover on top
Disassemble the black thing that holds the mold
To pack
Take out the metal base (four screws with washer) / four screws on the inside blue circle
Store the métal base in the down shelf
Store the câble in the down shelf also
Store the tool in the top shelf
Take out the handles
Close the side door
Put the blue thing back inside / cover with the orange top
Handles fit in holes on both sides of the machine
Tips:
If the machine is not turning on:
The emergency button might have been pushed down. Just turn-pull it back up!
The circuit breakers on the wall might be turned off.
Troubleshooting:
The next few pictures show how the motor should be aligned. If it is pushed out/not aligned:
Get a rubber hammer.
Grab the motor as shown in the picture and put your weight back, away from the machine.
While you are pulling the outer rim back, start hammering the inside towards the machine.
Do this until you see a flat alignment!